Disclosure: This post may contain affiliate links, which means I may earn a commission if you click on the link and make a purchase.
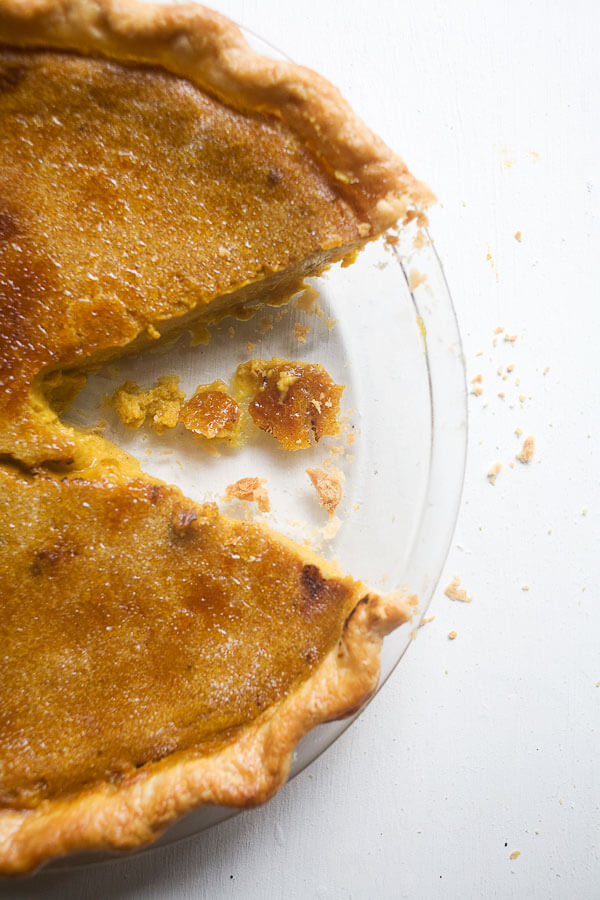
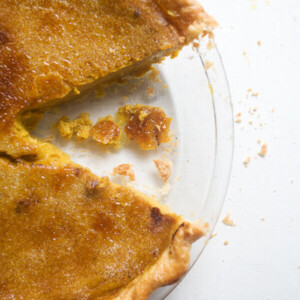
This Brûléed Pumpkin Pie is silky smooth and perfectly spiced. It’s baked in a par-baked pie crust and sprinkled with sugar. The torch crystalizes the sugar until a shell is formed. The fun part is cracking it with a spoon.
Brûléed Pumpkin Pie
This pie is for pumpkin pie lovers. I am a pumpkin pie lover. I love this pie just as much as my butterscotch pumpkin pie and marbled pumpkin cheesecake.
This pie is as if creme brûlée and pumpkin pie dated and got married. The filling is a silky smooth classic pumpkin pie filling but with a sugary crust that is so delicious.
Ingredients You’ll need for Brûléed Pumpkin Pie
- Homemade pie crust or store-bought pie crust.
- Pumpkin puree – I like to use organic pumpkin from the Whole Foods brand 365. I love how bright orange it is in color.
- Eggs – Pumpkin pie is essentially a custard and this allows it to set properly.
- Heavy cream – This makes a rich, delicious filling.
- Spices – They add for a very dynamic and delicious filling. We have ground cinnamon, ginger, nutmeg and allspice.
For the rest of the ingredients, please take a look at the recipe card below!
How to Make Brûléed Pumpkin Pie!
This recipe isn’t that far of a cry from other pumpkin pie recipes.
- Make your pie crust. You can obviously use a store-bought pie crust if you’re looking for a bit of a shortcut!
- 2. Par-bake your crust! I personally can’t stand par-baking but I make the exception for pumpkin pie. You can use pie weights or dried beans.
- In a large bowl, whisk together the filling ingredients. There is pumpkin puree, spices, a bit of rum, salt and eggs. This is a balanced flavored filling.
- Add the filling to the par-baked pie crust and bake!
- When it’s done baking, you want to chill the pie crust for about 1 hour before you transfer it to the fridge.
- You can make this ahead for up to 2 days.
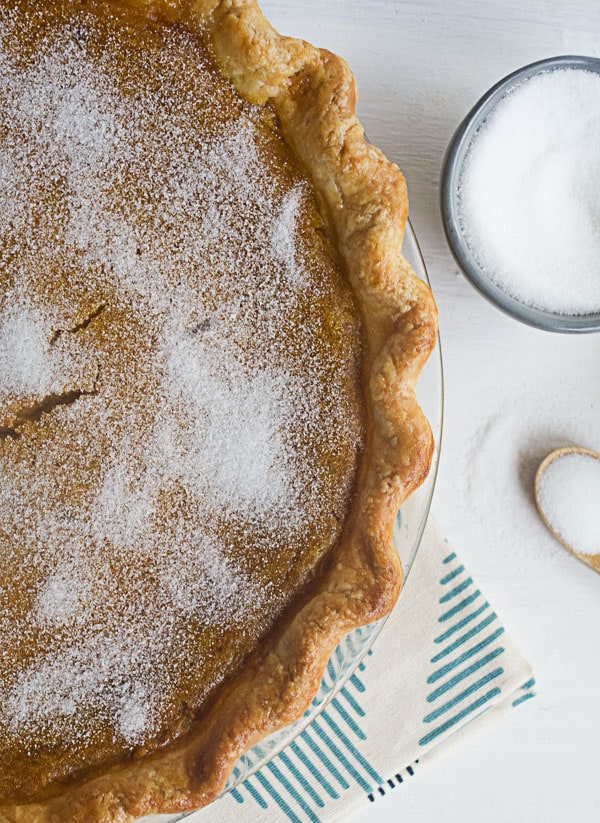
- When you’re ready to serve it, add the sugar to the top of the pie and then brûlée the top with a kitchen torch!
Tips and Tricks
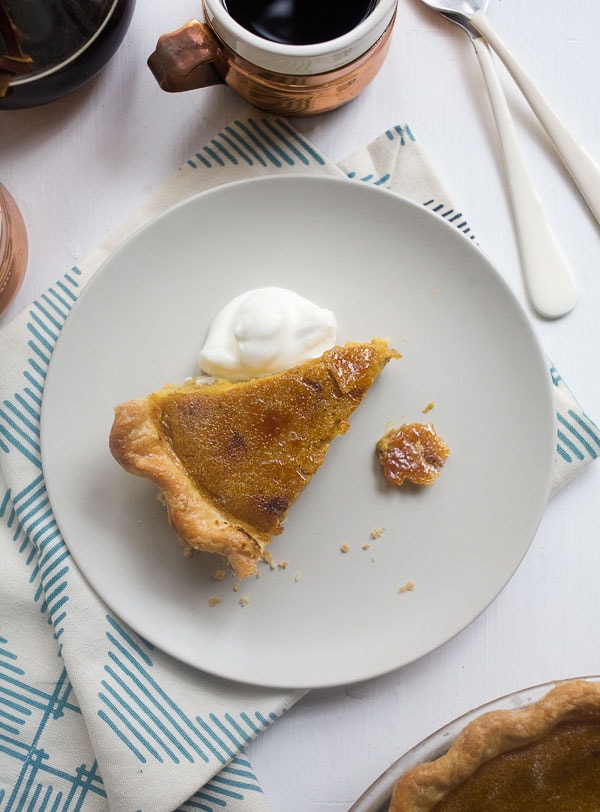
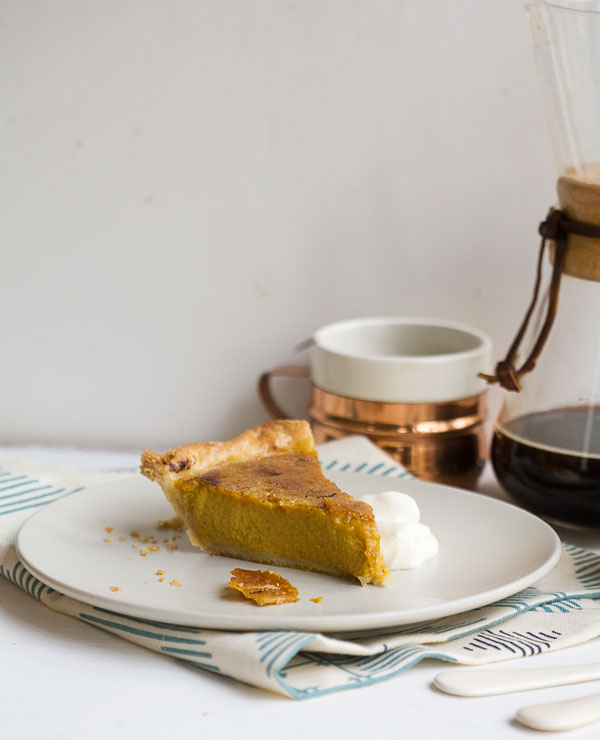
- Chill this pie – You really want to ensure you chill this pie properly so you have a set pie. Also the cold and warm topping contrast is really nice.
- You can find a torch at your local bake store, Amazon or at a hardware store.
- For a twist, mix a pinch of cardamom into your pie filling – it’s like autumn in a spice.
- Before bruleeing, chill the pie – the cold will help the sugar harden into a crisp shell quicker.
- When torching, keep the flame moving in circles to avoid burning spots.
- Add a touch of bourbon to your whipped cream for a boozy complement to the sweet pie.
- Use a shallow pie dish for an even layer of filling that sets nicely and cooks evenly.
Recipe FAQs
Fire up your torch! Sprinkle a thin, even layer of sugar over your cooled pie and torch it until it bubbles and caramelizes – watch it like a hawk, though; it goes from fab to burnt real quick.
You bet! Just roast it up, puree it smooth, and measure it out cup for cup.
A gentle bake and avoiding overcooking is key – think of it as a custard that doesn’t like a fuss.
If you don’t devour it all, store it in the fridge. But remember, the bruleed top will lose its crunch over time.
Indeed! Make the pie a day or two before, but save the bruleeing for showtime, right before serving.
What to Serve with Brûléed Pumpkin Pie
- Sheet Pan Turkey
- Cacio e Pepe Mashed Potatoes
- Creamy Mashed Potatoes
- How to Build a Cheese Board
- Creamy Baked Macaroni and Cheese
Brûléed Pumpkin Pie
Equipment
- 1 (9-inch) pie baking dish
- 1 kitchen torch
- 2 mixing bowls
Ingredients
Pie Crust:
- 1 single homemade pie crust or store-bought
Filling:
- 2 large eggs
- 1 large egg yolk
- 1/2 cup granulated sugar
- 2 tablespoons light brown sugar
- 1 (15-ounce) can pure pumpkin puree, (not pumpkin pie filling)
- 1 1/3 cup heavy cream
- 3 tablespoons dark rum
- 1 1/2 teaspoons ground cinnamon
- 1/2 teaspoon ground ginger
- 1/4 teaspoon freshly grated nutmeg
- 1/4 teaspoon ground allspice
- 1/4 teaspoon kosher salt
- 1 large egg, beaten, for egg wash
For Topping:
- 2 tablespoons granulated sugar
Instructions
To Par Bake the Crust:
- To par bake your crust, preheat your oven to 400 degrees F. Using the tines of a fork, poke the bottom of the pie crust a all over. Line the crust with a piece of parchment and fill with beans or pie weights. Bake for 15 minutes. Remove the pie weights and parchment and bake for an additional 10 minutes. Remove from the oven and set aside while the filling is made.
To Make the Filling:
- Preheat your oven to 325 degrees F. In a medium bowl, whisk together the eggs, egg yolk, 1/2 cup white granulated sugar, light brown sugar, pumpkin, heavy cream, rum, cinnamon, ginger, nutmeg, allspice and salt. Mix until very smooth; if there are lumps due to the pumpkin puree, run the mixture through sieve.
- Place your prepared 9-inch pie pan onto a baking sheet (this will help with transferring it in and out of the oven). Pour the pumpkin mixture into your pie crust and brush the edges of the crust with egg wash.
- Carefully transfer the pie to the oven and bake for 45 to 50 minutes, and until the center of the pie is set and it jiggles slightly. Make sure to check on it at the 20 minute-mark. If the pie crust is becoming too dark, place a tent, using foil, around the pie crust. Allow to cool at room temperature for 1 hour. Transfer to the refrigerator to chill for at least 2 hours.
To Brûlée the Top:
- Right before serving, sprinkle the top of the pumpkin pie with 2 teaspoons of sugar. Using a blow torch, move the flame in small circles over the sugar until it melts and turns a light golden brown color. Serve immediately.
Notes
Nutrition
Nutrition information is automatically calculated, so should only be used as an approximation.


We made this for Thanksgiving and it was definitely the best pumpkin pie we’ve ever had. We didn’t brulee as we are sans torch, but it was delicious nonetheless. This was the first pie my 18 month old son has ever had and he kept asking for “mo umpkin ie.” He’s been talking about it as he falls asleep each night.
We also made the classic cranberries and they, too, were amazing. I think it was the star anise and vanilla that made it so good.
Thanks for helping make our Thanksgiving yummy and easy!
Awwww that’s sooo awesome. I love that. I made this pumpkin pie again too!
So glad you liked the cranberry sauce, too! I used a quarter of a vanilla bean in mine and was obsessed! xo
I don’t have a torch but love the idea of the bruleed top! do you think I could do it in the broiler? Maybe I cover the crust with tin foil to be sure it doesn’t brown? also, do you have any tips for par baking? I tried to par bake a crust once and found a) that the tin foil melted into the crust and it was an awful mess and b) the crust shrank so much (it was for a tart) and in the end it was basically just the bottom dough with about 1/4″ rim around it. I am using a ceramic pie pan for this, do you think I could skip it?
Hi Ellie, It will not work under the broiler. Unfortunately for any bruleed recipe you definitely will need a torch. The fire has to touch and burn the sugar rapidly in order to create that hard top.
As for par baking, I always start with a frozen crust. I think this helps a lot. I think a ceramic pie pan should work great (I’d just stay away from aluminum). Hope that helps!
Bummer! I made this for my office potluck and the bottom of the crust was raw still! Like soft uncooked dough. I followed the cook times/temperatures exactly and then even cooked for an extra 3 minutes bc the center was still a little too jiggly. Were we supposed to par bake the pie crust?
Man, this bums me out. I tried this recipe both ways: with par baking and not par baking. I found that I didn’t need the par bake and figured why add an extra step. When I didn’t par bake my crust was cooked – but definitely not crispy. Perhaps I should give people the option up above. Sorry the crust didn’t work out. Grr. Oh can I ask what type of pan you were using? Was it glass, ceramic or aluminum?
Traditional with an edge…I like it!!!
Is it weird that I’ve never tried pumpkin pie before? It feels like it is… This one makes me want to though!
Would it be acceptable to sub roasted fresh pumpkin for the canned? Was wondering if the water content is the same.
You know, I’m not completely sure. Fresh pumpkin vs. canned has been a big debate. I will say that this canned pumpkin I used was pretty moist so you should be ok.
Where did you learn food photography? I love your photos and especially the styling. Do you just have a gift for it? : )
Well if you go back in the archives to some of my earlier photos, you’ll notice they’re not all that great. And even now I struggle. I think practice has made me better. I also think that since I went to film school I came into photographing food with a basic understanding of how ISO/aperture/shutter speed work, so that definitely helped! I think the thing that’s worked best for me is to look at photos that I absolutely love and try and emulate them the best I can. Before I shoot something I always look online at a few food photographers to see exactly how they shoot that exact type of food. Hope that explanation helps a bit!
This is so gorgeous! I can practically feel that texture from the torched sugar on top.
Feel better soon 🙂 Cake looks super delicious, and maybe some rum will do you good 😉
This is total genius!! LOVE!