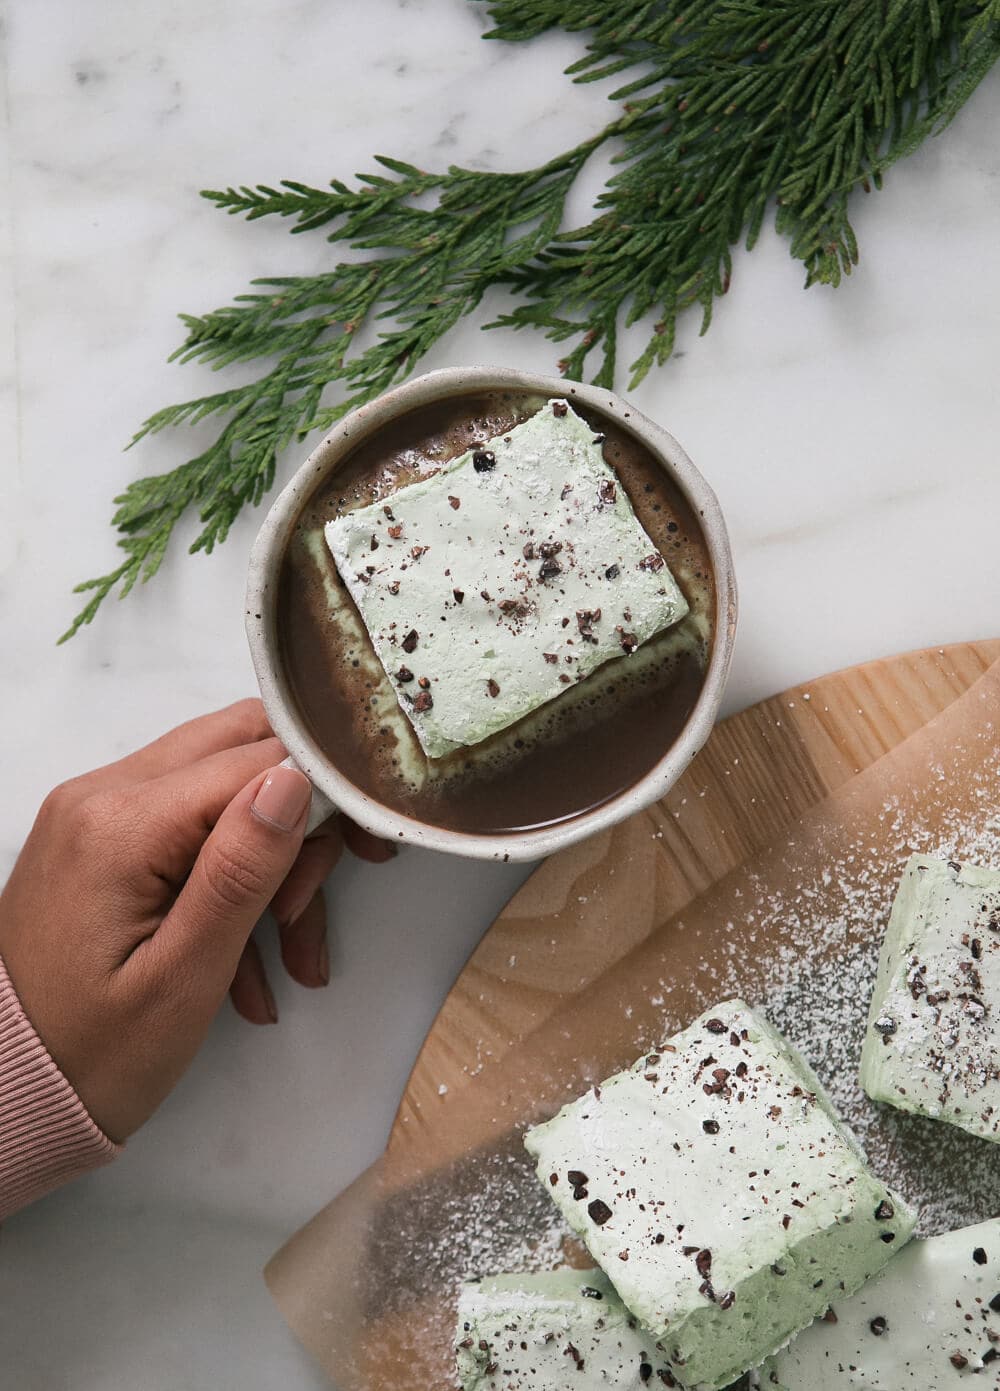
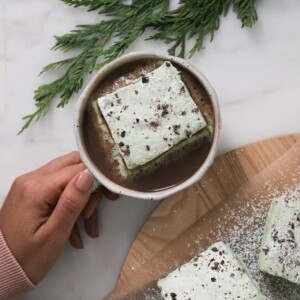
Mint Chocolate Chip Marshmallows
25
Updated Oct 28, 2025, Published Dec 14, 2023
Disclosure: This post may contain affiliate links, which means I may earn a commission if you click on the link and make a purchase.
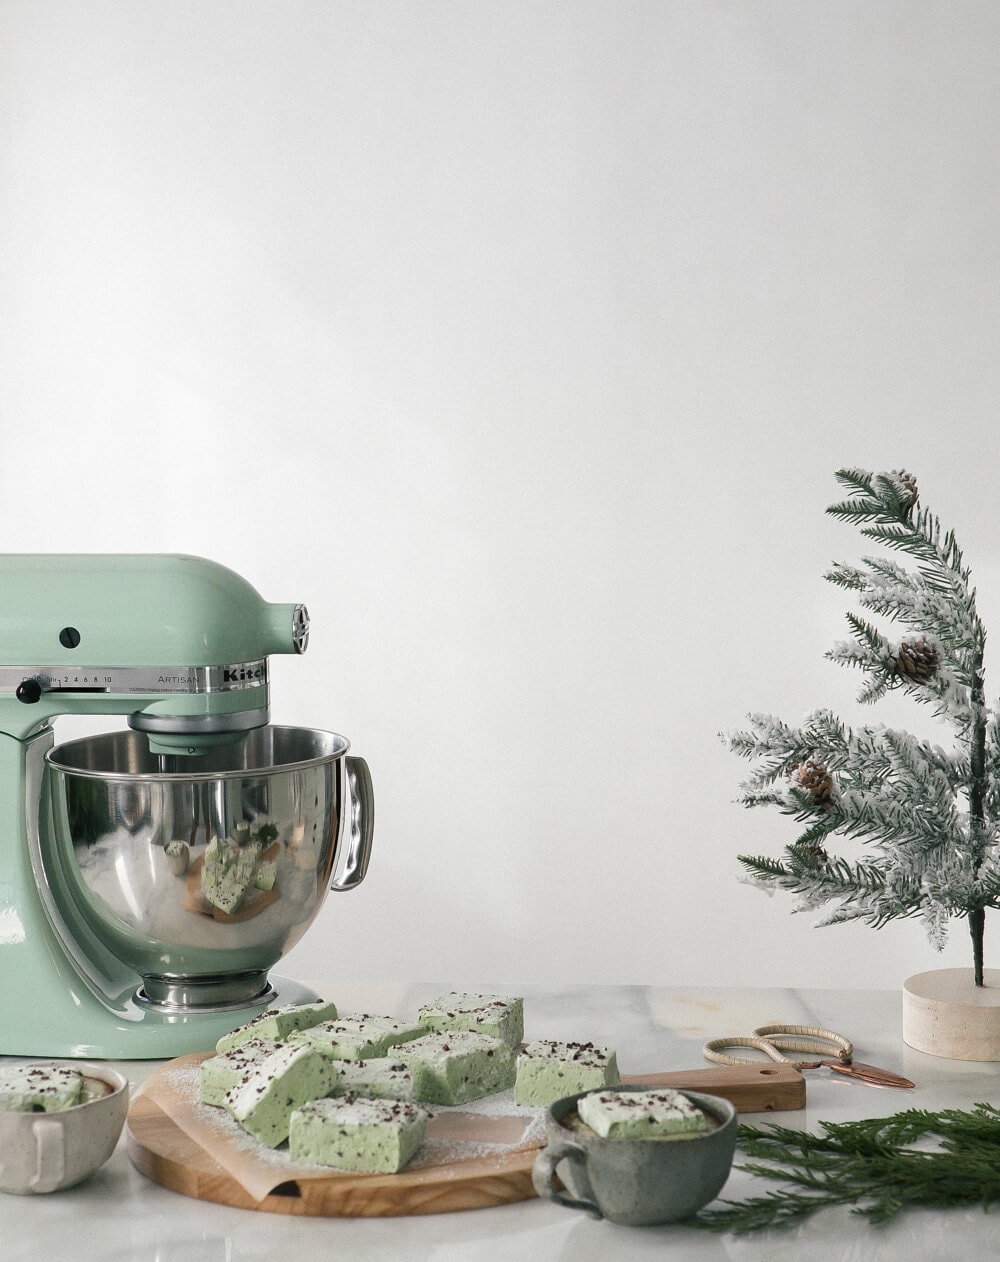
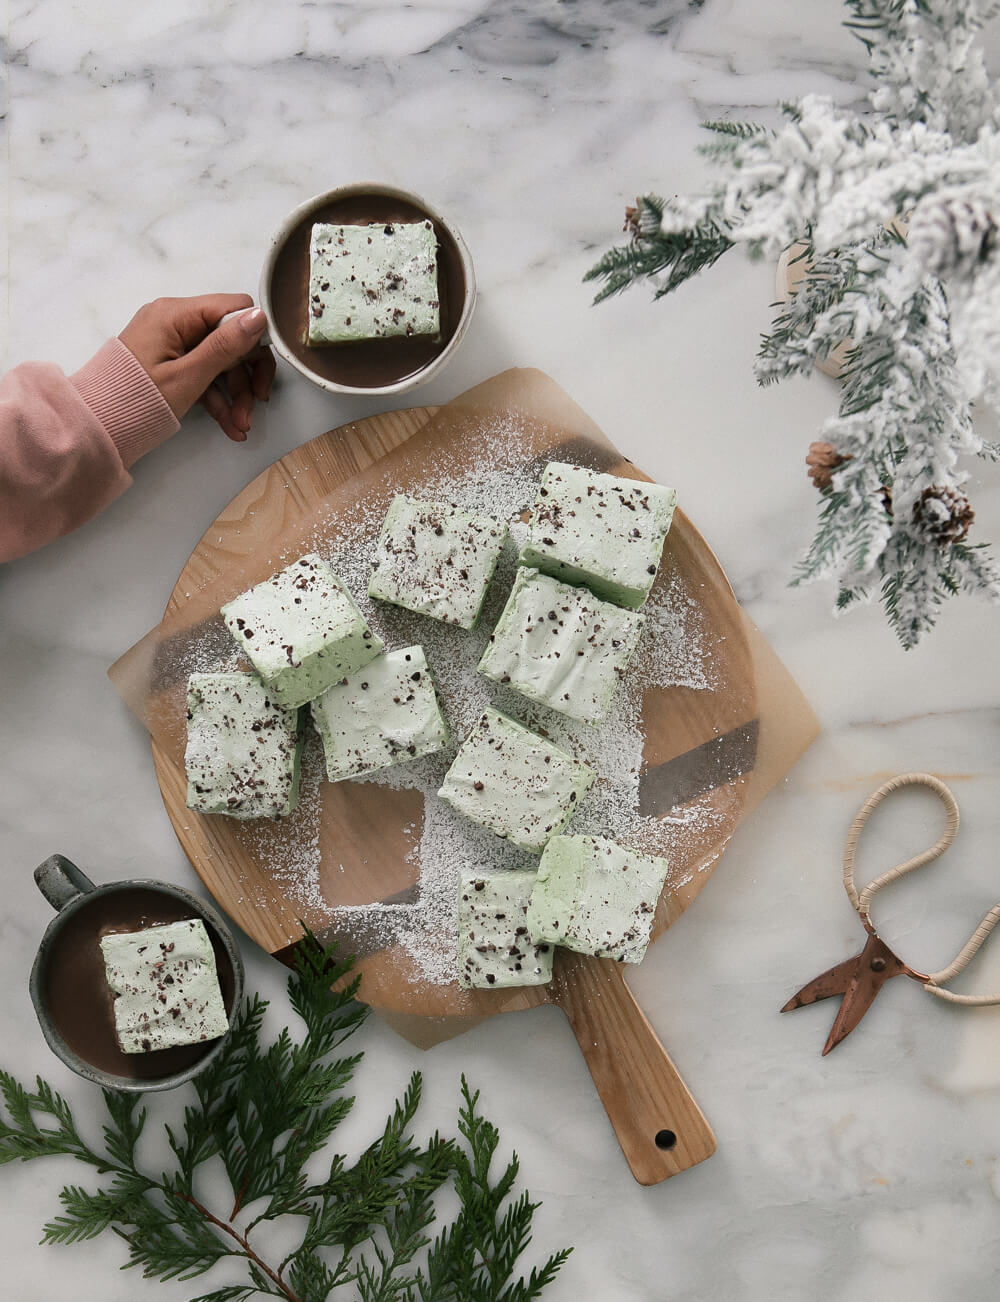
These Mint Chocolate Chip Marshmallows are fluffy, slightly chocolate-y and have the perfect hint of mint. They are like my favorite ice cream flavor in marshmallow form. Top them with the perfect Homemade Hot Chocolate for the ultimate holiday experience.
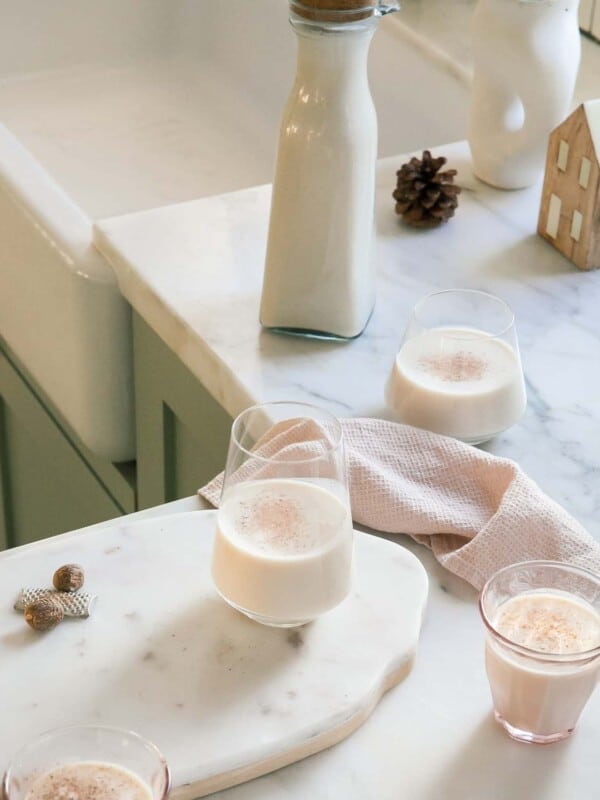
Last week I woke up early, made my Oat Milk Hot Chocolate and headed to the flower market.
I decorated the kitchen with a beautiful garland, I bought gorgeous little ceramic houses and mini decorative trees. I’m ready for the season! And I made a batch of these marshmallows for good measure.
Ingredients for Mint Chocolate Chip Marshmallows
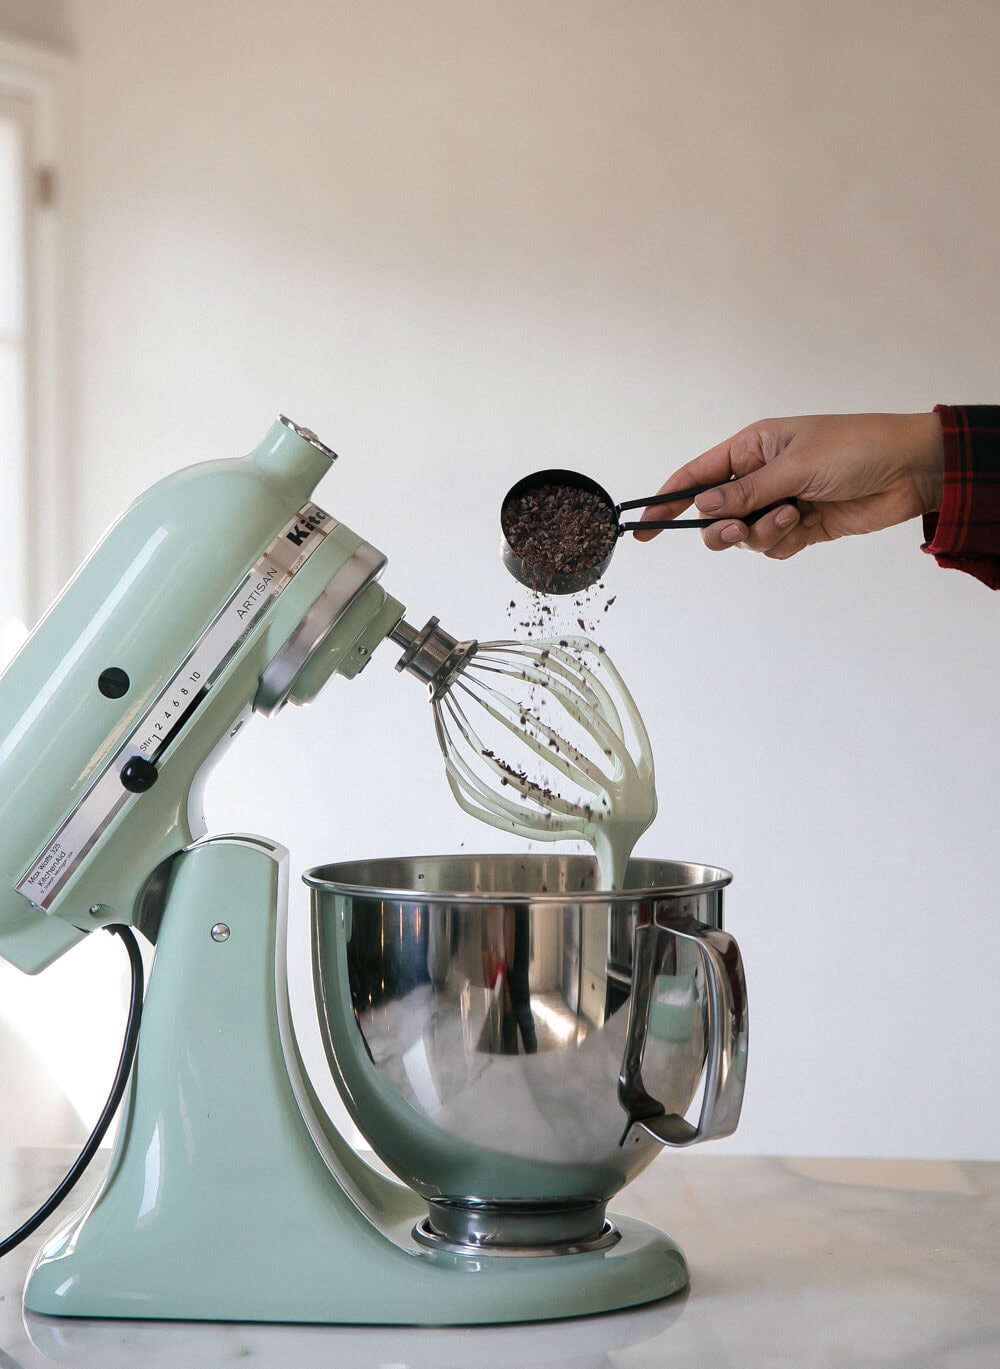
- Cacao nibs – This is going to give us those little bits of chocolate throughout. They’re the perfect natural texture for these marshmallows.
- Corn syrup – This will give these marshmallows the perfect fluffiness.
- Gelatin – This holds everything together. I’ve made marshmallows from egg whites before and this method is far superior (and easier!)
- Peppermint extract – The extract is going to impart a delicious mint flavor on these marshmallows.
For the rest of the ingredients, please refer down to the recipe card!
How to Create the Perfect Hint of Mint
I did not go to art school for nothing. Actually if I’m being honest, I had no idea how to create the perfect hue of mint. However, my friend Billy is a color genius and he figured out how we could get the perfect color. Blue and yellow food coloring will give you this perfect mint color.
How to Make Mint Chocolate Chip Marshmallows
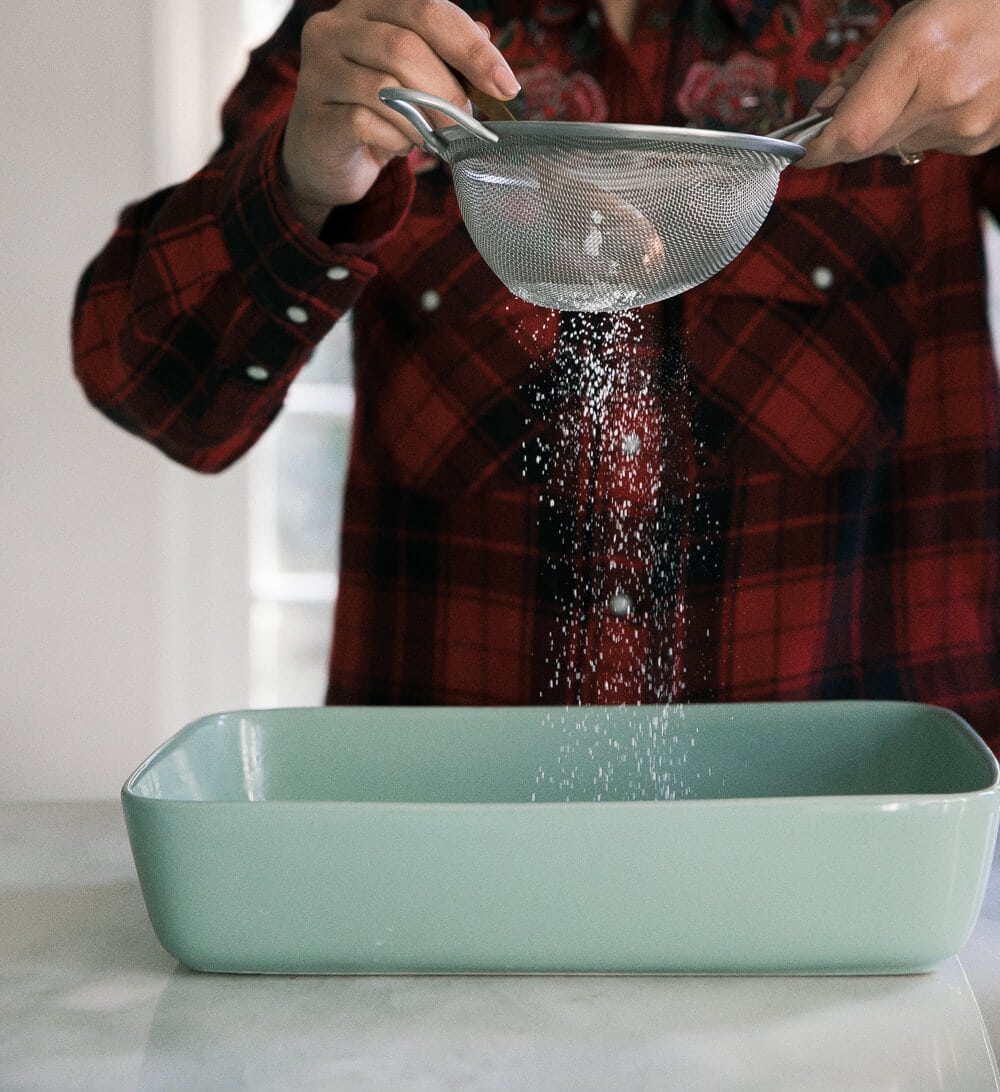
- Prepare your baking dish. You really can use any baking dish you like. Use a few if you need to! But you must sift together the powdered sugar and corn starch. And sift it into the bottom of the dish.
- Combine the gelatin. Sprinkle the gelatin on top of cold water. This will solidify over 10 minutes or so.
- Heat up the corn syrup mixture. In a saucepan, set over medium-high heat, add in the sugar, corn syrup and water. You want to cook this until the candy thermometer reaches 240 degrees F.
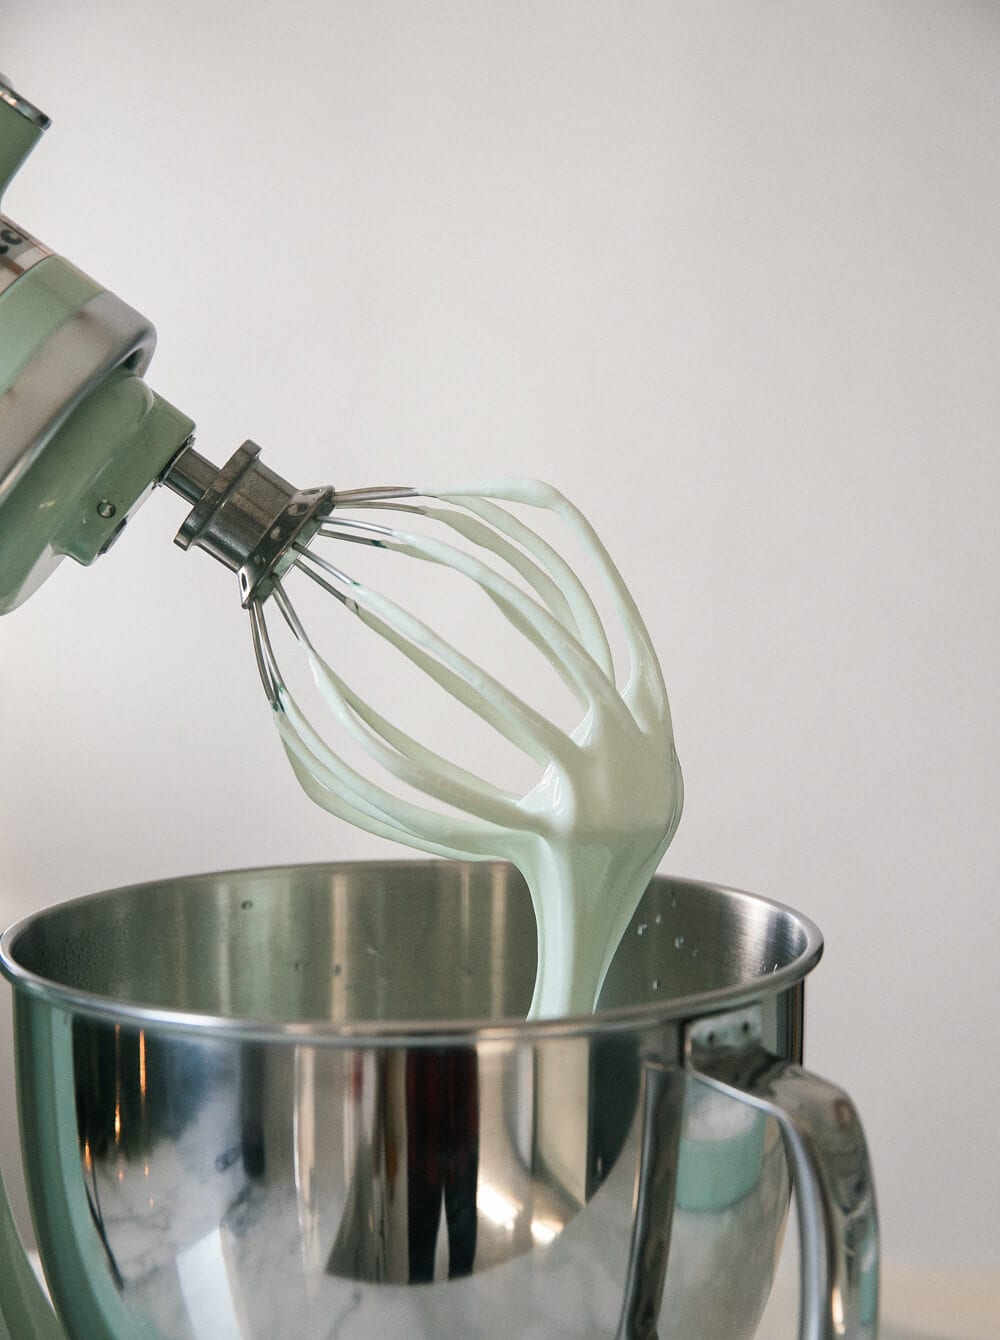
- Make the marshmallow mixture. Pour this hot corn syrup mixture into the bloomed gelatin. Whether you’re doing this in the bowl of a stand-up mixer OR a large bowl with an electric hand mixer, you want to pour in the very hot syrup SLOWLY.
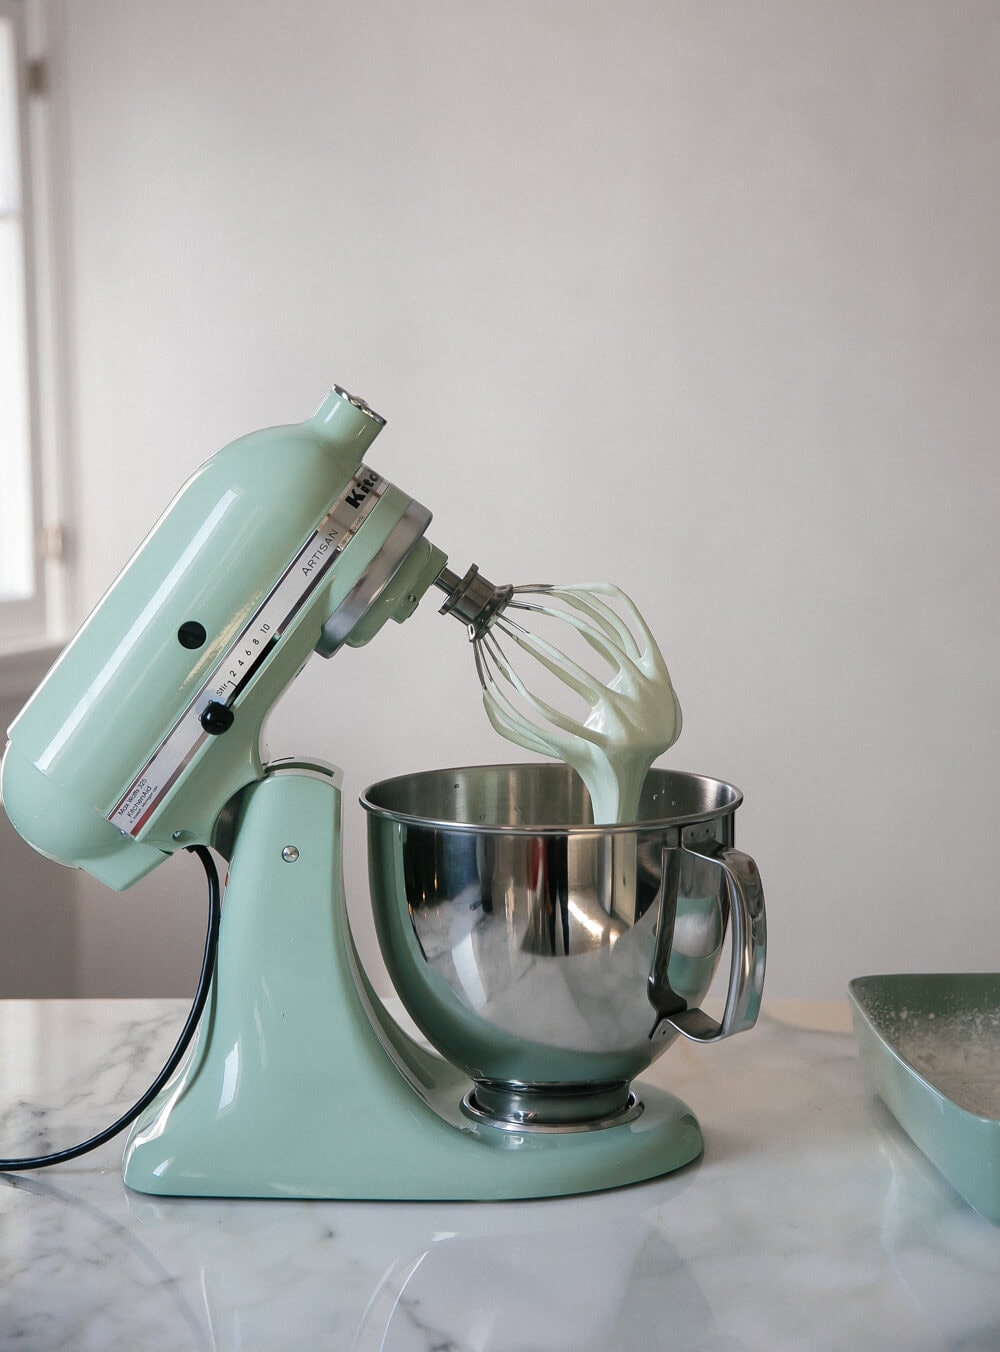
- Beat the marshmallow mixture. Mix on low for a minute and then increase the speed. It should start increasing in volume and the sides of the bowl will gradually cool down.
- Add in the flavors. In our case, that means peppermint extract and vanilla extract. Beat again.
- Color it (optional). I wanted the mint color so I went with drops of blue and yellow to make the perfect hint of mint green. Mix it again.
- Fold in the cacao nibs. These keep their shape and don’t melt upon meeting the warm marshmallow mixture. Fold them in.
- Set the marshmallows. Pour the marshmallow mixture into the baking dish – it’ll be sticky! Using a silicon spatula, spread it into one even layer. Top it with the remaining dusting of the powdered sugar and corn starch mixture. Let it set for 3-4 hours.
- Cut up the marshmallows! Cut them into any size you like. I like big marshmallows. So that means 3×3-inch squares.
Recipe Tip
Switch it up! Leave out the food coloring and peppermint extract. You’ll end up with a more chocolate-chip and vanilla marshmallow.
Add in vanilla bean – If you want more flavor, add in the caviar from half of a vanilla bean. Yum!
Gift them – Toss up the cut up marshmallows with some of the leftover powdered sugar and corn starch mixture. Place them in a gift bag and tie a ribbon. The cutest homemade gift. You could even gift them alongside my Homemade Sugar Cubes or Homemade Vanilla Extract.
Recipe FAQs
Sure! That will be fine. They won’t be green, obviously. But they’ll be white with little speckles of chocolate.
Please do! Who doesn’t want burnt marshmallow vibes in their hot chocolate or in between two graham crackers.
Hmmm…I don’t think you’ll get the exact color of mint but it should in some varying degree color them.
More Holiday Recipes
Christmas
Coquito

Christmas
Cozy Gingerbread House
Holiday
Fluffy Gingerbread Rolls
Desserts
Iced Oatmeal Cookies
If you tried this Mint Chocolate Chip Marshmallows or any other recipe on my website, please leave a 🌟 star rating and let me know how it went in the 📝 comments below. Thanks for visiting!
Mint Chocolate Chip Marshmallows
Equipment
- 1 Candy thermometer or digital thermometer
- Stand-Up Mixer (with the whisk attachment) or electric hand mixer
Ingredients
Prep the Pan:
- 3 tablespoons powdered sugar
- 1 tablespoon corn starch
Marshmallows:
- 3/4 cup cold water, divided
- 3 envelopes of gelatin, 7 1/2 teaspoons
- 1 1/2 cups white granulated sugar
- 1 cup light corn syrup
- 1/2 teaspoon kosher salt
- 1/2 teaspoon peppermint extract
- Blue and Yellow Food Coloring
- 1/2 cup cocoa nibs, chopped, reserving a tablespoon to sprinkle over the top
Instructions
To Prep the Baking Dish:
- Before you begin, let's do some prep. Start by sifting together powdered sugar, corn starch onto a large plate. Grease you 8×8-inch casserole dish or baking dish. If you don't have one, you could use a variety of dishes. We're using this to set the marshmallows.
- Rub the dish with a bit of neutral oil in one even layer. Add a teaspoon of the powdered sugar mixture to the casserole dish and shake it around until the bottom of the edges are dusted. Set aside.
To Make the Marshmallows:
- To the bowl of your stand-up mixer (or a large bowl if you're using an electric hand mixer), add 1/2 cup of water and sprinkle the gelatin on top; allow to sit for 10 minutes. Attach the bowl to the stand-up mixer and add the whisk attachment.
- Meanwhile, in a medium saucepan, combine the granulated sugar, corn syrup, salt and remaining 1/4 cup of water. Heat the mixture over medium heat until the sugar has dissolved. Turn the heat up to moderately high heat and bring the mixture to a hard boil and cook for 1 minute, until the candy thermometer or digital thermometer reads 240 degrees F.
- Lower the whisk attachment and turn the machine on low. Carefully add the boiling liquid to the gelatin mixture. Turn the mixer to high and beat for 5 minutes, until the mixture has grown in volume. Stop the mixer and add 12 to 15 drops of each food coloring—this will make the perfect shad of “mint green."*If you're using a large bowl, simply add the hot mixture and turn the electric hand mixer on low being sure it doesn't splatter. After a minute or so, increase the speed to high and beat for 4-5 minutes. Proceed with recipe above and below.
- Beat again for an additional 3 minutes, until doubled in volume and until it holds stiff peaks. Add the peppermint extract and vanilla extract. Beat for an additional minute or so until the both of them are incorporated. Fold in the cocoa nibs.
- Pour the mixture into the prepared baking pan, smoothing out the top until it's evenly disbursed (it'll be sticky!). Sprinkle the remaining cocoa nibs on top. Lightly cover with plastic wrap.
- Allow it to firm up on the kitchen counter for about 3 to 4 hours. Take a knife and run it around the edges of the casserole dish or pan and invert the marshmallow sheet onto a large cutting board, smacking the bottom of it, if needed. You also may need to use your fingers to loosen the marshmallow sheet from the casserole dish and gently glide it onto the cutting board.
- Using a sharp knife, cut the marshmallows into 2 or 3-inch squares. Store the marshmallows in an airtight container for up to 1 week.
Notes
- Switch it up! Leave out the food coloring and peppermint extract. You’ll end up with a more chocolate-chip and vanilla marshmallow.
- Add in vanilla bean – If you want more flavor, add in the caviar from half of a vanilla bean. Yum!
- Gift them – Toss up the cut up marshmallows with some of the leftover powdered sugar and corn starch mixture. Place them in a gift bag and tie a ribbon. The cutest homemade gift. You could even gift them alongside my Homemade Sugar Cubes or Homemade Vanilla Extract.
Nutrition
Nutrition information is automatically calculated, so should only be used as an approximation.


Yum! What a fun idea!
Kari
http://sweetteasweetie.com/raspberry-mule-absolut-elyx/
This looks delicious! You mention vanilla extract in your written directions but it’s not on the list of ingredients. Did you use 1/2 teaspoon of this as well? I am a baking newbie so I don’t want to mess this up!
I made these yesterday without previewing the recipe method (woops) but having made a few batches of marshmallows this season already, I spotted the hiccups. In the first step of water addition, you add 1/2 cup of water. For the addition of vanilla, I used 1/2 tsp in addition to the peppermint extract because other marshmallow recipes have called for a range of 1 tsp vanilla to 1 Tbsp vanilla. I had to assume the peppermint was the star so I only used 1/2 tsp vanilla extract. I also only found peppermint flavor at my local sprouts so I used a whole tsp and I think it was the right call. The final flavor was delightful.
These look AMAZING. Will a hand mixer (beater attachments) work to make them? I don’t have a KitchenAid mixer. (Seriously, I want to get married just to get one as a wedding gift.)
Feel you girl. Yes, you can do it with a hand mixer. It will take a bit of time but it’s definitely doable! You might have to switch arms because your arm might get sleepy but it’s absolutely achievable! xo
What do you think would be a good substitute for the cacao nibs? I have a hard time finding that ingredient usually.
Trader Joe’s has cacao nibs.
I agree about the KitchenAid mixer. For the first 20 years of my baking life, I used a Hamilton Beach stand mixer (a wedding gift in 1969) and it worked pretty well. But as I got better at baking, I really wanted a KitchenAid, but they were so expensive. When I got one for Christmas in 1989, I actually cried! I still have that KitchenAid. I even bought accessories for it (copper bowl, pasta maker, etc.), but the one I actually use is the flat beater with the rubber edge. Truly indispensable.
So I tested this first with chopped up chocolate, but it melted because the marshmallow mixture is warm, but it was actually really pretty. It kinda created a marble-effect. So feel free to use chopped chocolate but know that it will melt and won’t be “mint chocolate chip” but you know, it’ll still taste like chocolate! 🙂
As Sophie stated, you can find cacao nibs at Trader Joe’s, Sprouts, Whole Foods or even another health-food store. 🙂
Oh my gosh, these look amazing! These are a must for this Christmas!
They really are xox
Is there a reason for using the peppermint instead of just mint extract? Marshmallows are a holiday gift staple for me and I’m looking forward to trying something a little different than my usual vanilla, bourbon, lavender, or peppermint ones. 🙂 thank you, these look delish!
Oh that’s just what I have in my pantry. I believe mint extract is just a combo of spearmint and peppermint so it should be pretty much the same! 🙂
Such beautiful marshmallows! And I agree about kitchenaid mixers lasting a long time, mine lasted me about 10 years with heavy use before it broke. Great investment and I can’t imagine baking without it. Also, it would be impossible to make marshmallows without it hahaha 🙂
It really is nearly impossible to make these without one! 🙂
Just beautiful!
Gemma
www.fadedwindmills.com
Those look divine! They would be so pretty wrapped up in cellophane for gifting too!
They would make a great gift!
I’m so excited to make a vegan version of these! I think some of the directions might have cut off though.
Oh yes that’s a great idea!! And I just fixed it 🙂