Disclosure: This post may contain affiliate links, which means I may earn a commission if you click on the link and make a purchase.
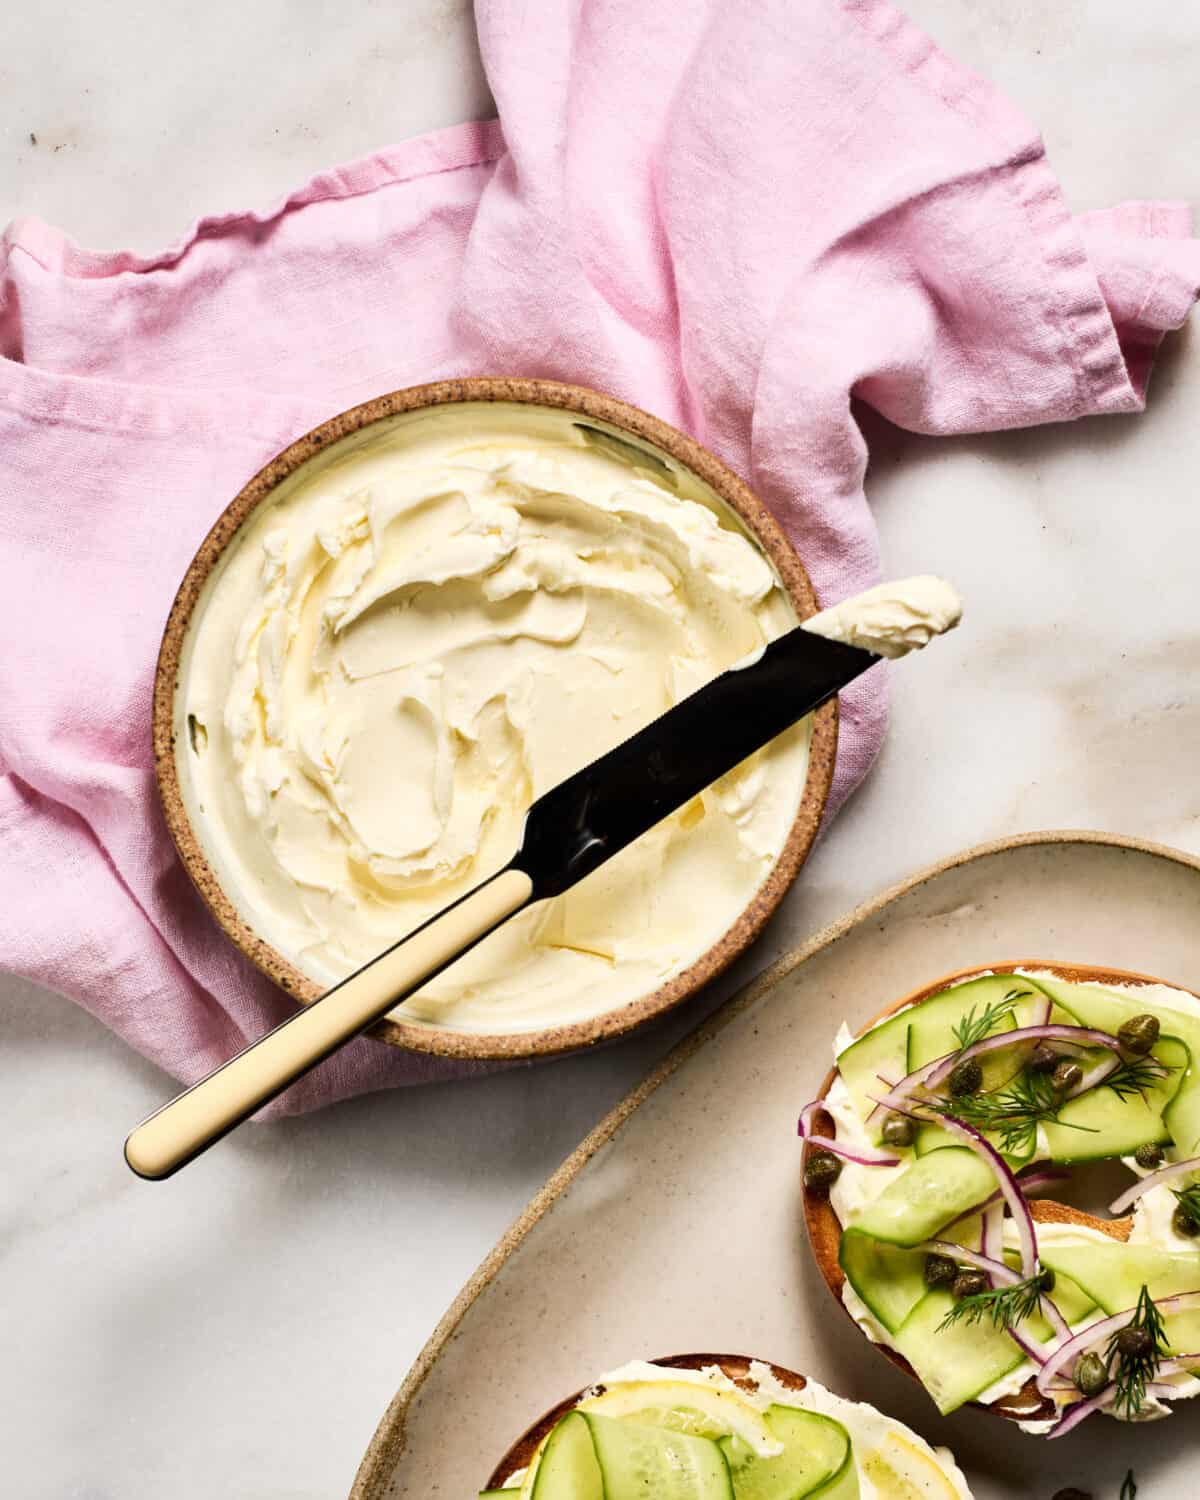
With just three simple ingredients and a few inactive hours, this Homemade Cream Cheese is creamier, fluffier, and more delicious than anything store-bought. You’ll love it smeared on protein bagels or a piece of toast.

Breakfast at home will always beat brunch out—why pay for overpriced, mediocre food when you can make something way more delicious for a fraction of the price? I love whipping up everything from Breakfast Burritos and Breakfast Tacos to the best Blueberry Muffins.
Supplies You’ll Need to Make Homemade Cream Cheese
Most of the supplies you’ll need to make homemade cream cheese are easy to find, especially on Amazon. Here is what you’ll need:
Ingredients for Homemade Cream Cheese

- Dairy – We need heavy cream, whole milk and buttermilk.
- Rennet – You can use vegetable or animal rennet.
- Salt – I like to use kosher salt. That’s it!
How to Make Homemade Cream Cheese
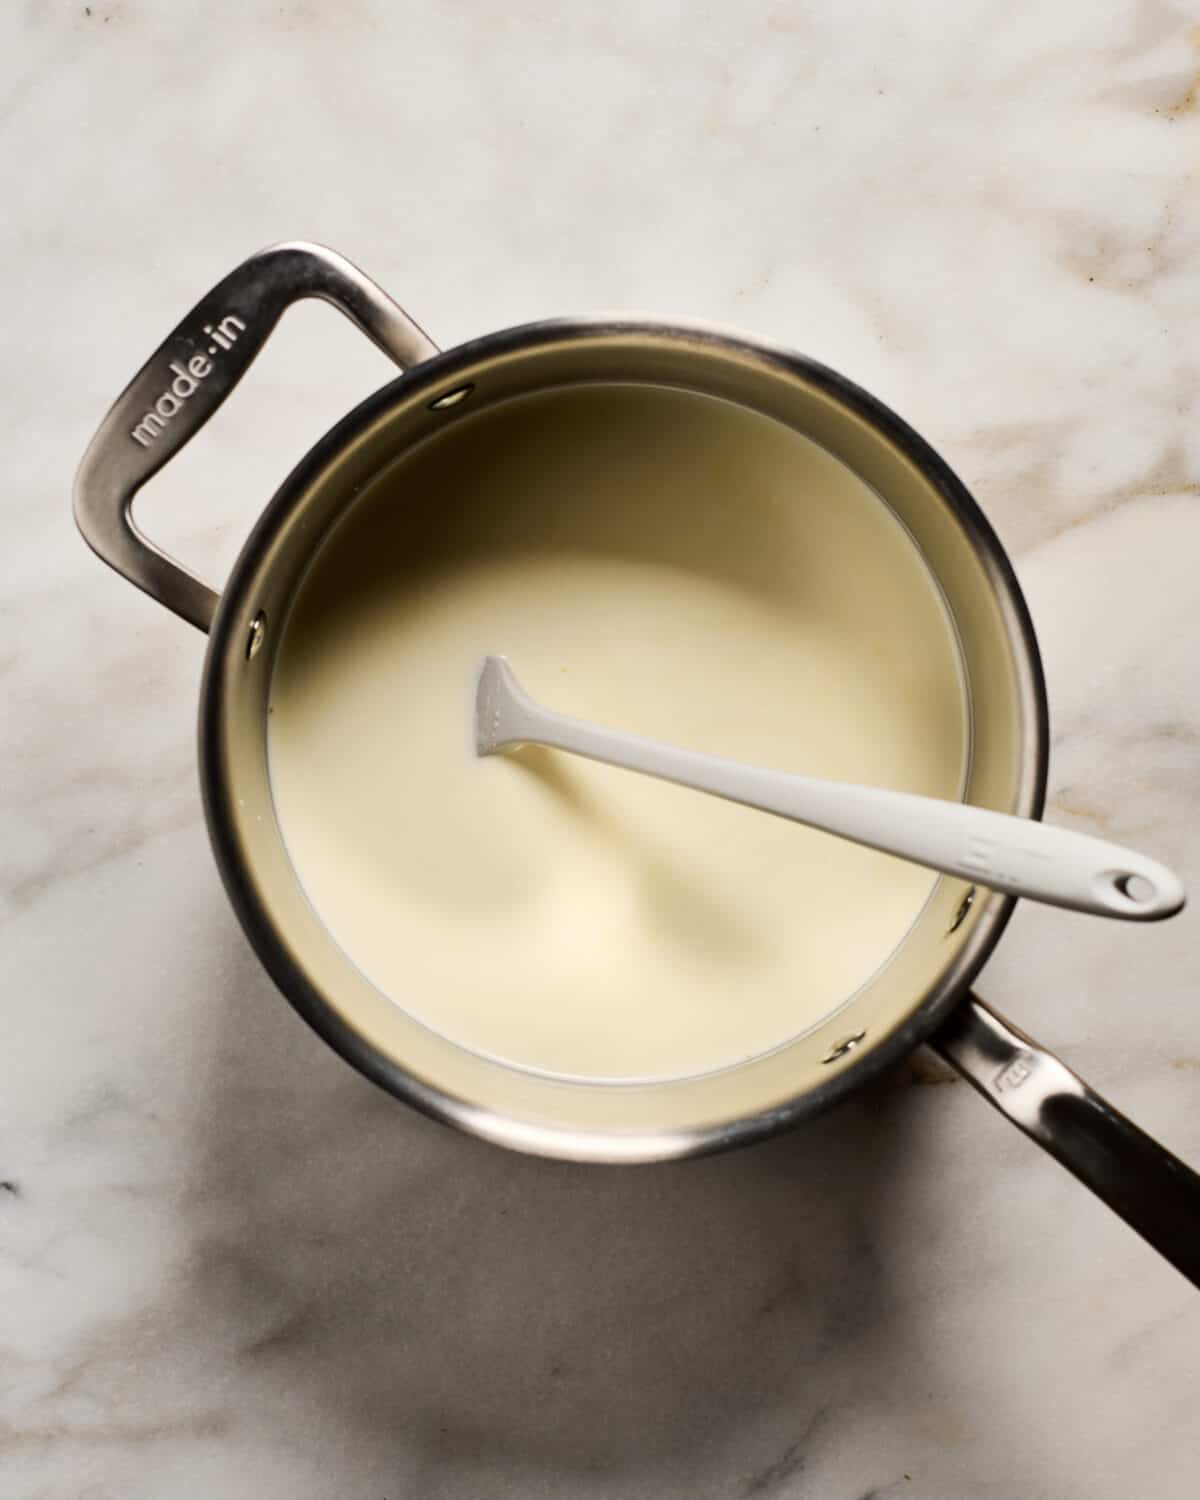
- Combine the milks. In a big pot, add the heavy cream, whole milk, buttermilk and salt.
- Warm to 75 degrees F. Heat the milk mixture to this temperature.
- Mix in the rennet. Add the rennet and mix throughout. This is going to make it so the solids separate from the whey.
- Allow to stand at room temperature in a warm place. In order for this to actually work, the temperature has to be nice and warm.
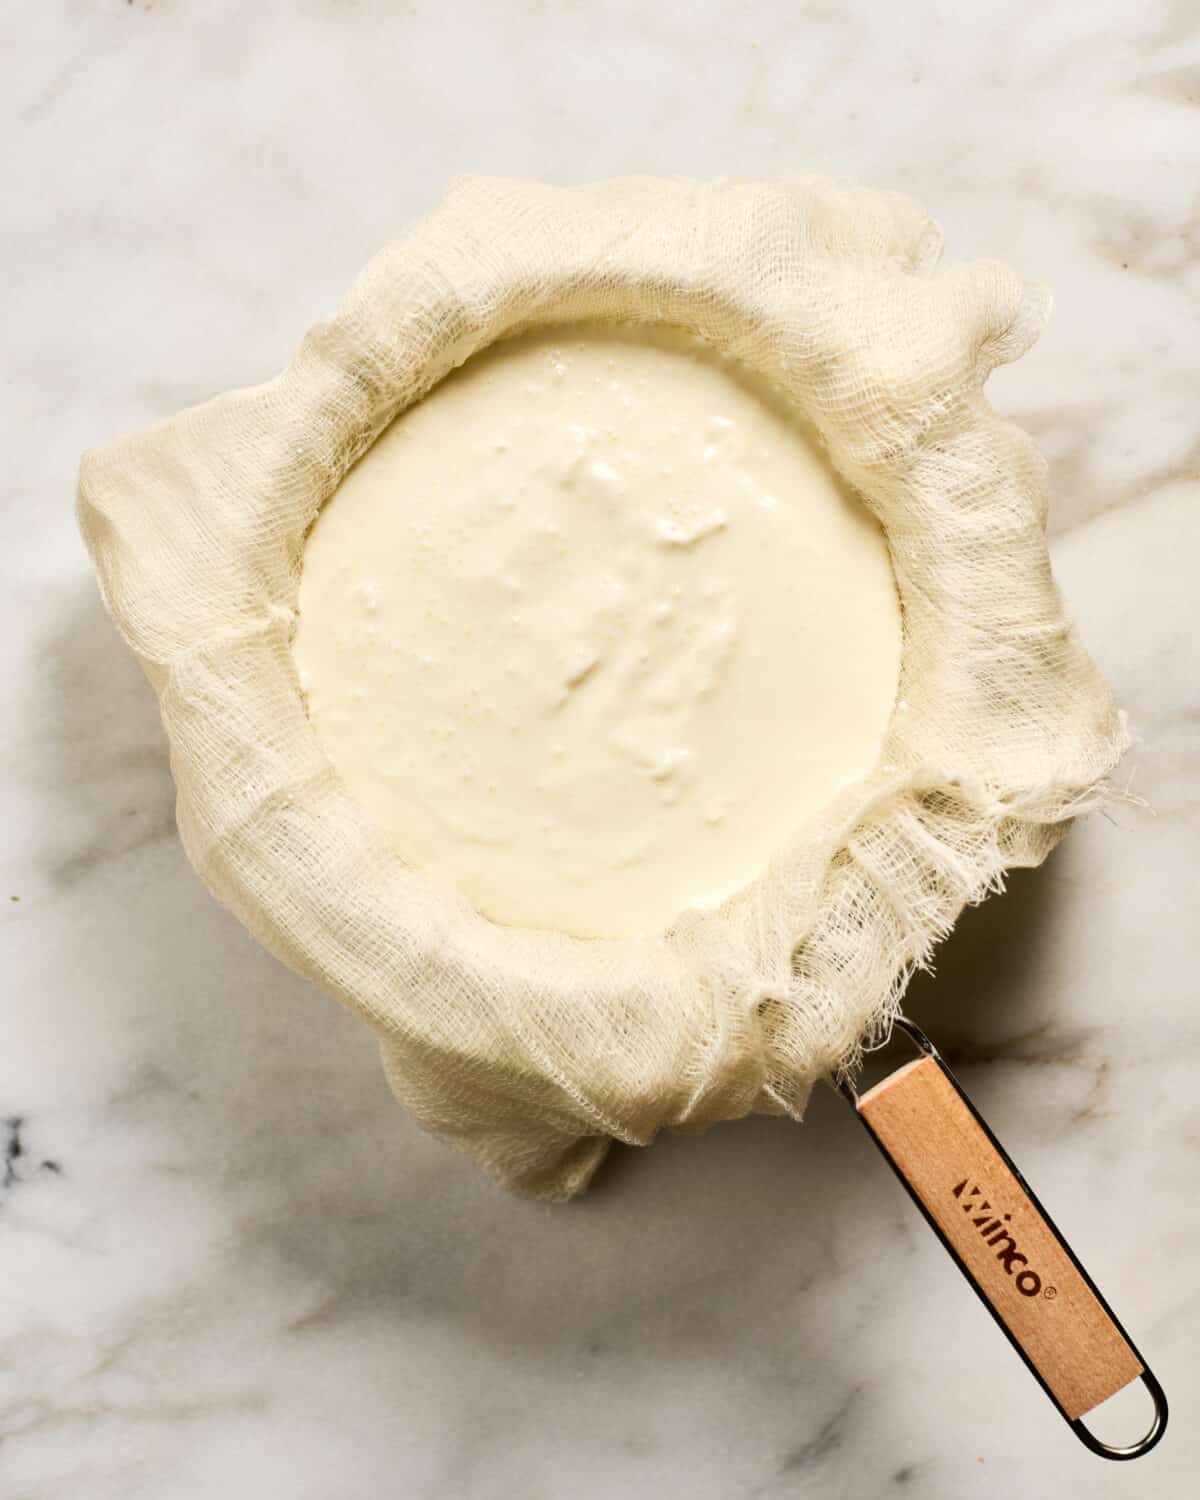
- After 14 Hours, strain it. This takes about 14 hours for the whey and solids to separate. Line a sieve or strainer with a few layers of cheesecloth. Nestle it over a large bowl. Pour the mixture into the cheesecloth.
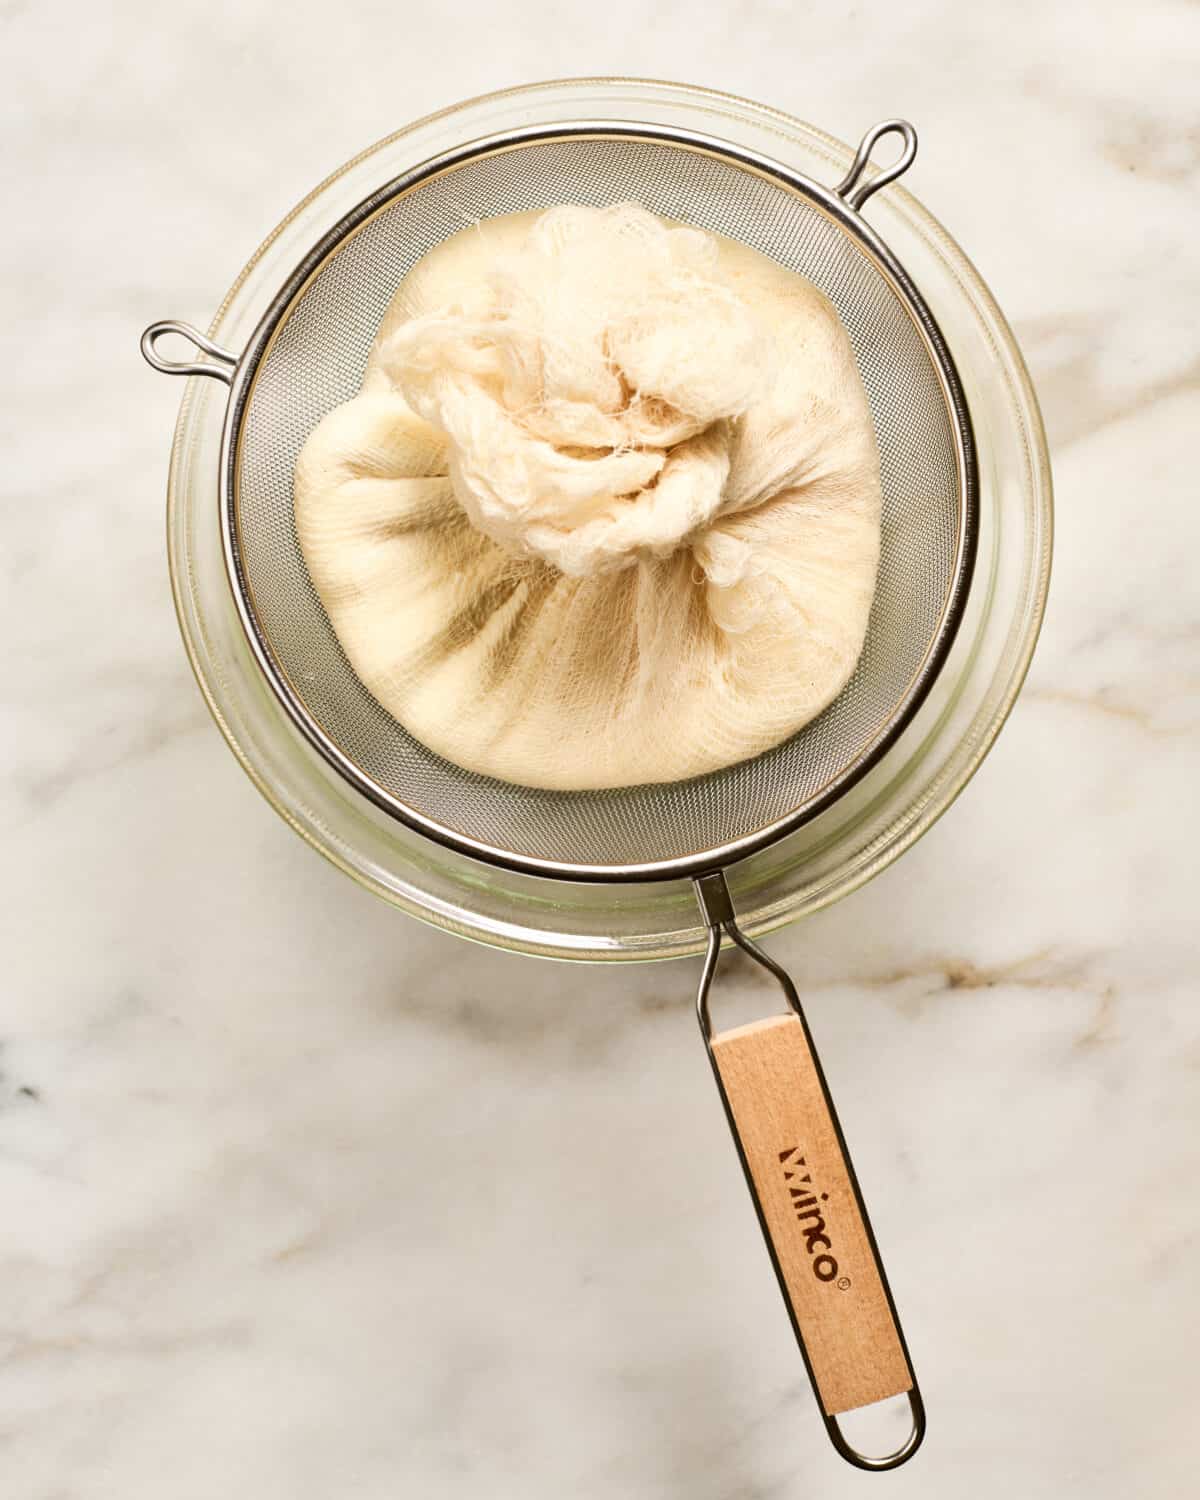
- Allow it to drain. This should take about 4 hours for it strain.

Recipe Tip for Homemade Cream Cheese
Leftover Whey. You’ll end up with whey, which is the liquid leftover from the curds. Don’t throw it away! Instead, use it in place of the buttermilk in my Buttermilk Biscuits. The result will be divine, super tender and delicious biscuits.
Recipe FAQs
I adore cream cheese frosting (my brown butter cream cheese frosting is DIVINE). This homemade version is MUCH softer than store-bought cream cheese so this will make the frosting softer too. I would add less heavy cream in that recipe, as well as chill the frosting so it doesn’t melt.
Homemade cream cheese is smoother, lighter, and creamier than store-bought versions, which use gums that make them thick and dense. It’s so good that I’ll probably never go back to store-bought again.
More Breakfast Recipes
Quick and Easy
Hailey Bieber Strawberry Glaze Skin Smoothie
Breakfast
Apple Cider Doughnut Muffins
Breakfast
Best Lemon Ricotta Pancakes

Holiday
Buttermilk Biscuits
If you tried this Homemade Cream Cheese Recipe or any other recipe on my website, please leave a 🌟 star rating and let me know how it went in the 📝 comments below. Thanks for visiting!
Homemade Cream Cheese

Equipment
- Cheese cloth
- 1 Strainer
Ingredients
- 2 cups heavy cream
- 2 cups whole milk, ultra-pasteurized is ok!
- 2 tablespoons buttermilk, shaken
- 1/2 teaspoon kosher salt
- 3 drops liquid vegetable or animal rennet, dissolved into 2 tablespoons of water
Instructions
- In a large pot, combine heavy cream, whole milk, buttermilk and salt. Heat to 75 degrees F. (Warm to the touch.)
- Mix in rennet being sure it’s evenly distributed. Cover with clean kitchen towel and allow to stand in place that’s 75 degrees for 14 hours. Just a heads up, I tried this once during the day and once at night. No surprise that the batch that sat for 14 hours during the day was MUCH better. It was just warmer and was overall a better environment for the cream cheese.
- Line a fine-mesh strainer with a few layers of cheesecloth; and then nestle it over a large bowl. Pour the cream/milk mixture into the cheesecloth and allow it to strain, on its own (don’t work it through), for about 4 hours to 5 hours. When it’s completely drained, the final product should be a creamier, smoother and lighter version of cream cheese that you’re probably used to. It keeps in the fridge for 2 weeks.
Notes
Nutrition
Nutrition information is automatically calculated, so should only be used as an approximation.
*This post was originally published on June 24th, 2015 but it has since been updated with new copy and new photos!


Can you further explain in depth the purpose and uses of gums in store-bought cream cheese? What are they made of and why are they bad to consume?
-Curious, Cream Cheese Lover
Guar gum is usually the thickener and stabilizer that’s used in cream cheese. I don’t think it’s like the worst thing in the world for you (we consume them all the time in all sorts of foods). Here’s more info on it:
https://en.wikipedia.org/wiki/Guar_gum
I like this cream cheese not necessarily because “it’s better for me.” It more has to do with loving the texture without the gums. This is much lighter and fluffier, while store-bought cream cheese is a whole lot more dense.
I am a cream cheese freak! I never thought about making it myself, though. It doesn’t seem like it’s that hard, either.
Thanks for sharing!
http://aneducationindomestication.com
This has got to be more EXPENSIVE than store bought cream cheese. You have to buy 2cups of cream and 2cups of milk plus the rennet and cheese cloth. And the time that it takes you to make it. Plus you left your oven on for 16 hrs., what about the electricity cost?
How much did you end up getting in the end?
Here where I live store brand cream cheese goes for about $2.00 for 8ozs.
Actually, its not too expensive. I regularly make cream cheese this way I get a gallon of milk ~3.00 and a pint of heavy cream (~1.50), so total of $4.50 (Aldi). The liquid rennet I have lasts forever, so I don’t really count into the cost. In the end I get about 3-4 cups of cream chees :).
YUM! I had no idea you would make your own cream cheese. I also love carbs! I secretly love bread baskets at restaurants and no meal is complete without bread!
Leslie
http://alifewellconsumed.com
What a cool recipe! I love being able to know exactly what is in my food and this allows me to do that with this kind of cheese that I love so much.
This looks fabulous! I love the idea of fresh homemade cream cheese that’s so natural without all the fillers.
Very nice. I will try it at home
Hope this homemade one will be cheaper for me than the shop one
It is possible to use charcoal jiko for baking?
I’m also curious about the 75 degrees. We try to keep our house between 76 & 80 during the summer (outside is well over 100 most days) and the winter it rarely gets above 74. What happens if it doesn’t stay at 75 degrees? So excited to make cream cheese at home 🙂
A really good option is to put the oven on 200 degrees F and set the bowl on the stove. I did that for the overnight version and it took a bit longer (around 16 hours) but it still worked!
That would be a great idea but I have a cooktop and oven that are separate 🙁 Could I put it inside my yogurt maker or would that be too warm? Any ideas on why it needs to be 75 degrees? I’m wondering if the temp messes with the length of the process. For instance, does it take longer at lower temps?
Ahh I see. The importance re: the temperature is that the good bacterias from the buttermilk need a warm environment to do their thing, much like when you make yogurt. The temperature absolutely affects the time it will take. If you had a colder environment, it would take probably 16 to 18 hours. You could also put the pilot light on in your oven and stick the pot in the oven. (I wouldn’t cover it with a towel in this instance, but instead a lid for the pot.) It should be about 80 degrees in the oven with the pilot light on.
THANKS! I’m so excited to try this 🙂