Disclosure: This post may contain affiliate links, which means I may earn a commission if you click on the link and make a purchase.
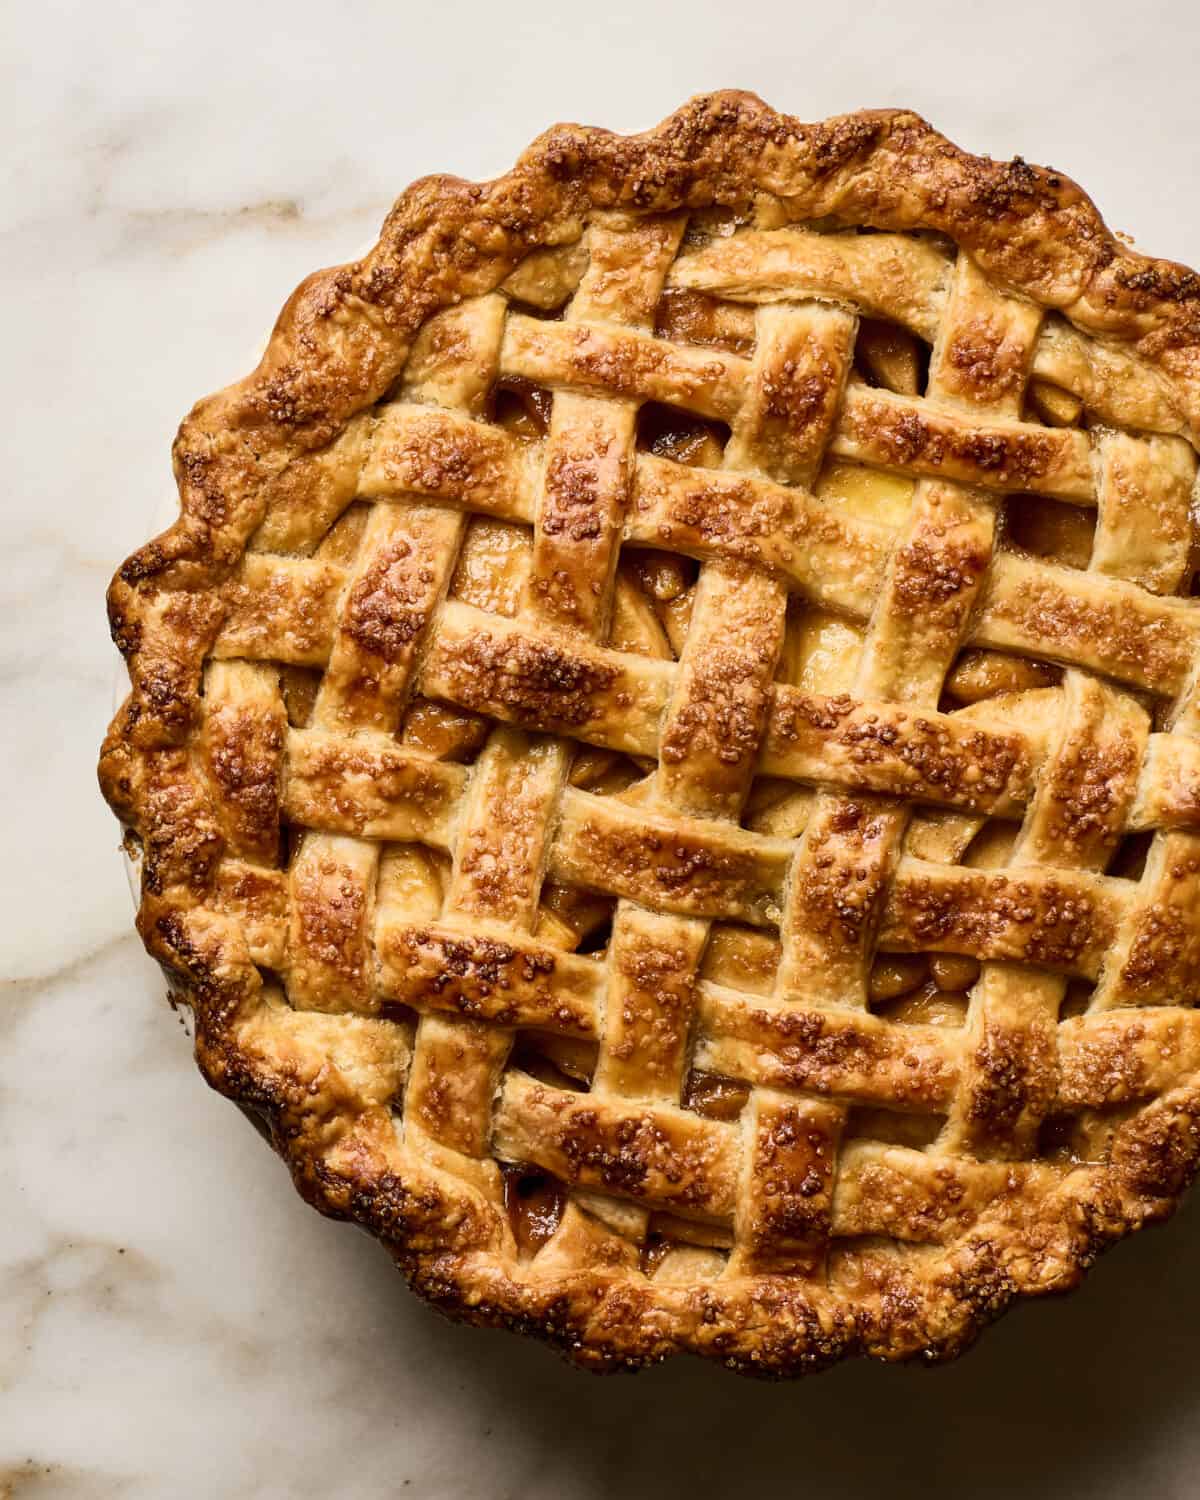
If you adore pie, this post will help you to success! This step-by-step guide for homemade pie crust will result in an all-butter, flakey pie crust that’s easy to execute and perfect for Homemade Apple Pie, Rose Apple Pie or Apple Hand Pies.
Pie is my love language. I’ll admit that the first time I made pie, years ago, it was a complete disaster. I blame myself for being a terrible reader of instructions AND pies aren’t “easy as pie.” (That might be the most inaccurate, idiotic idiom I’ve ever heard.)
Pie has its challenges, though it’s definitely not impossible. Hopefully these tips and photos will help make you successful at da pie-a-makin’. Use this pie crust for my favorite pies like my Classic Cherry Pie, Butter Pecan Pie, Black Bottom Pecan Pie or this Chocolate Coconut Pecan Pie.
Ingredients You’ll Need for Homemade Pie Crust
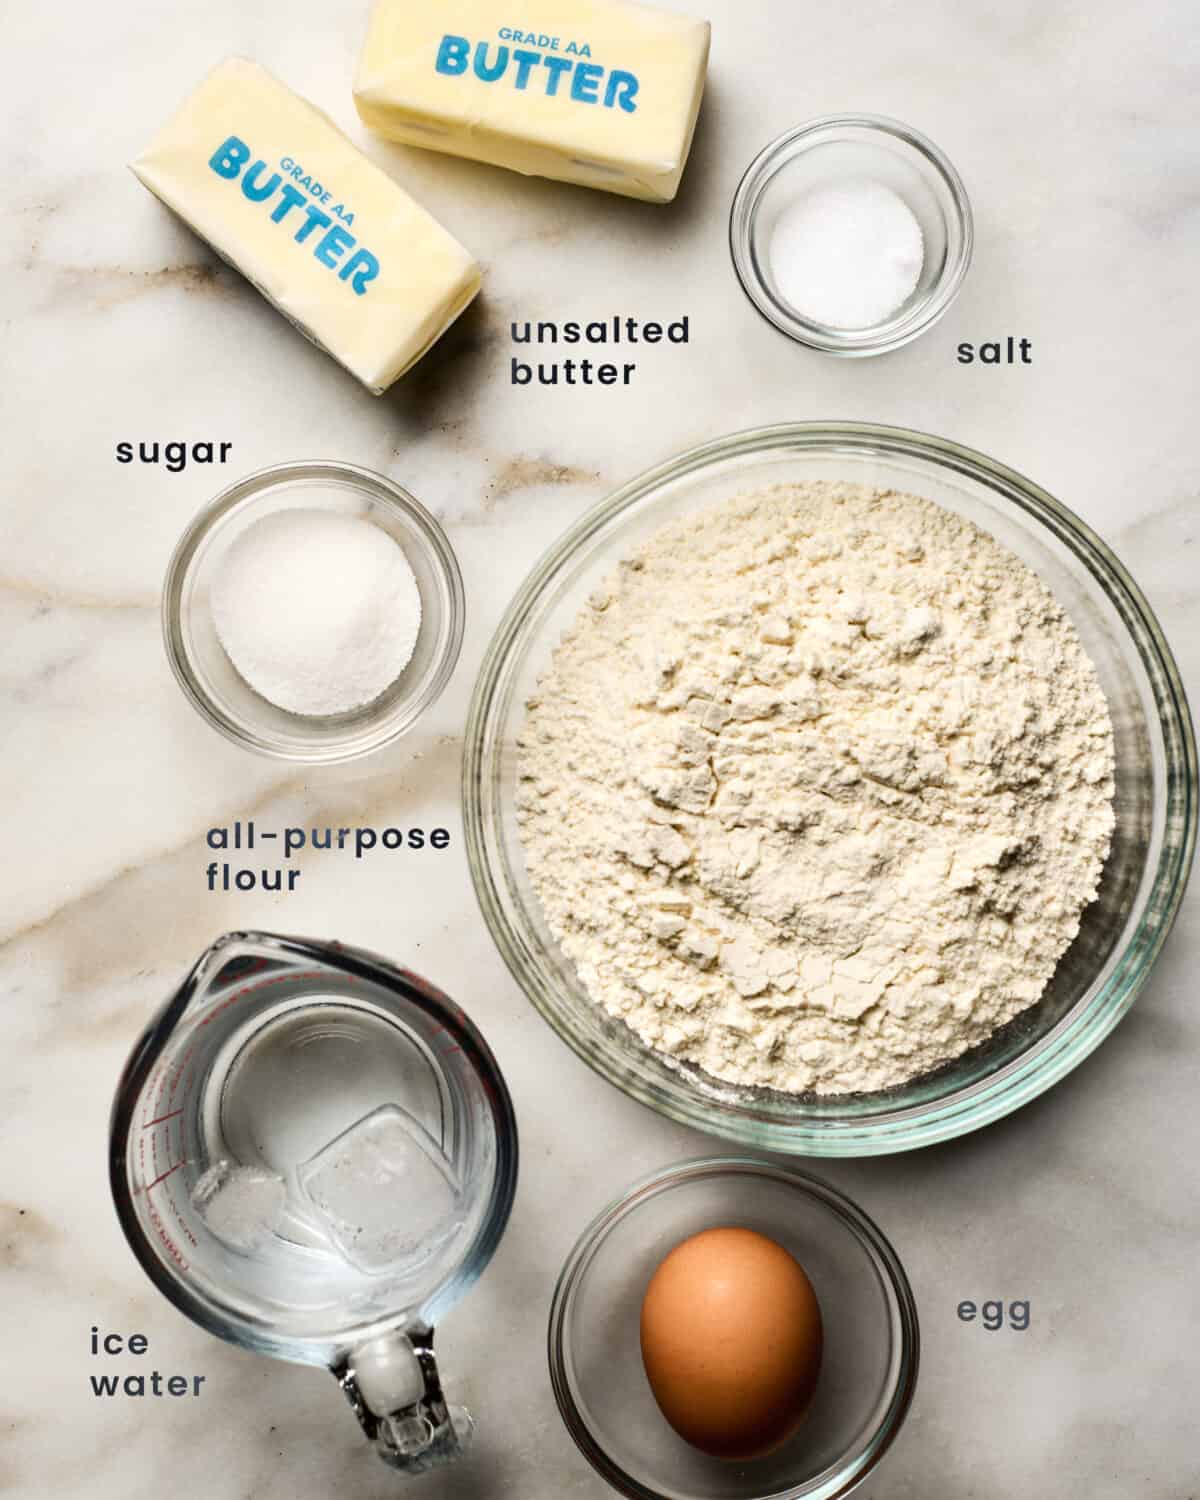
- All-purpose Flour – My favorite flour is King Arthur’s Flour. This unbleached, sturdy, high-quality flour results in the best pie crust results.
- Unsalted Butter – If you want to be fancy, feel free to use a European butter but I simply use American, grocery store-bought butter and I get great results.
- Ice Water – We want everything to be cold, including the water we’re adding to the pie crust.
- Sugar – This will give just the perfect amount of sugar for this pie crust.
- Salt – I like using kosher salt. Everything sweet needs a balance of salt.
For the rest of the ingredients and instructions, please see the recipe card below!
How to Make Homemade Pie Crust
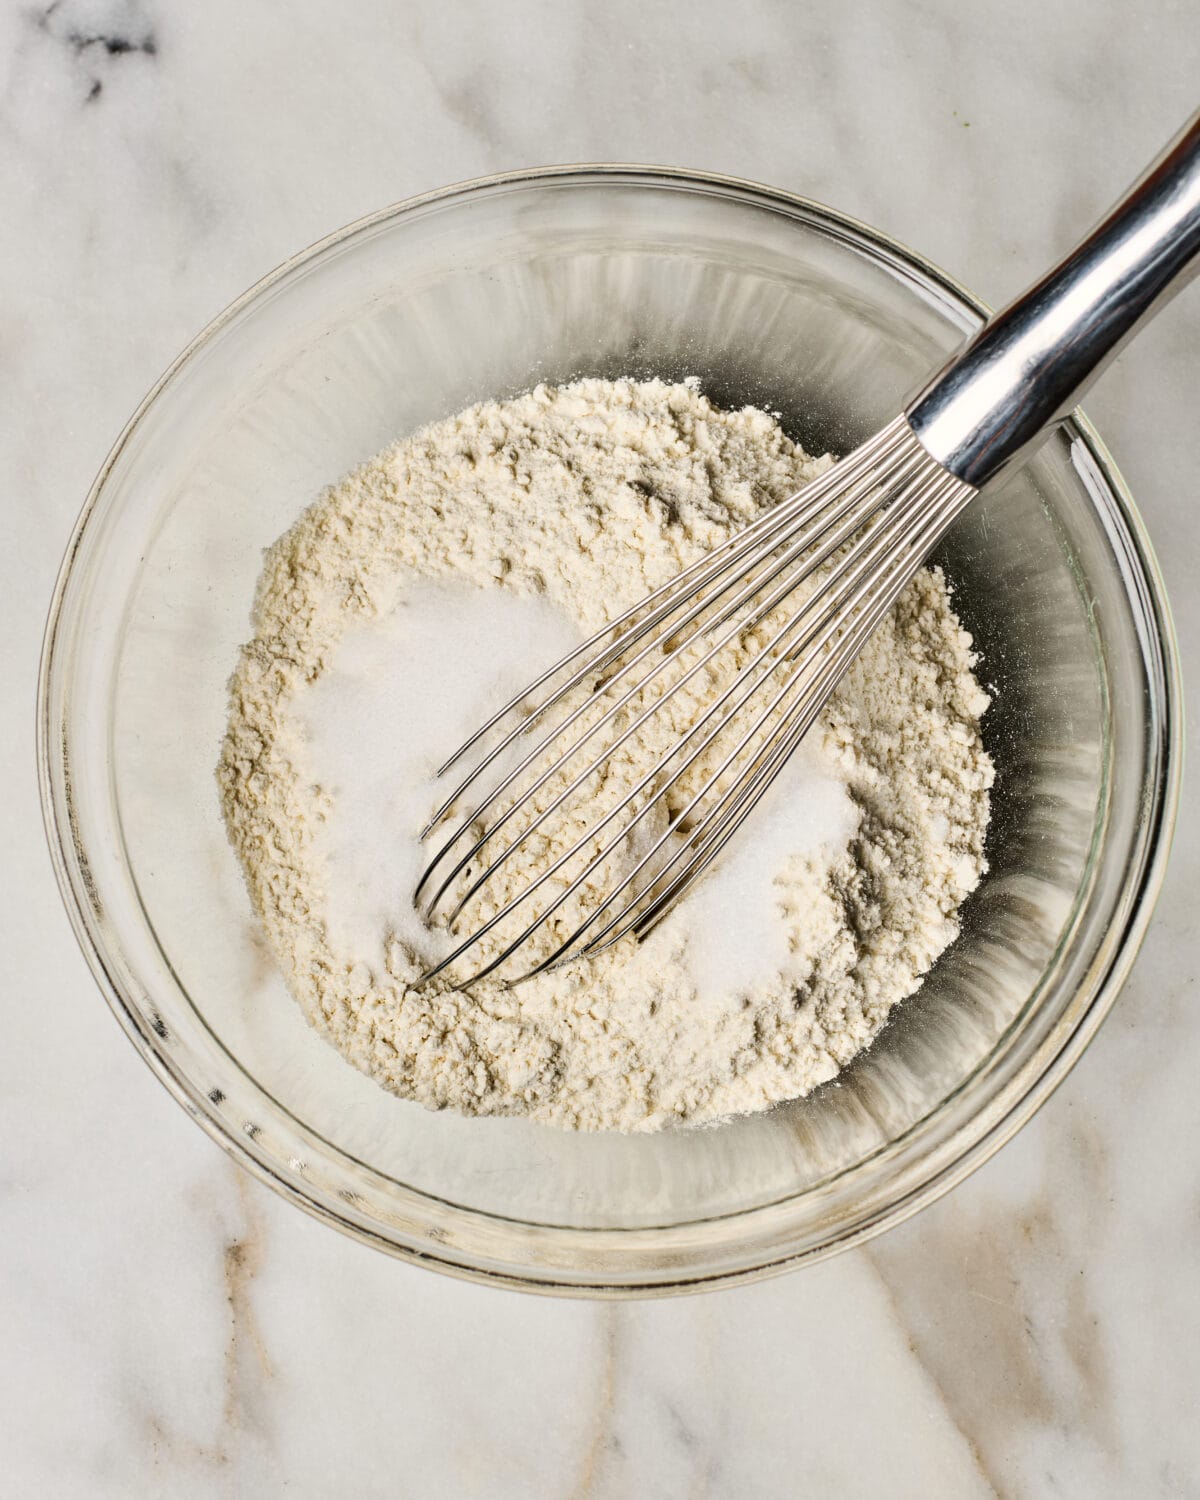
- Mix together the dry ingredients. To a large bowl, add the flour, salt and sugar.
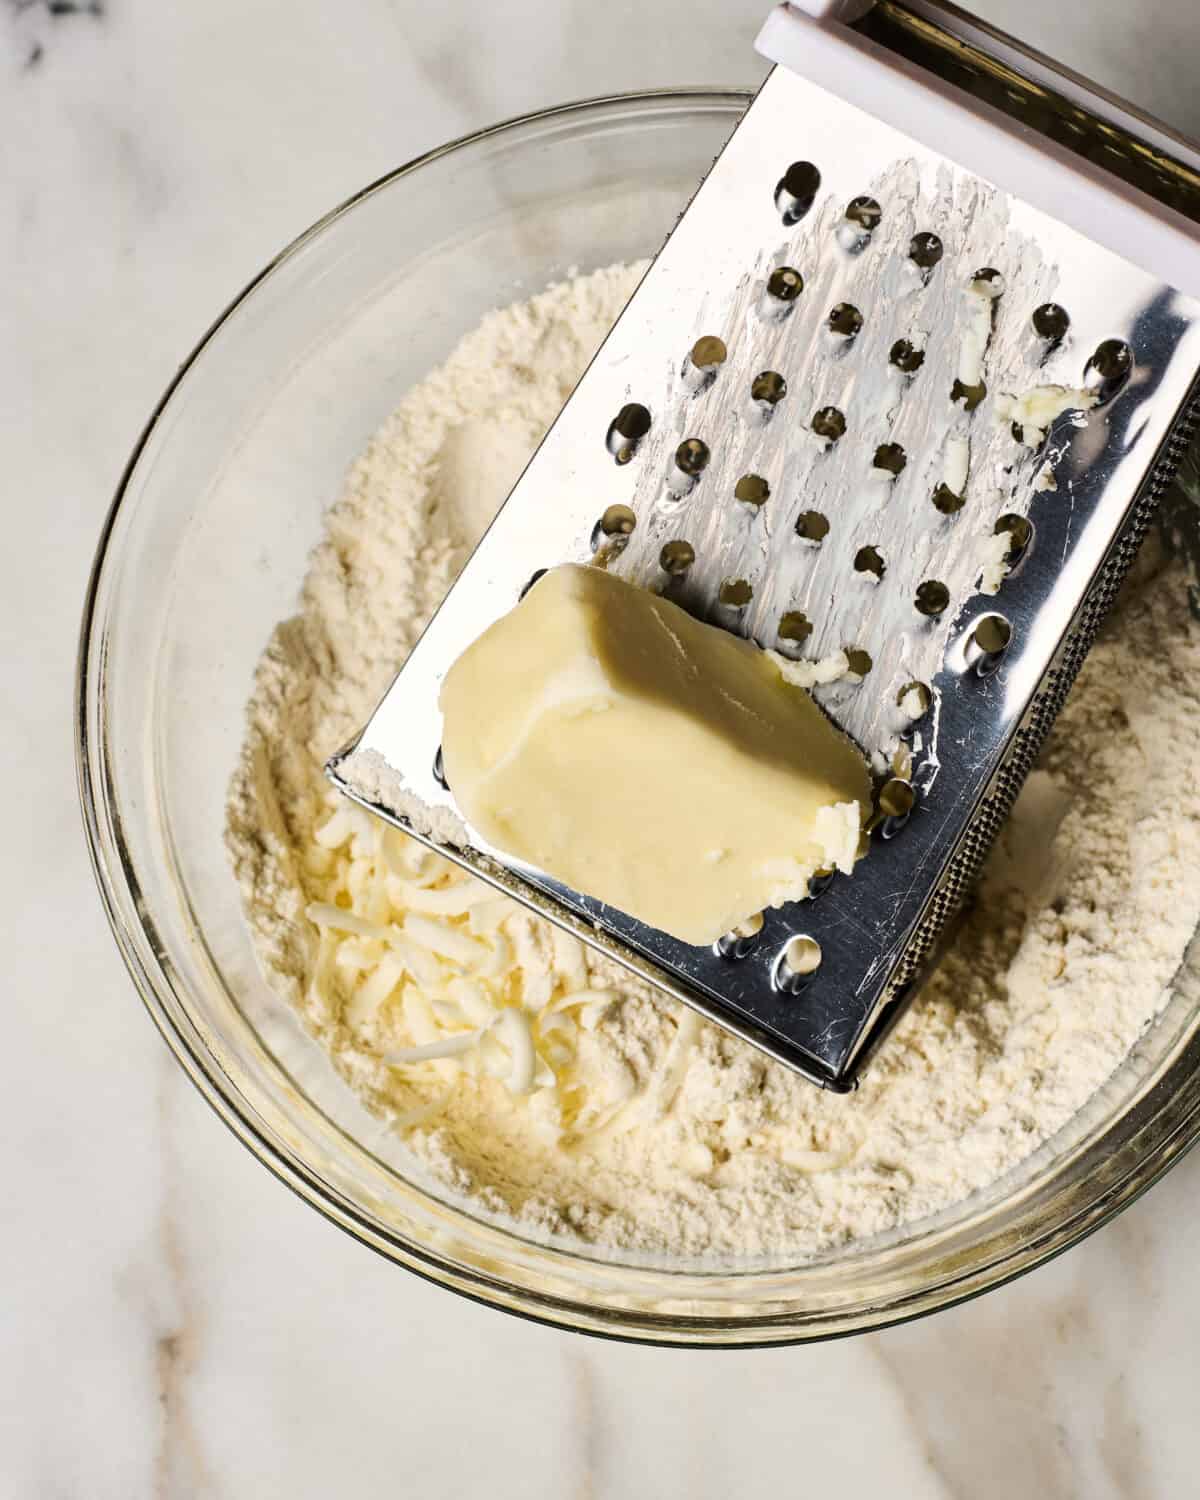
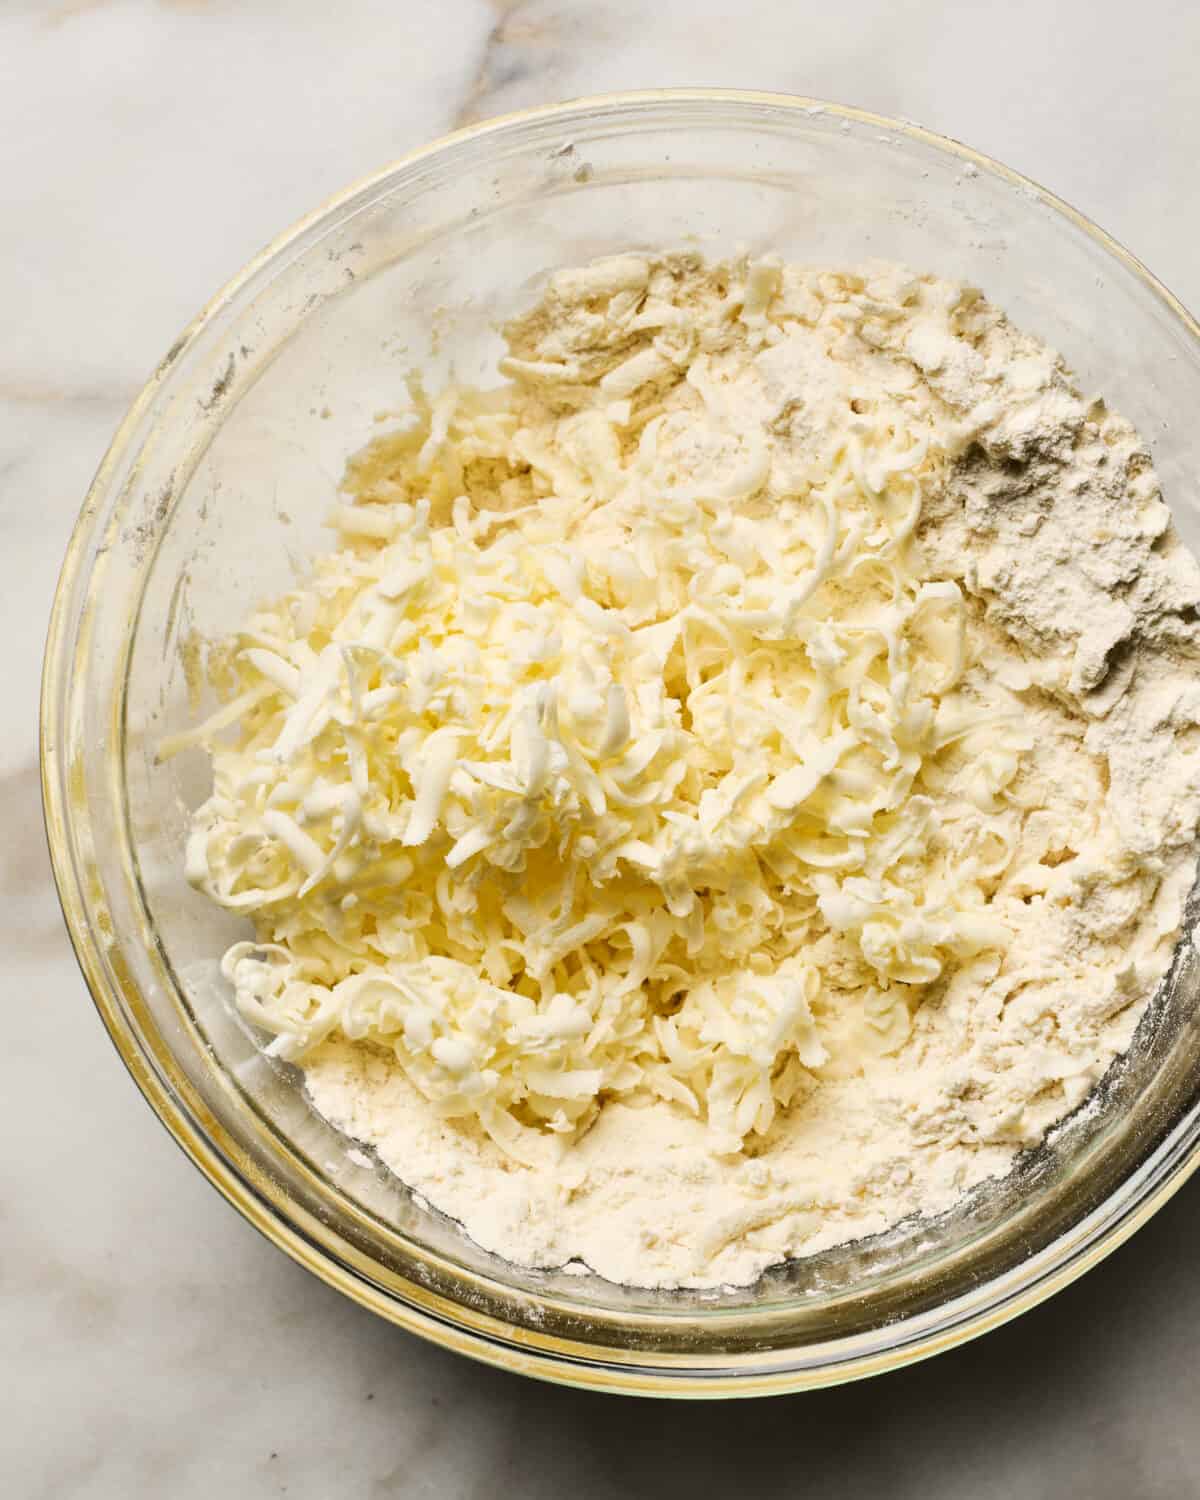
2. Use a box grater to cut up the butter. I find this WAY easier than breaking it up using a pastry cutter. Shred the butter atop the flour. The end goal when making pie dough is to get the butter to resemble pea-sized bits. This makes it so you handle the flour mixture less, which will result in a tender pie crust.
3. Stick the bowl in the freezer for 10 minutes. I like to do this because it gets the butter super cold. Next, press it with your fingers into the flour mixture. The color should go from white to slightly off-white/yellow. This means that it’s thoroughly mixed into the flour.
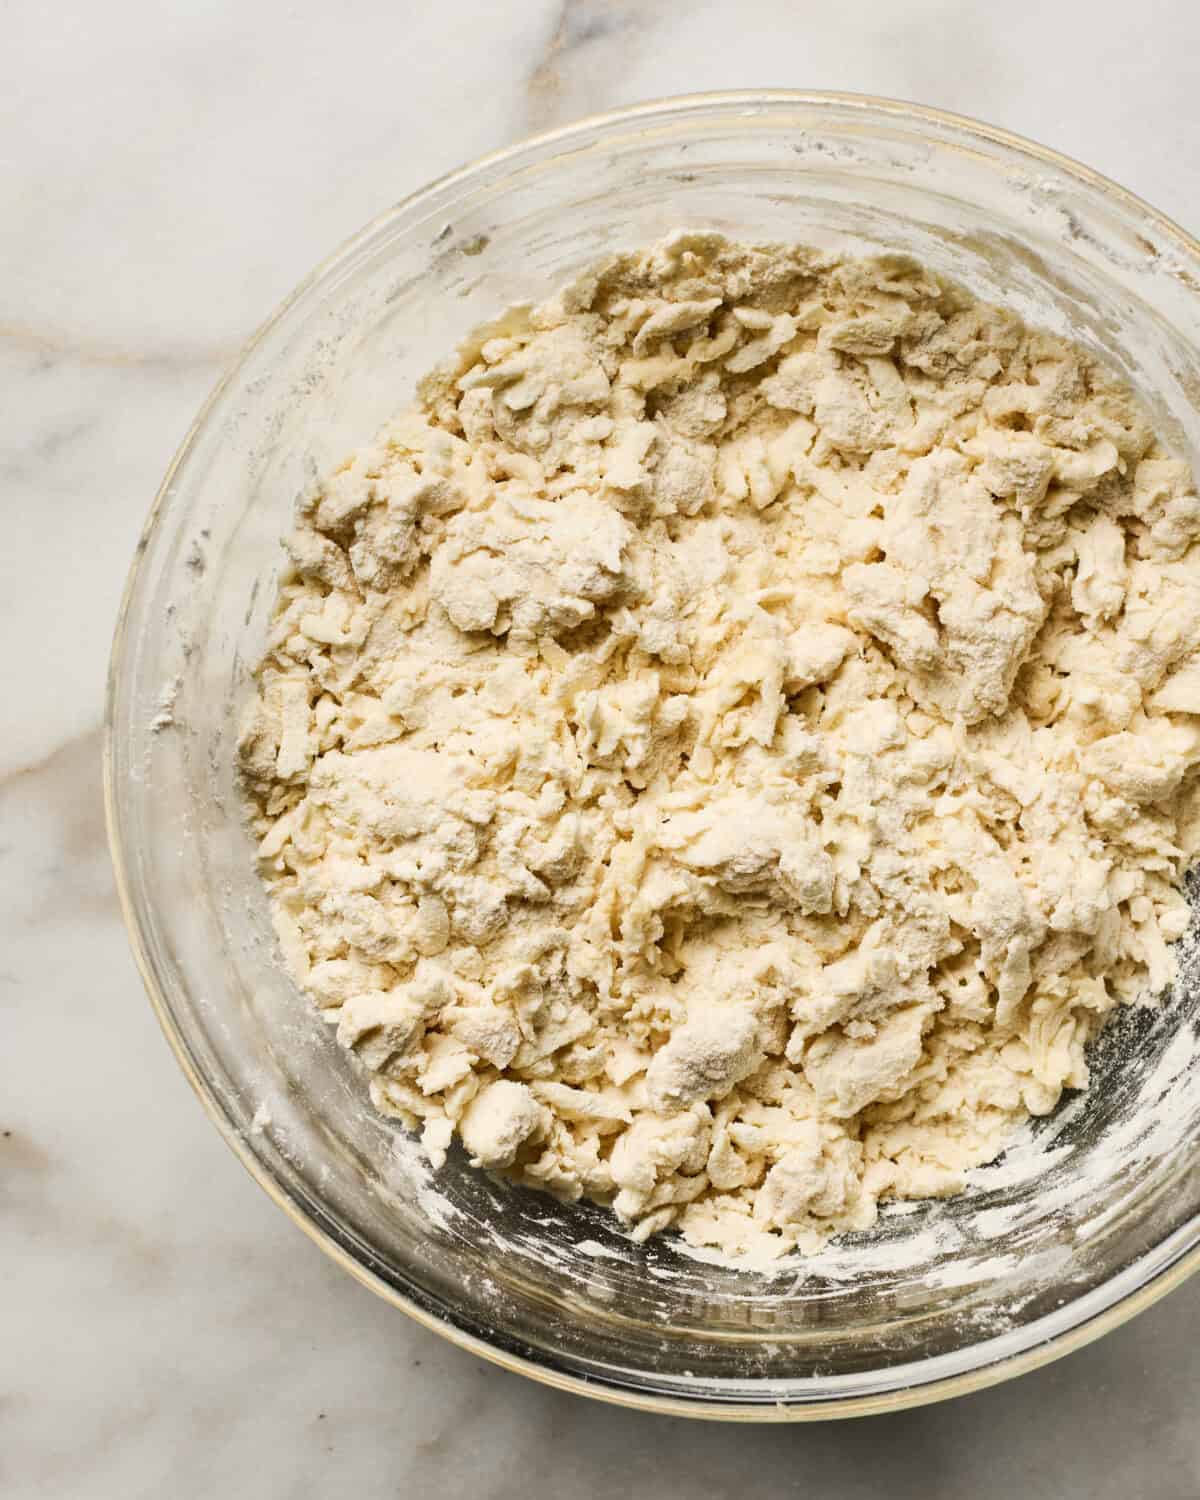
4. Pour in the water. I like to add about 50% of the water I need. Mix it together and then add more water a tablespoon at a time, until the dough comes together.
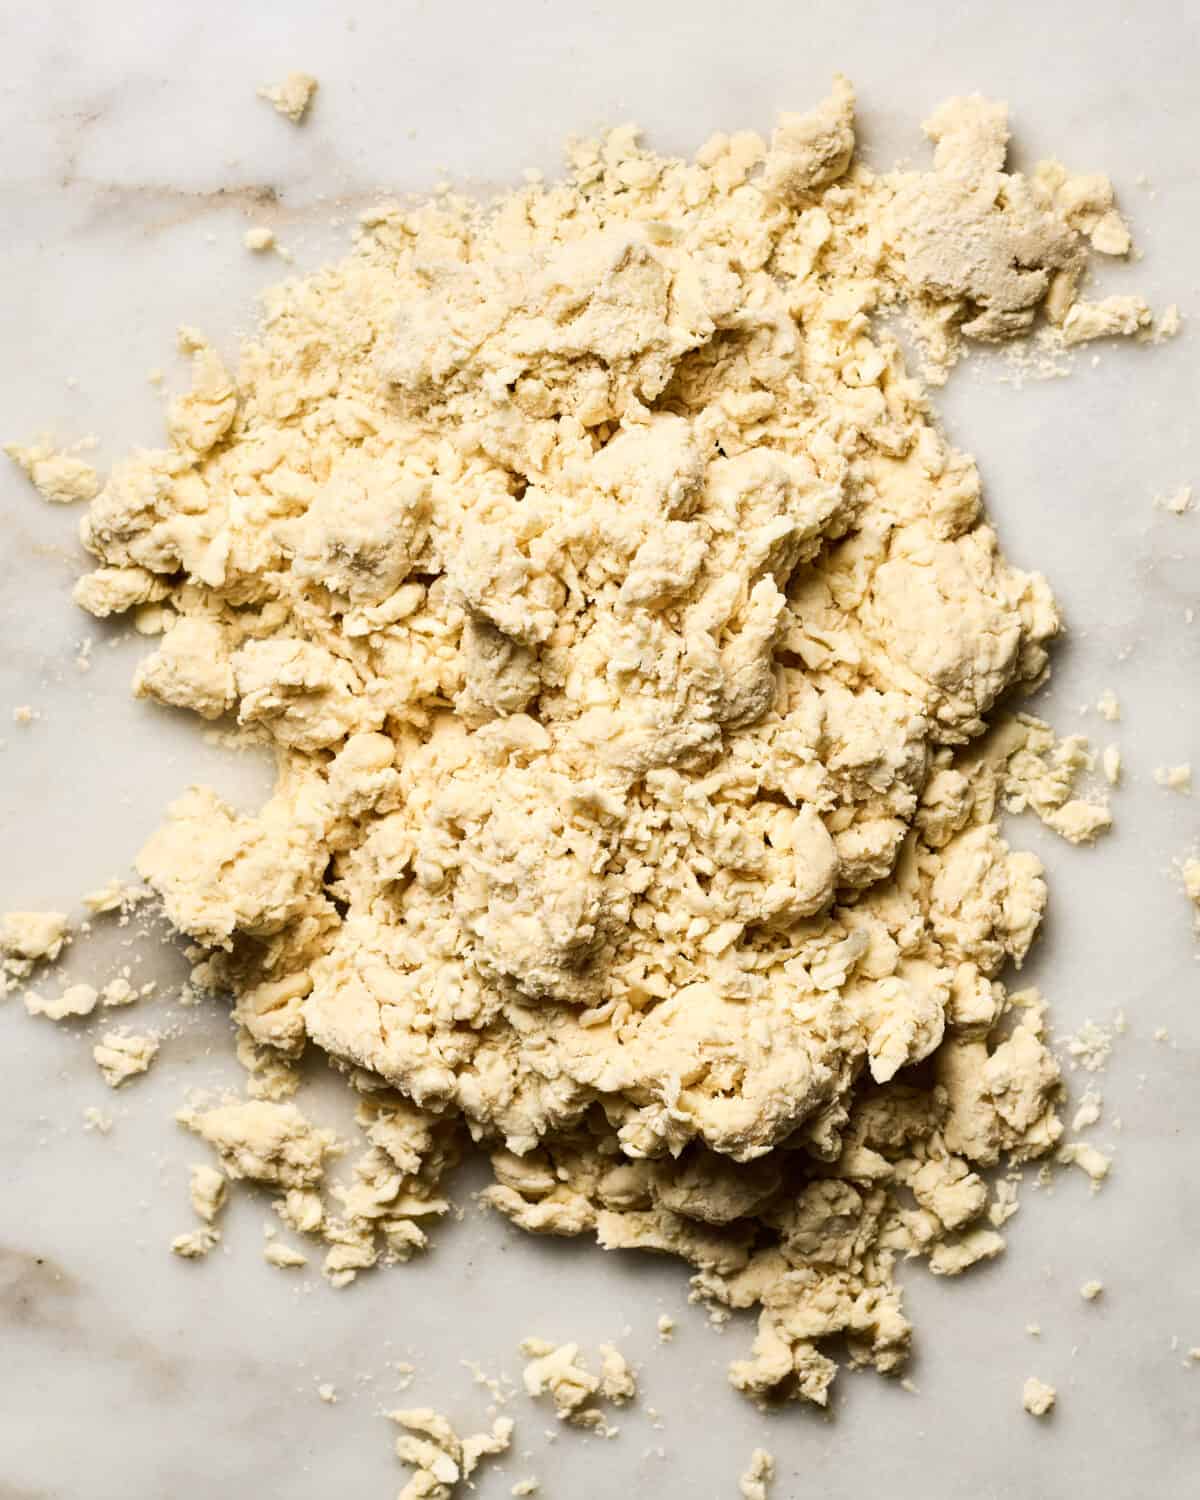
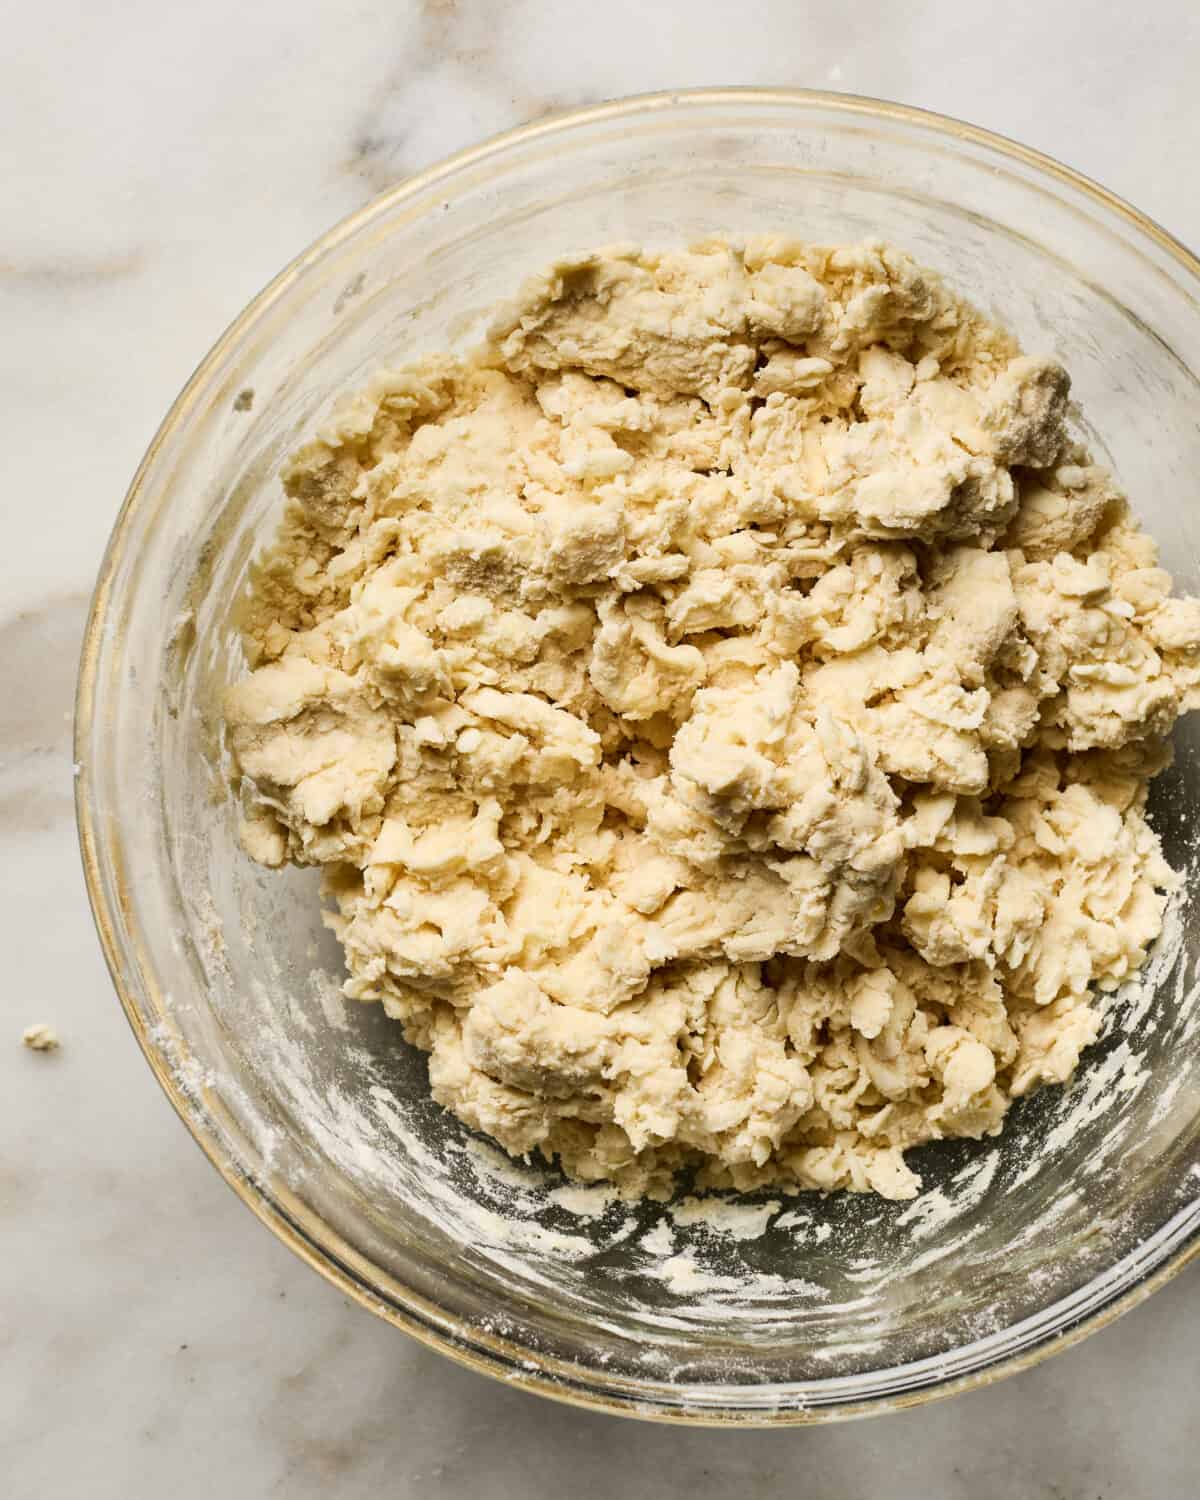
5. Pour the pie crust dough onto your work surface and knead it a few times.
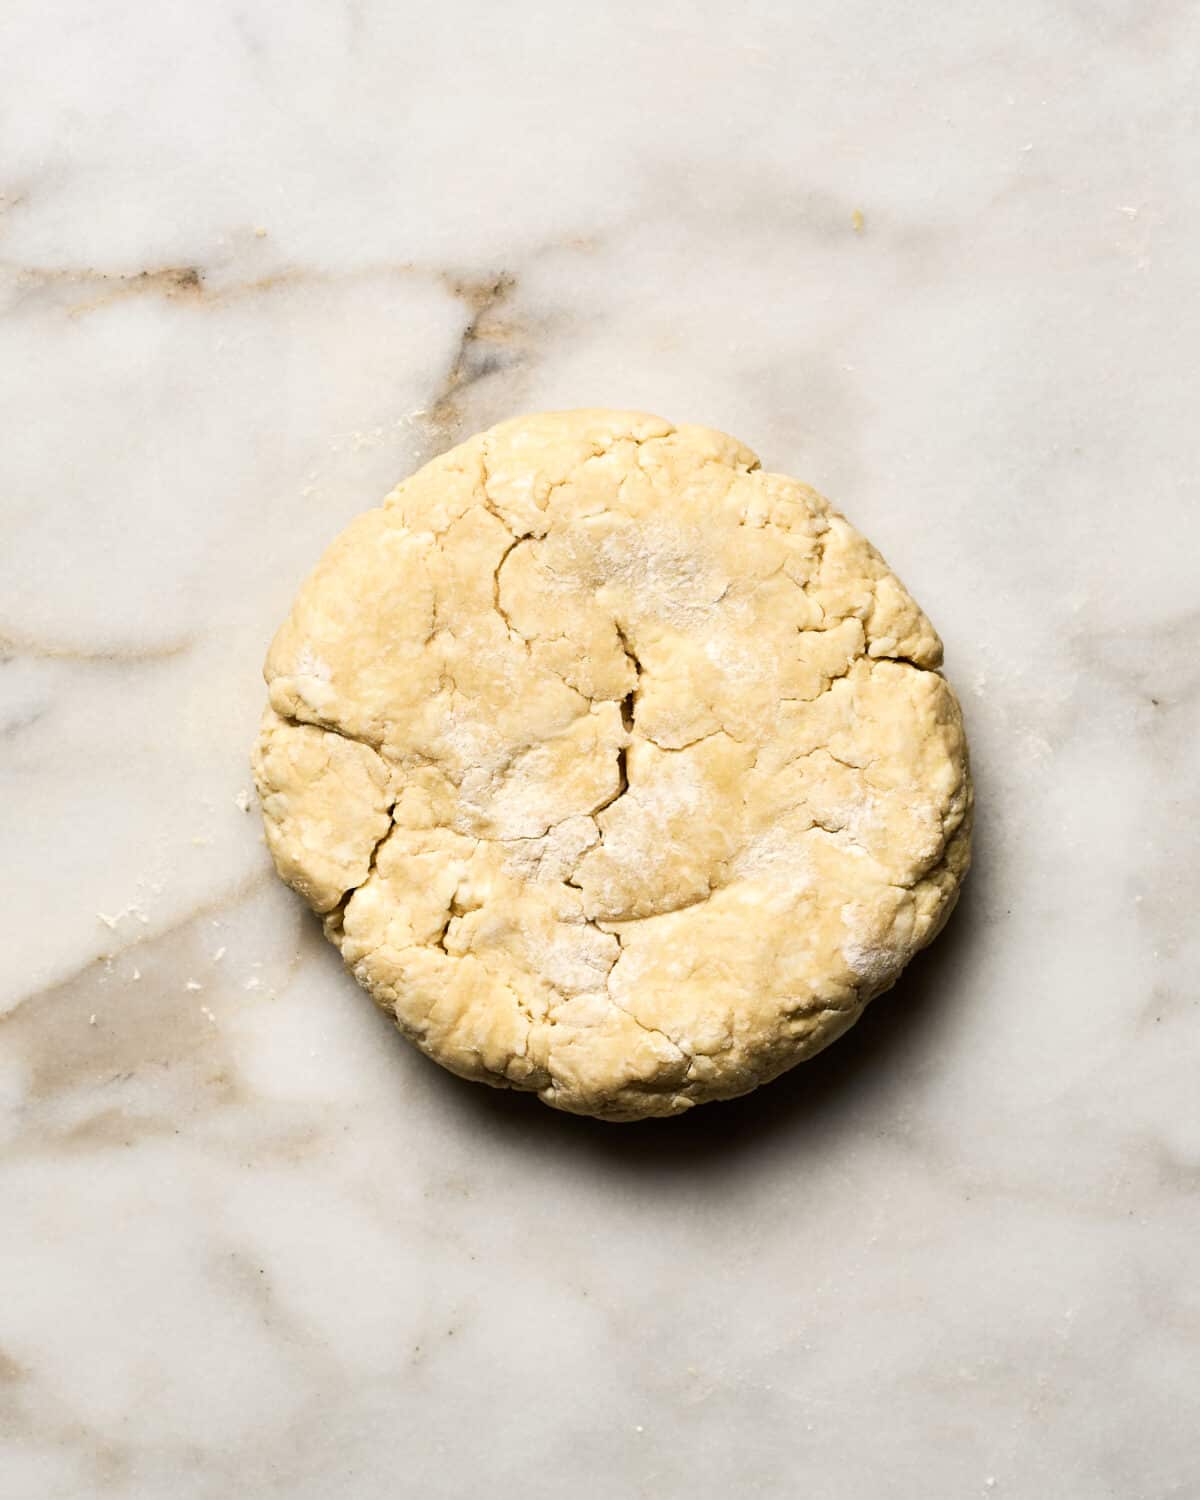
6. Form it into a disc.
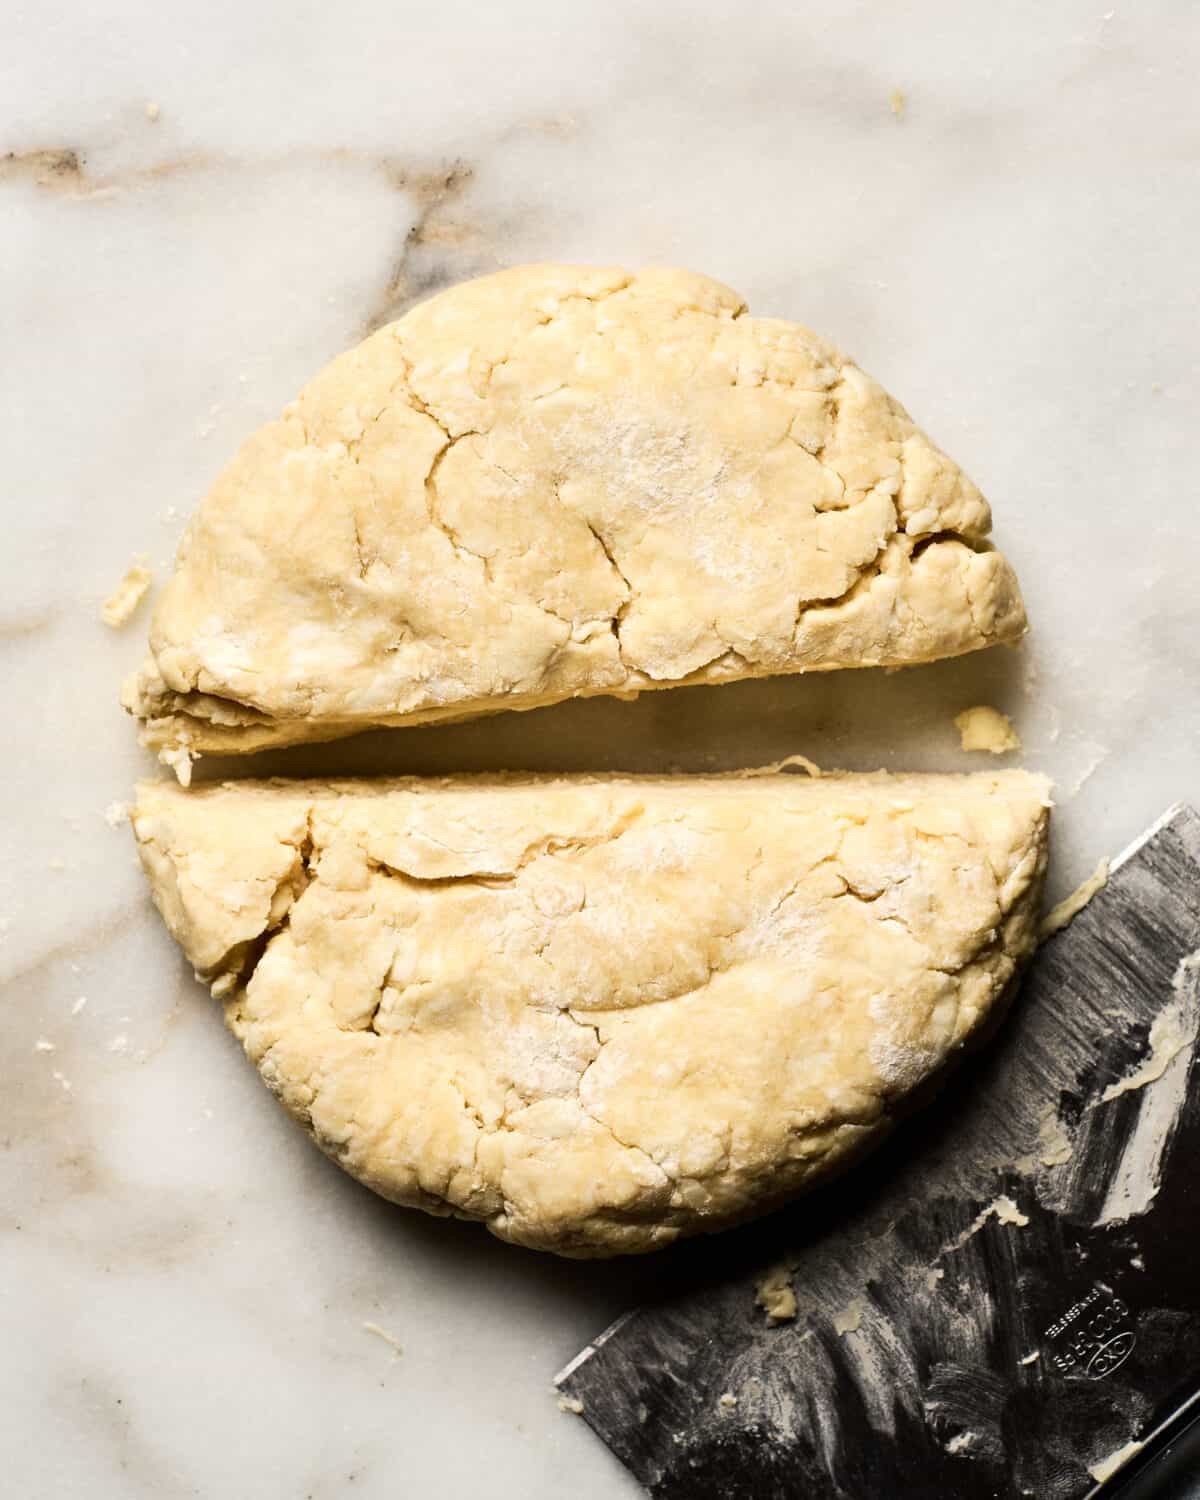
7. Cut it in half.
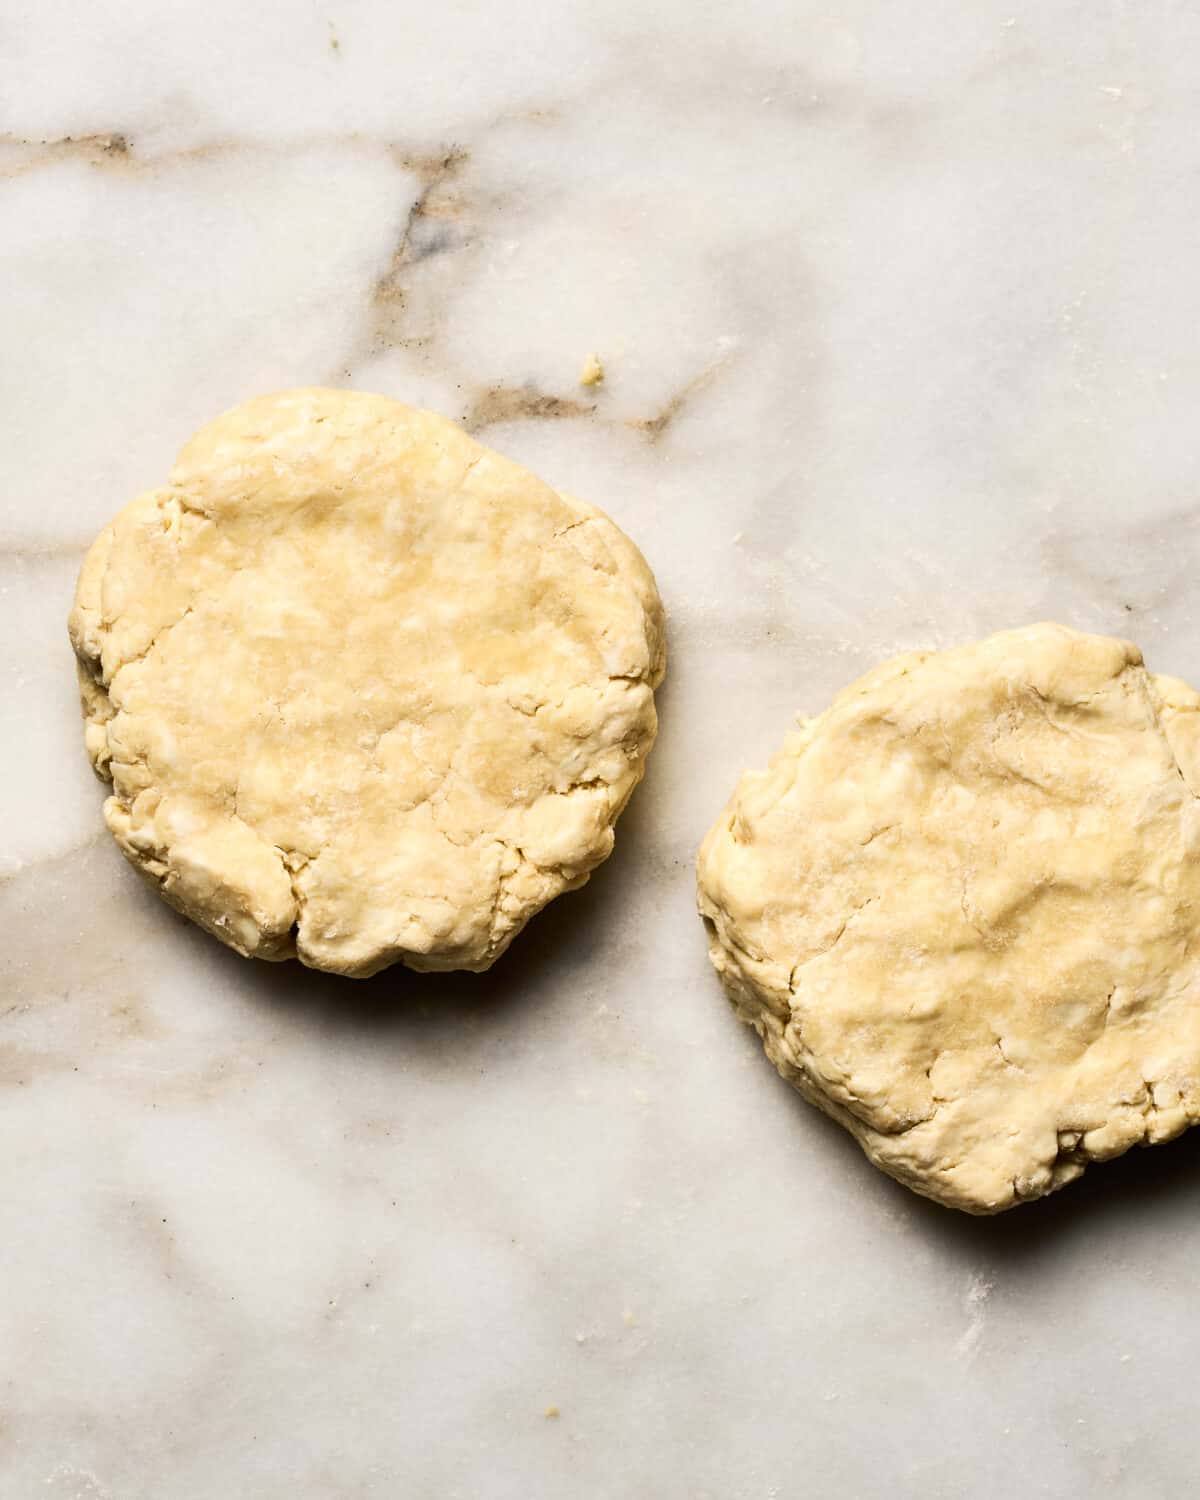
8. Form two discs. And wrap them in plastic wrap.
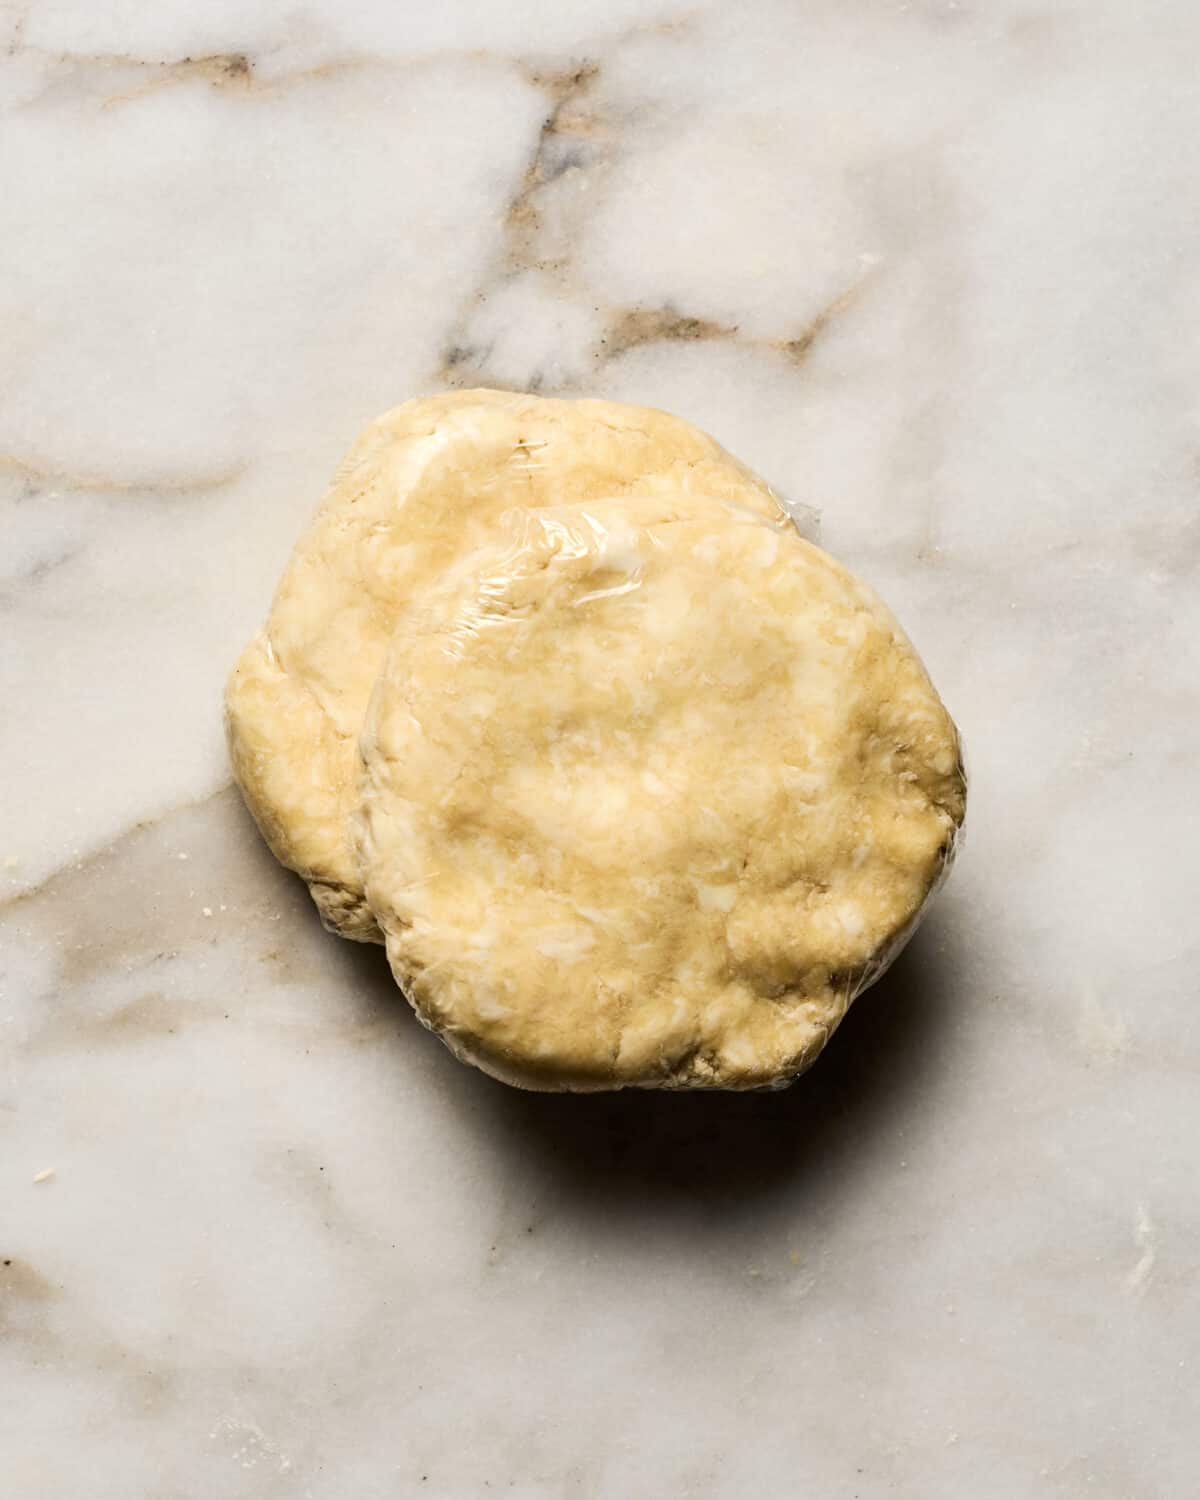
9. Let them rest in the fridge for at least 2 hours, but ideally overnight. Resting them in the fridge allows the gluten to settle and the moisture to despurse evenly throughout the pie crust.
Pie Crust Tips
Weigh your flour. I always weigh out my dry ingredients (because I actually find it easier than dirtying up cup measures). If you do use cup measures, make sure to fluff the flour, scoop it and then level it off with a butter knife.
Everything should be cold! I like to use cold butter straight from the fridge. And I’ll usually drop a few ice cubes into the water so the water is chilly.
Go slowly with the water. I usually add about 50% of the water I need to the dry ingredients, mix it together, AND then add more water a tablespoon at a time, until the dough comes together.
If the disc is a bit shaggy, no biggie. If it’s a bit shaggy, no biggie. When the dough rests in the fridge, the moisture will disburse throughout.
How to Roll out Pie Crust

- Remove the disc from the fridge. If it’s been in there overnight, let it rest on the counter for 5 minutes to shake off its chill.
- Flour your work surface lightly with flour. Also flour your rolling pin and the top of the pie crust. Not too much flour!
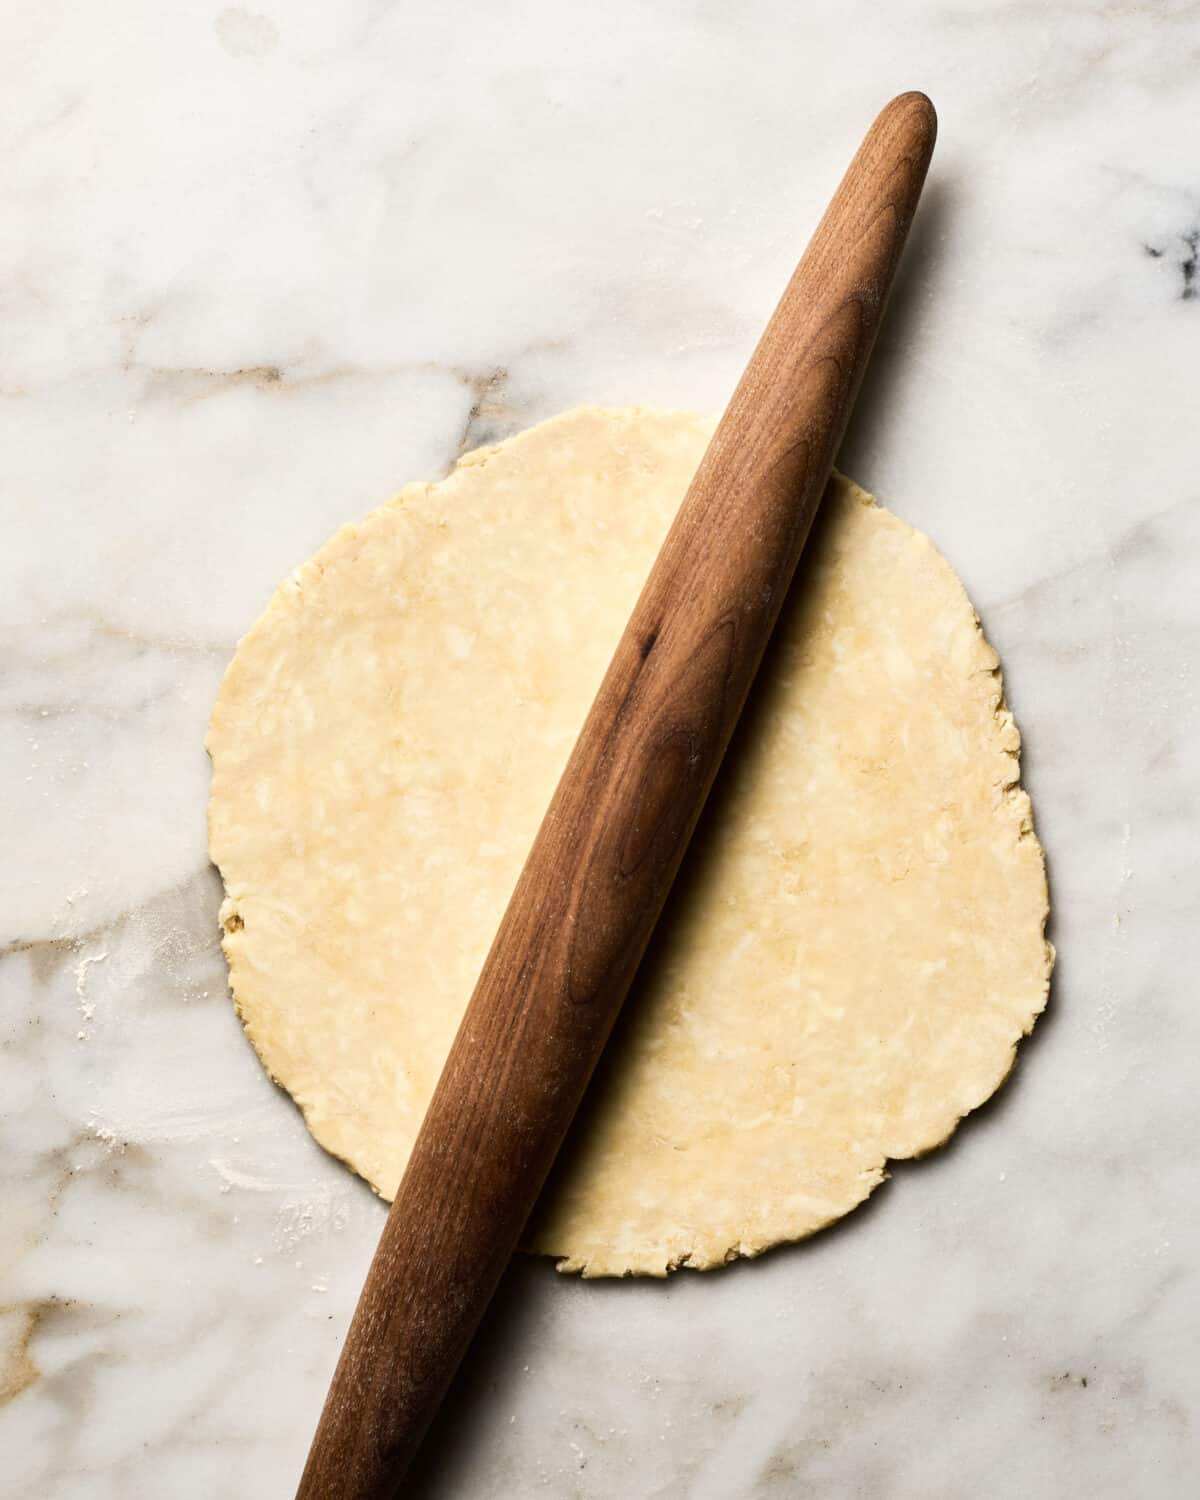
3. Start rolling it out, rotating it every so often. I also like to make sure it’s not sticking to the work surface.
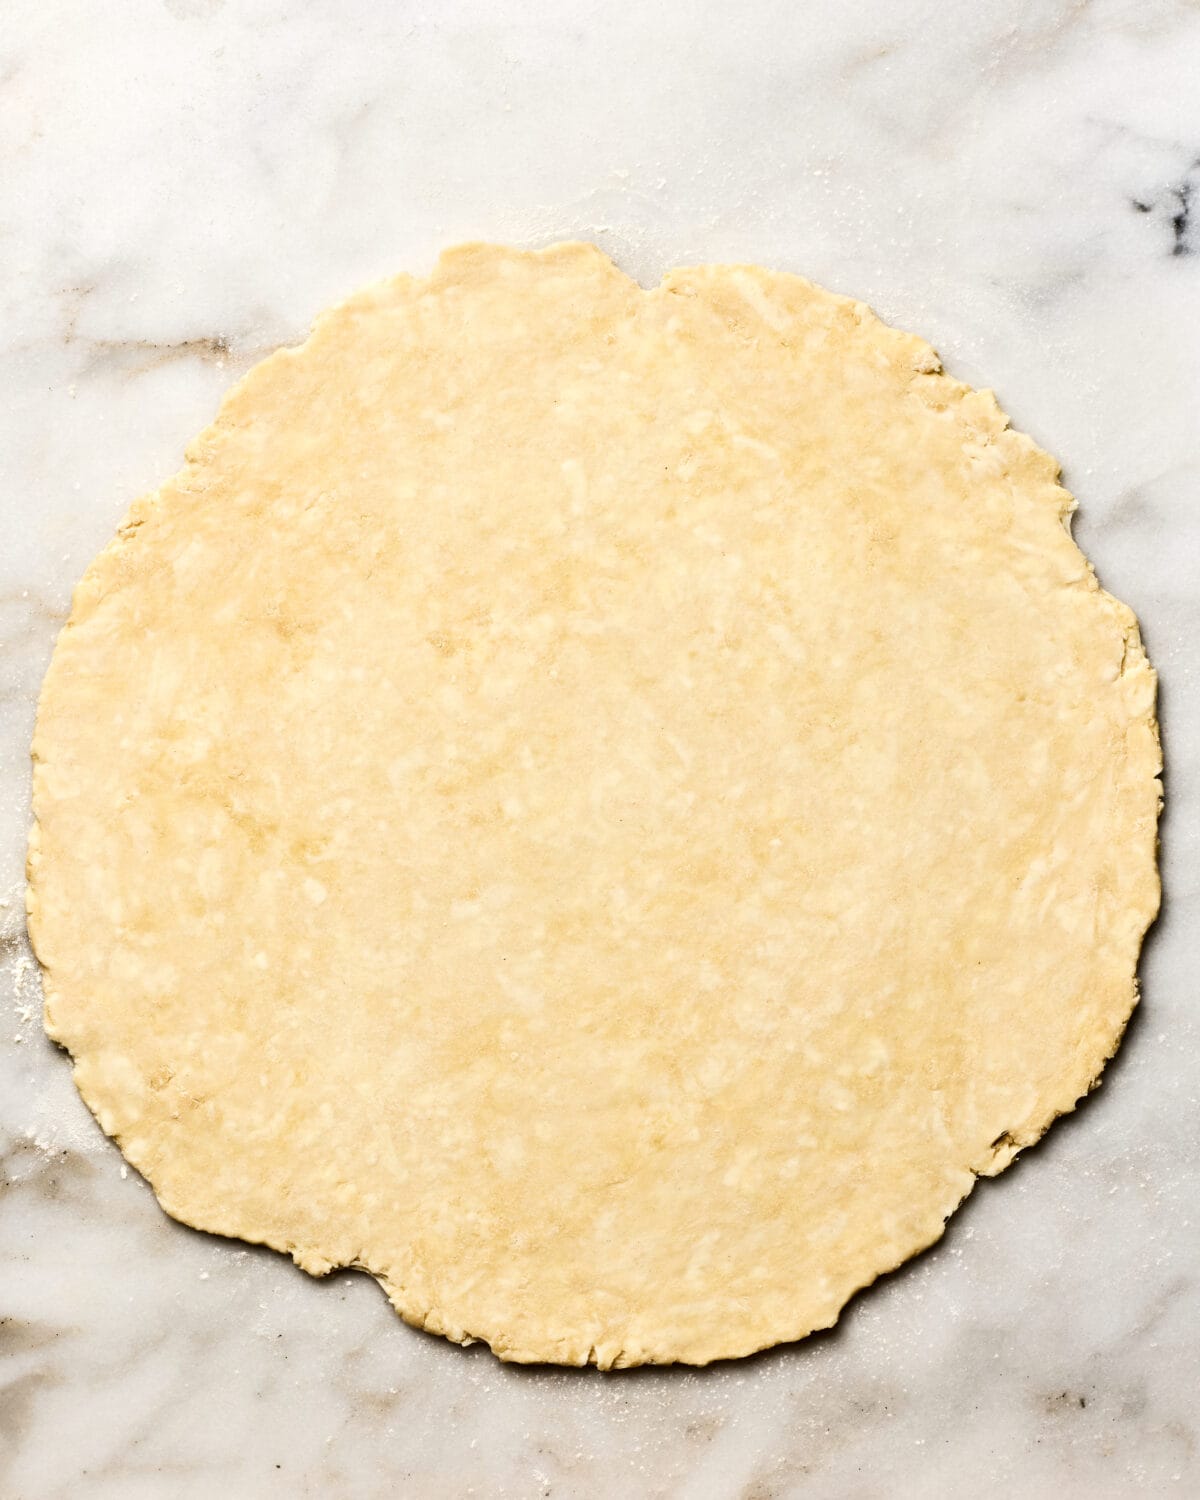
4. Rotate it and roll it some more. Continue this pattern until it’s about 13-inch in diameter.
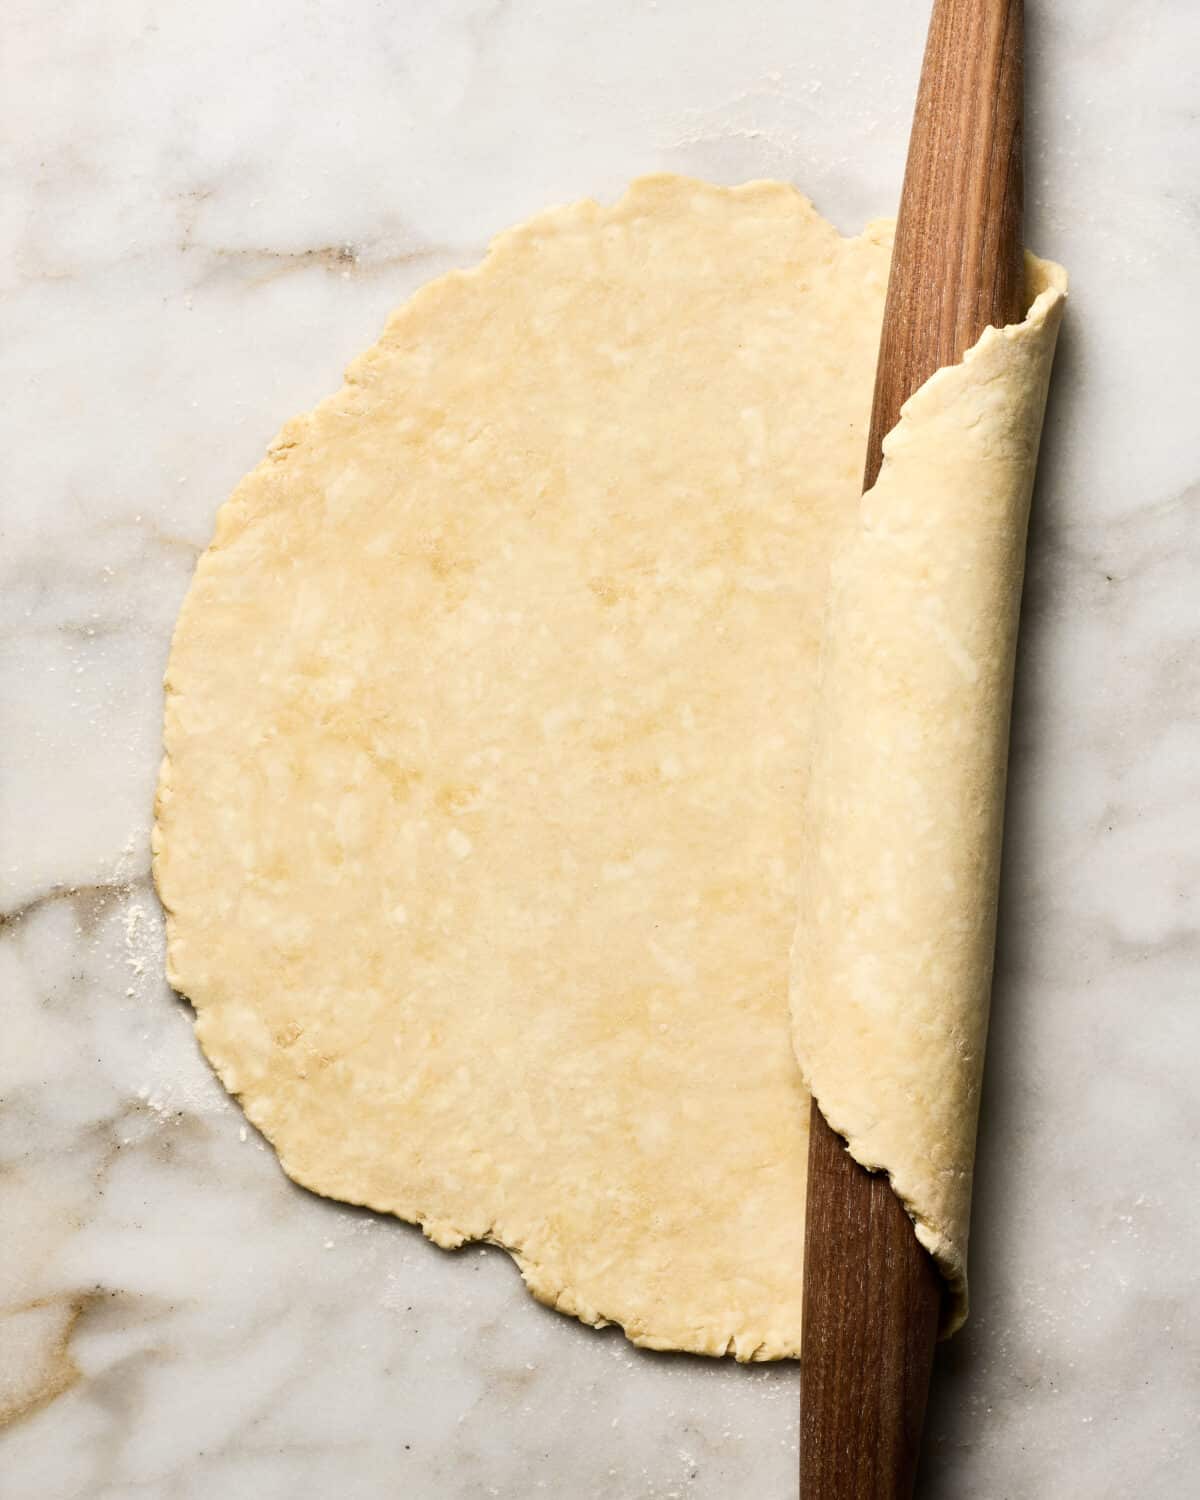
5. Roll it around the rolling pin. I find this as an easy way to transfer it to the pie pan.
Tips on Rolling out the Pie Crust
- Rest the dough. I like to make my pie crust the night before. This does two things: it helps the gluten relax, which will in turn make it easier to roll out. And it helps the moisture evenly disperse throughout the pie crust.
- Cracking Pie Dough. Have you ever started rolling, only to find out the pie dough starts to crack on you?! Very frustrating. Allow the dough to sit on a floured work surface for about 10 minutes. This way it’ll shake off its chill, making it easier to roll out.
- Lightly Flour Everything. Press your rolling pin and roll outward. Give it one push, then rotate the disc a quarter turn, and repeat the process until the pie dough has reached about a 13-inch circle. Keep flouring, too. If the dough seems like it’s sticking to your counter, lift it and sprinkle a little flour underneath.
- Avoid Shrinkage. This happens for two reasons: the gluten has not fully relaxed (hence why I like to keep it in the fridge overnight) or there was too much water in the pie crust. Some shrinkage is normal.
6. You have lots of options at this step.
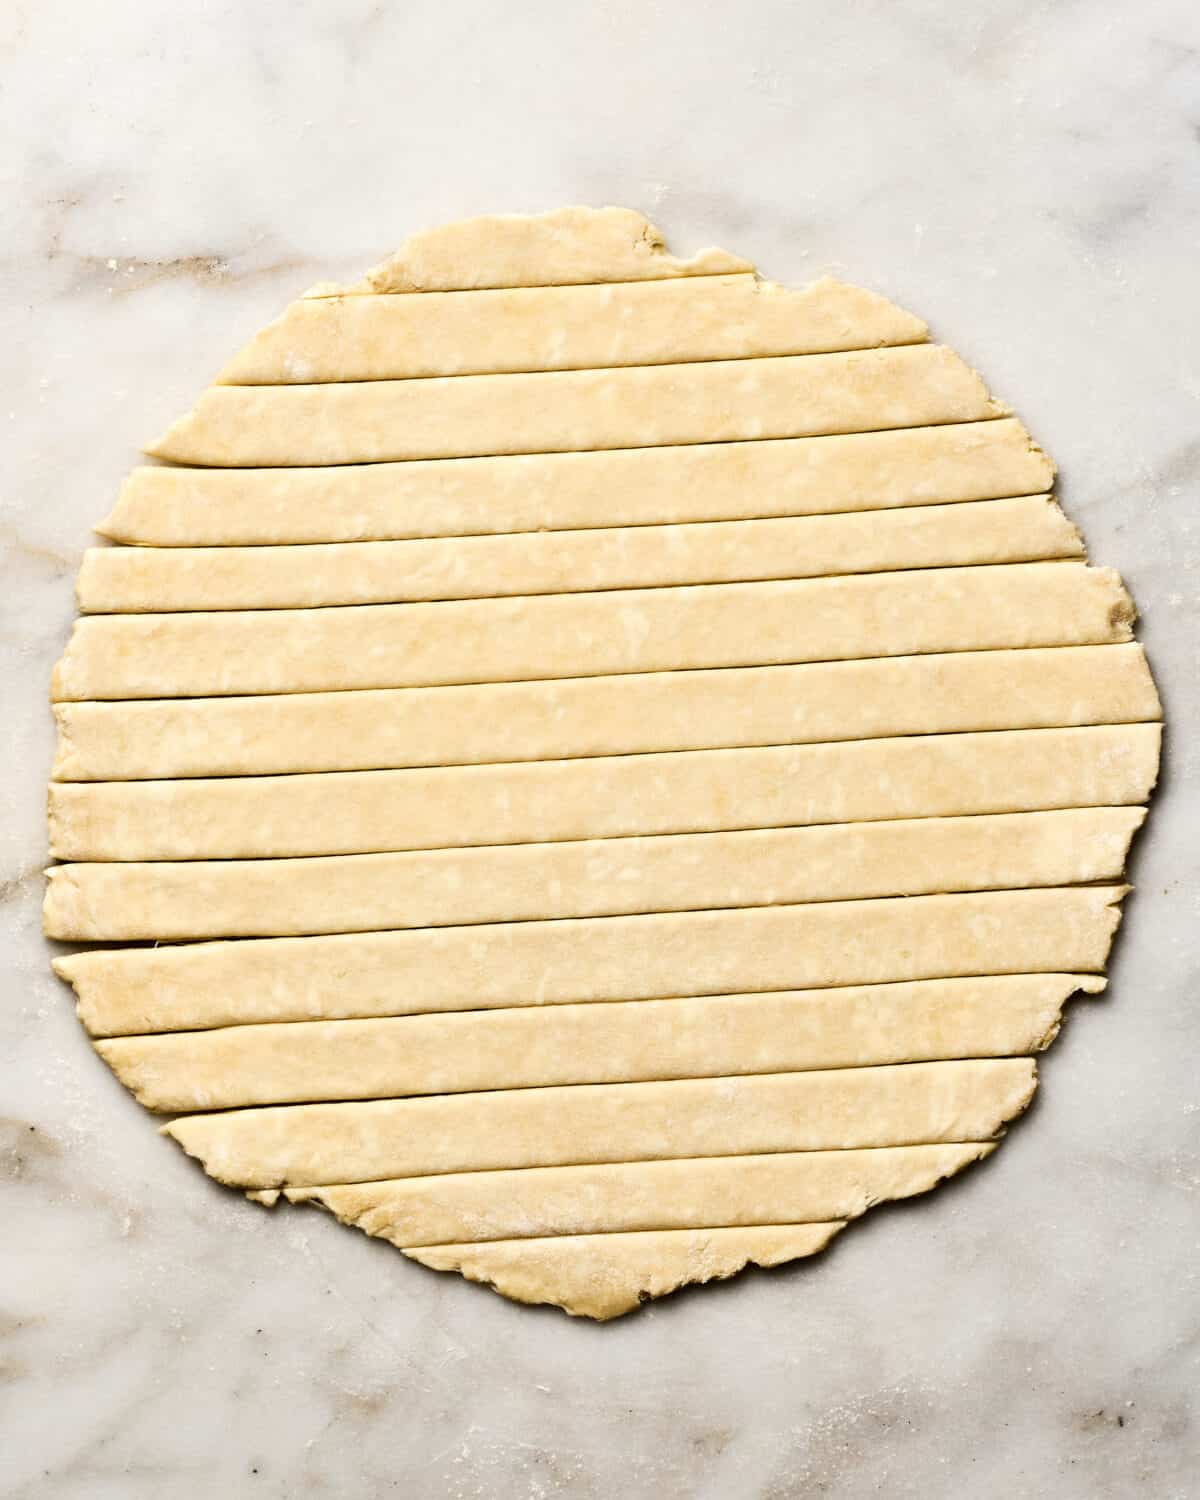
- Roll out the second disc and cut into strips to make a lattice top.
- If you only need a single pie crust, feel free to put the second disc in the freezer for later use.
Recipe FAQs
Absolutely. Store it in the fridge for up to three days. Alternatively, you can place it in the freezer for up to three months. I like to wrap the dough in plastic wrap AND then wrap it in foil to prevent any freezer smells from entering.
Spray a the bottom side of foil with cooking spray. Nestle into the pie crust and then pour either dried beans, rice or pie weights into the piece of foil. Preheat your oven to 400F. Bake for 15 minutes, until mostly golden brown. Remove the piece of foil with the pie weights. Bake for an additional 5 minutes. 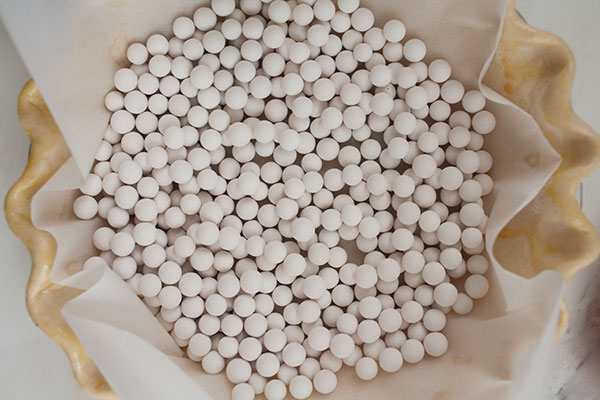
My Favorite Supplies for Homemade Pie Crust
- French rolling pin. These are inexpensive, better looking (in my opinion) and way less heavy than the traditional ol’ handle rolling pins.
- Box grater. See above for my long-winded, very passionate reason why I use a box grater! Another thing that would work is a food processor with the cheese grater attachment. But do we really want to clean a food processor? Not really.
More Pie Recipes
Desserts
Rhubarb Apple Pie
Desserts
Miso Caramel Apple Pie

Desserts
Rhubarb Slab Pie
Desserts
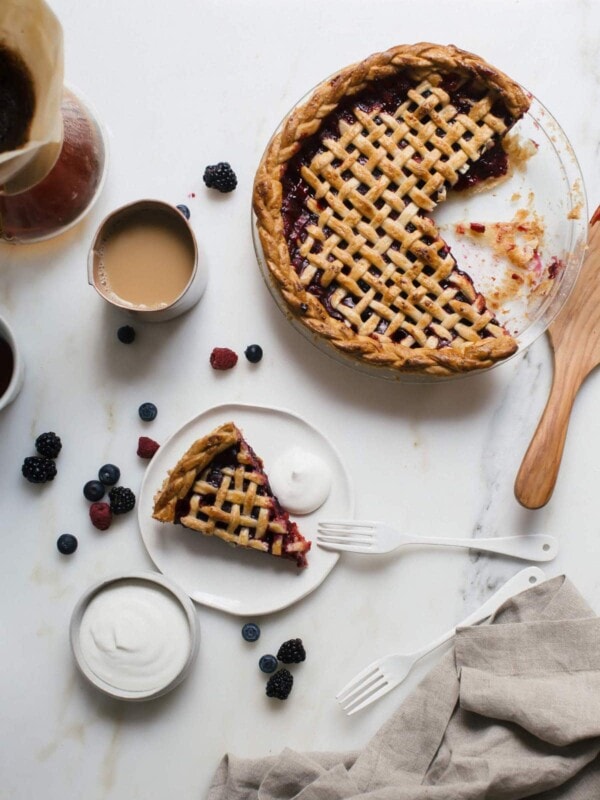
Mixed Berry Pie
If you tried this Homemade Pie Crust Recipe or any other recipe on my website, please leave a 🌟 star rating and let me know how it went in the 📝 comments below. Thanks for visiting!
Homemade Pie Crust

Equipment
- 1 (9-inch) pie plate
- 1 large bowl
- 1 box grater
- 1 Rolling Pin
Ingredients
- 2 1/2 (312) cups/grams all-purpose flour
- 2 (15g) tablespoons white granulated sugar
- 1 1/2 teaspoon kosher salt
- 1 (226g) cup unsalted butter, cold, straight from the fridge
- 3/4 cups very cold water, divided
- 1 large egg, beaten (for egg wash)
- 1 tablespoon demarara sugar , for topping
Instructions
To Mix the Dough:
- In a large bowl, mix together the flour, sugar and salt. Using a box grater, grate the cold butter atop the flour mixture. Transfer to the freezer to chill for 10 minutes. Working quickly, and using your hands, break the butter bits into the flour until they’re evenly distributed and resemble the size of teeny, small peas. Add a 50% of the recommended water and mix.
- The mixture will be shaggy at this point. From here, add about 1/4 cup of water and mix. Add an additional tablespoon of water at a time until the dough comes together. (I used all of the 3/4 of water but you may not need to.)
- Flour your counter and dump the dough onto it. Knead a few times more until it comes together into one cohesive mass. Divide the dough into two and wrap each disc in plastic wrap for at least 1 hour, ideally overnight.
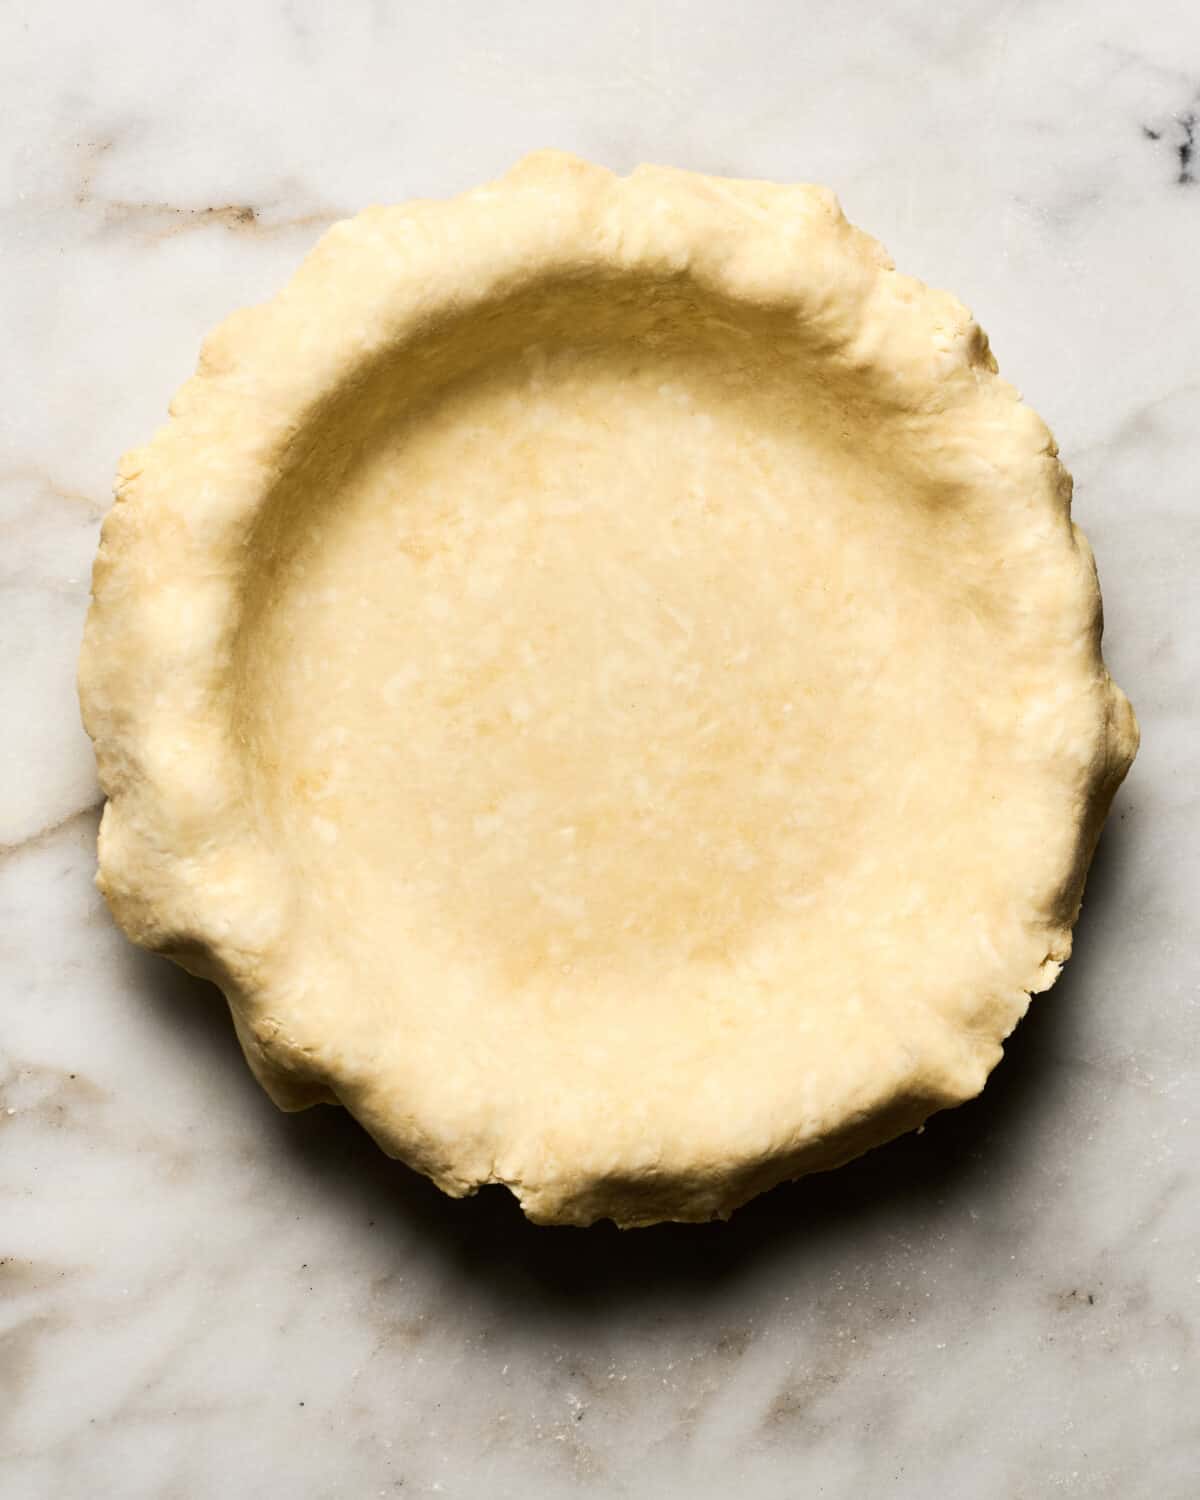
- Remove the first disc of dough from the refrigerator and allow to come to room temperature for 10 minutes. Liberally flour your work surface and rolling pin. Begin to roll the dough, being sure to rotate it every so often to avoid sticking, to a 13-inch round. Wrap the dough around the rolling pin and unroll it over the pie tin. Gently fit the dough into the bottom and up the sides of the pie tin. Trim the dough around the pie tin, leaving a 1-inch overhang. Add your filling and transfer the pie to freezer while you roll out the second disc of dough.
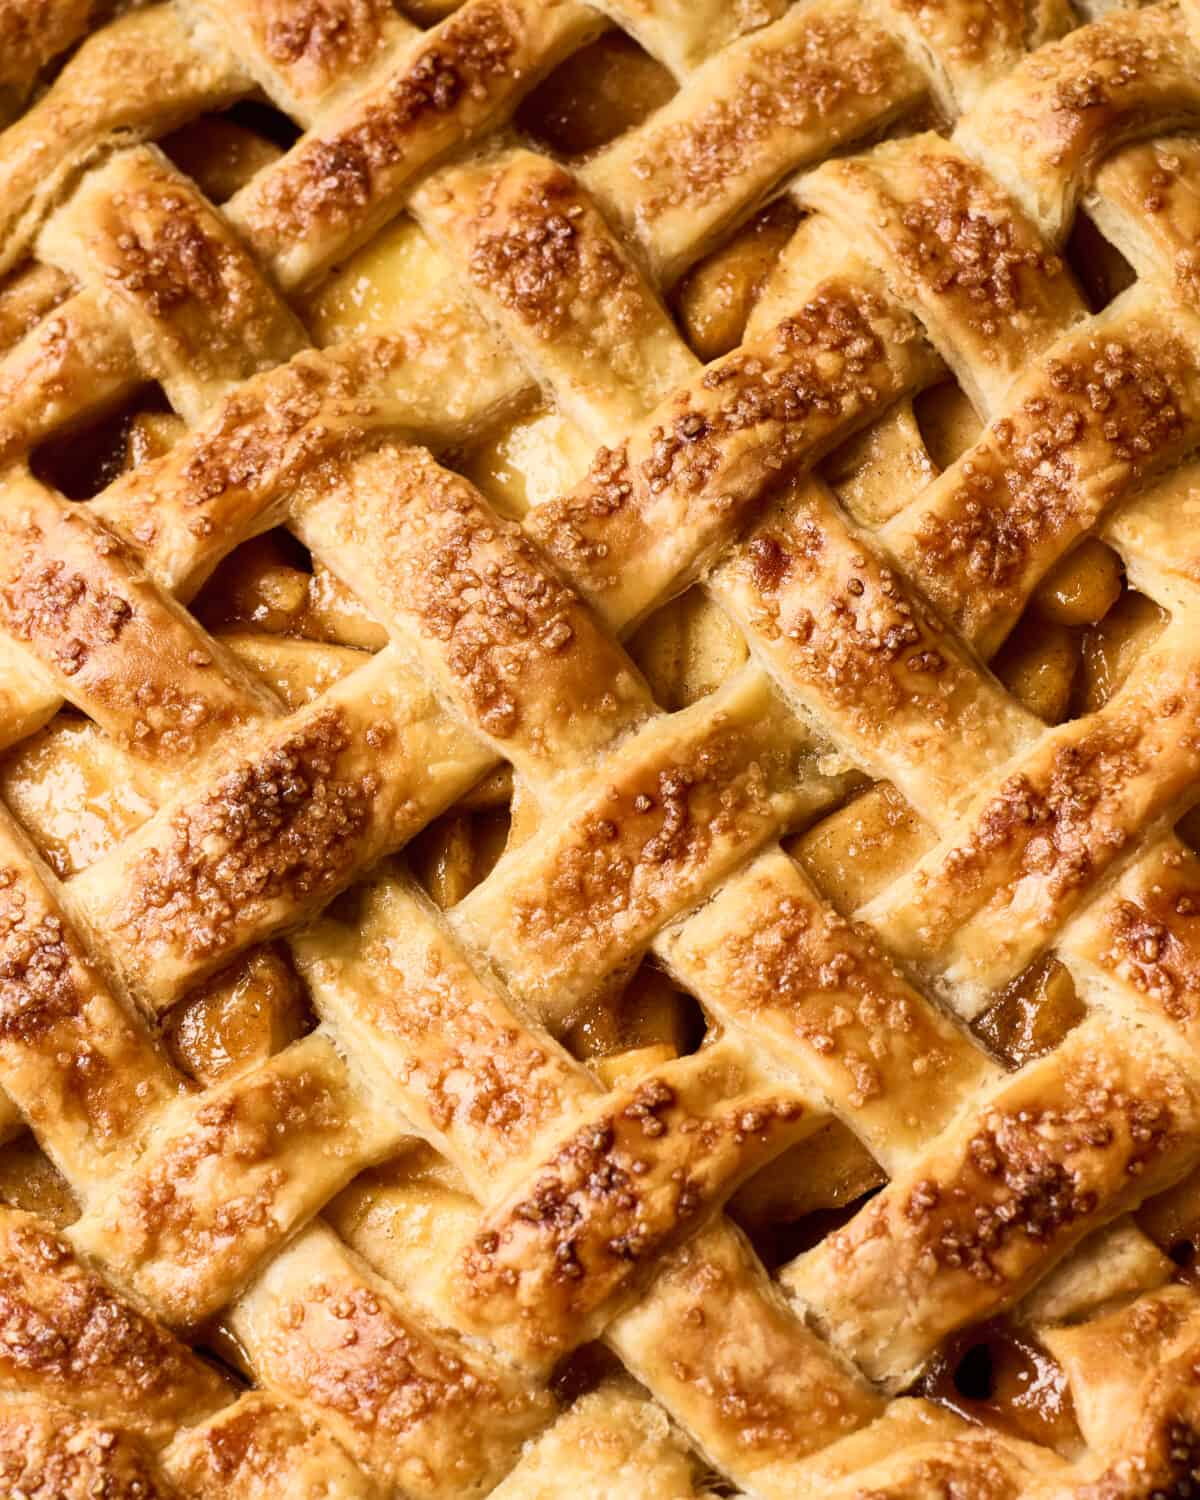
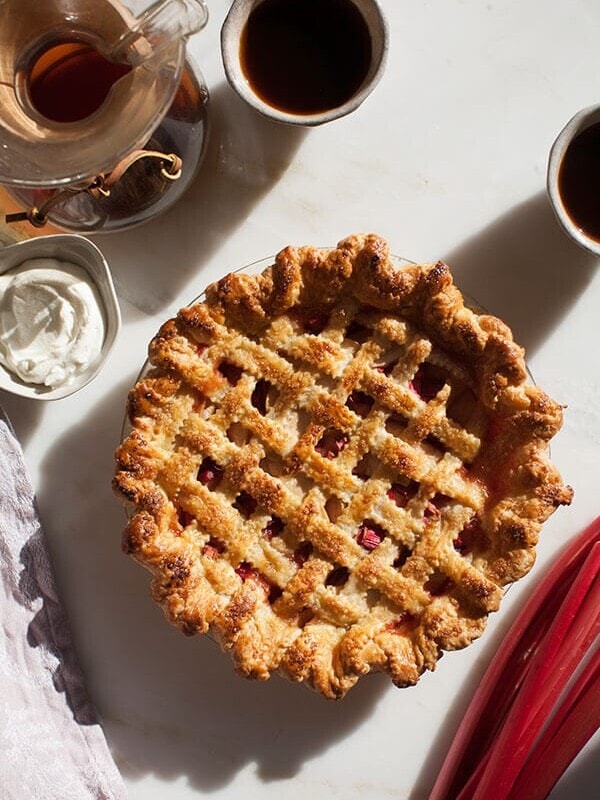
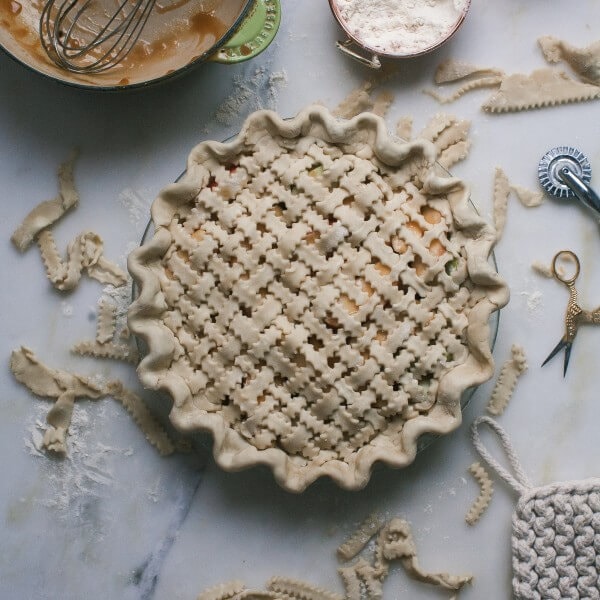
- Remove the second disc of dough from the refrigerator and repeat the rolling process as you did with the first disc. You have a couple of options, you could simply lay the second rolled out sheet of dough on top, making a few slits with a knife so steam can escape. You can do a lattice. You could even punch out holes or any sort of shape and place it on top. Crimp the edges and brush with the egg wash.


Thank you so much!!! I always have pie crust shrinkage issues, so I am super excited to try this method next week.
(Also I totally love this site.. Thanks for doing what you do. )
If you always have shrinkage issues, definitely freeze your pie crust for about an hour and then pop it in the oven. It should work!
Prettiest pie crusts, I adore the braid!
I LOVE LOVE LOVE your method of grating the butter. I will never make biscuits any other way again!
Thanks, Adrianna 🙂
Freezing and grating the butter is genius!! I’d love to see a gluten free version. Do u think u could just swap the all purpose flour for gluten free all purpose flour?? I recently became gluten free so maybe I will try it out and let u know 🙂
It should work! I’d go with Bob’s Red Mill all-purpose gluten flour or Cup-4-Cup. Good luck and let me know how it goes.
What a great pie post! It’s so helpful. I especially love the image at the top! Good job!
love love love the braided crust!!
gotta try this sometime 🙂 (good excuse with Christmas coming up 🙂 )
looking forward to your numerous pie recipes! 😀
Oh man, pie crusts seriously intimidate me for some reason. Is it the cold? Is it the rolling? I don’t know!
I prefer a french pin too, my mom and my aunts all have the kind with handles and they always become loose! WTF…we do not have time for that! PS, your crimps are so pro!
Ain’t got time fo dat!!!! (PS Thanks lady! x)
Hey,
Thanks for the recipe and techniques. Could you please highlight on the technique to mix butter with flour? If I just mix flour, butter with water than there will be lumps of butter in the flour. Someone once told me that one should rub the flour and butter between the palms before adding water… What would you suggest?
Thanks,
Nikita
Hi Nikita! Mix the dry ingredients together, grate the butter atop the dry ingredients and then mix with your hands, breaking up the butter bits with your fingers. It’s ok if there are bits of butter throughout–it’s supposed to be this way. The butter bits should be about the size of peas. Keep tossing, making sure the butter bits are distributed evenly throughout the flour mixture. THEN pour in the water and mix.
Besides the fact that your pie crusts are beautiful, I LOVE, LOVE, LOVE your marble counters!!