Disclosure: This post may contain affiliate links, which means I may earn a commission if you click on the link and make a purchase.
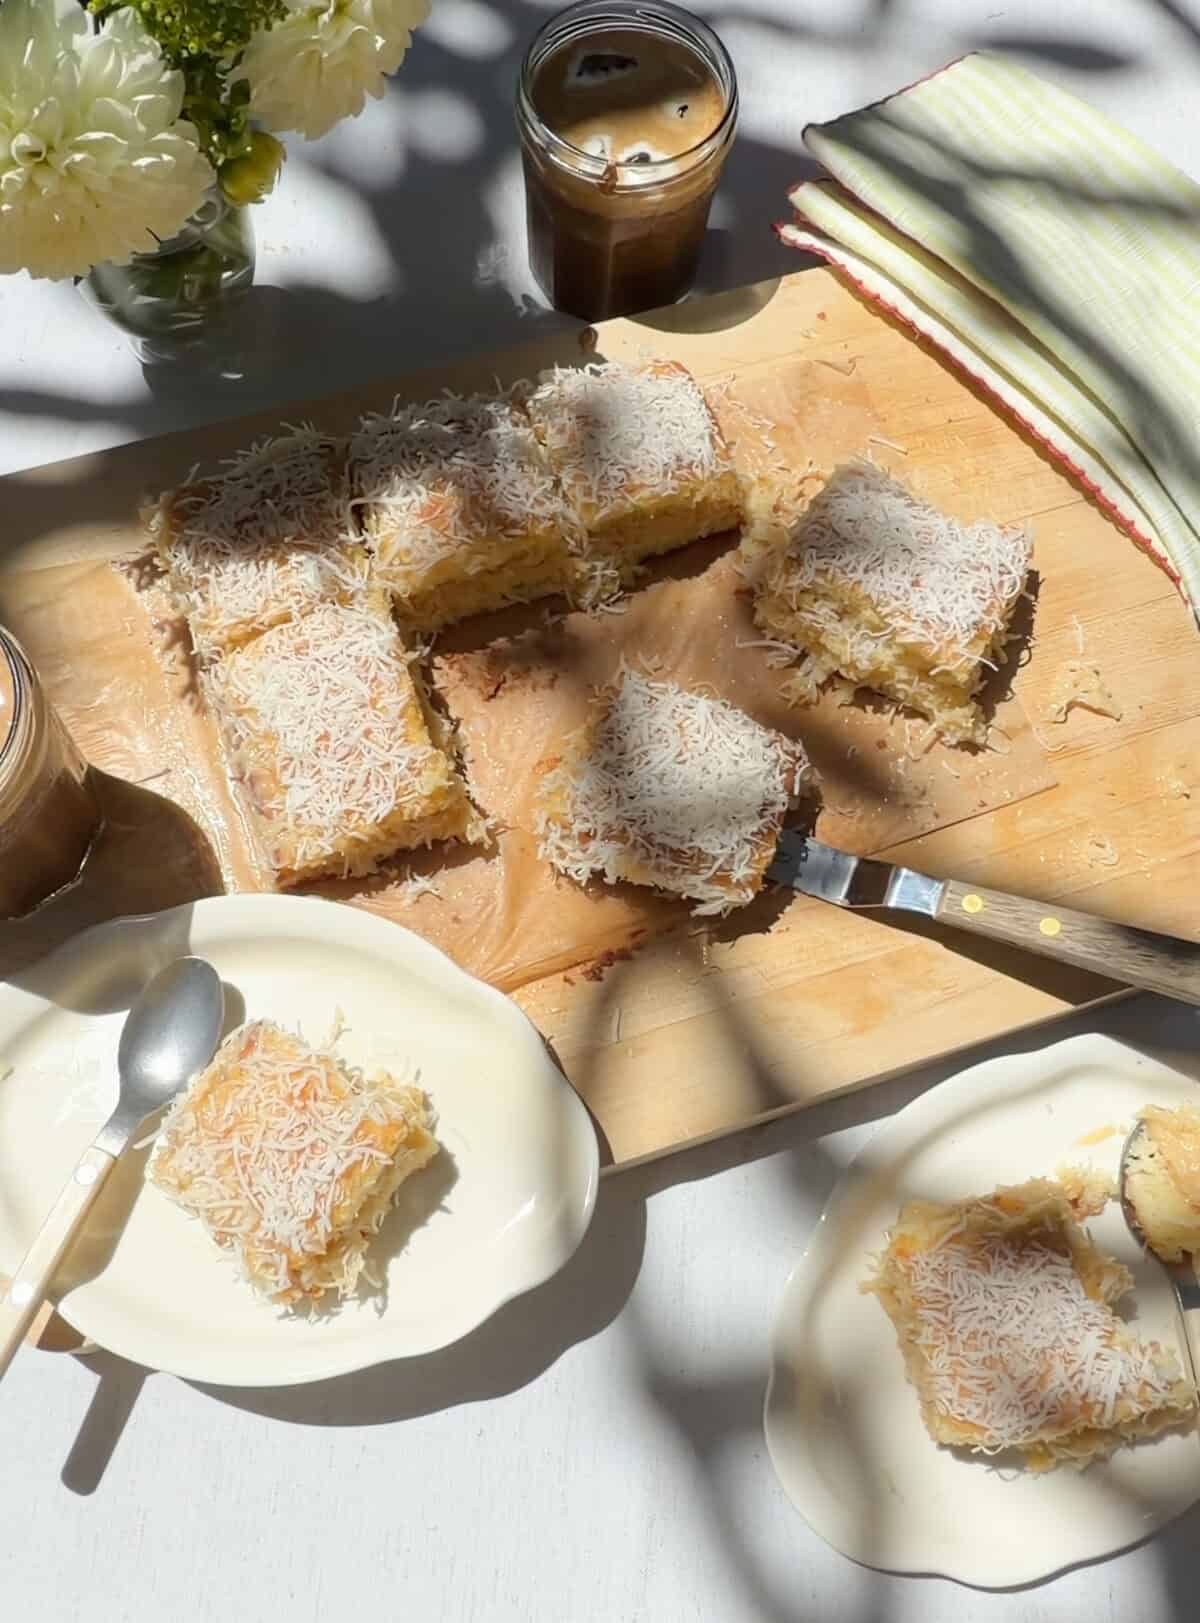
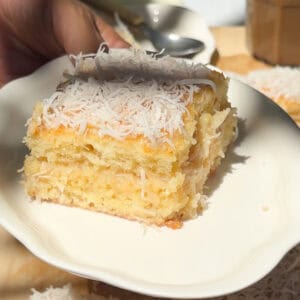
This Bolo de Coco is a soft coconut cake layered with a creamy coconut filling and soaked with milk for the most moist cake you’ve ever tasted. It’s simple to make ahead and tastes even better after chilling. After a meal of pescado frito, this chilled coconut cake is my favorite way to end a summer evening.
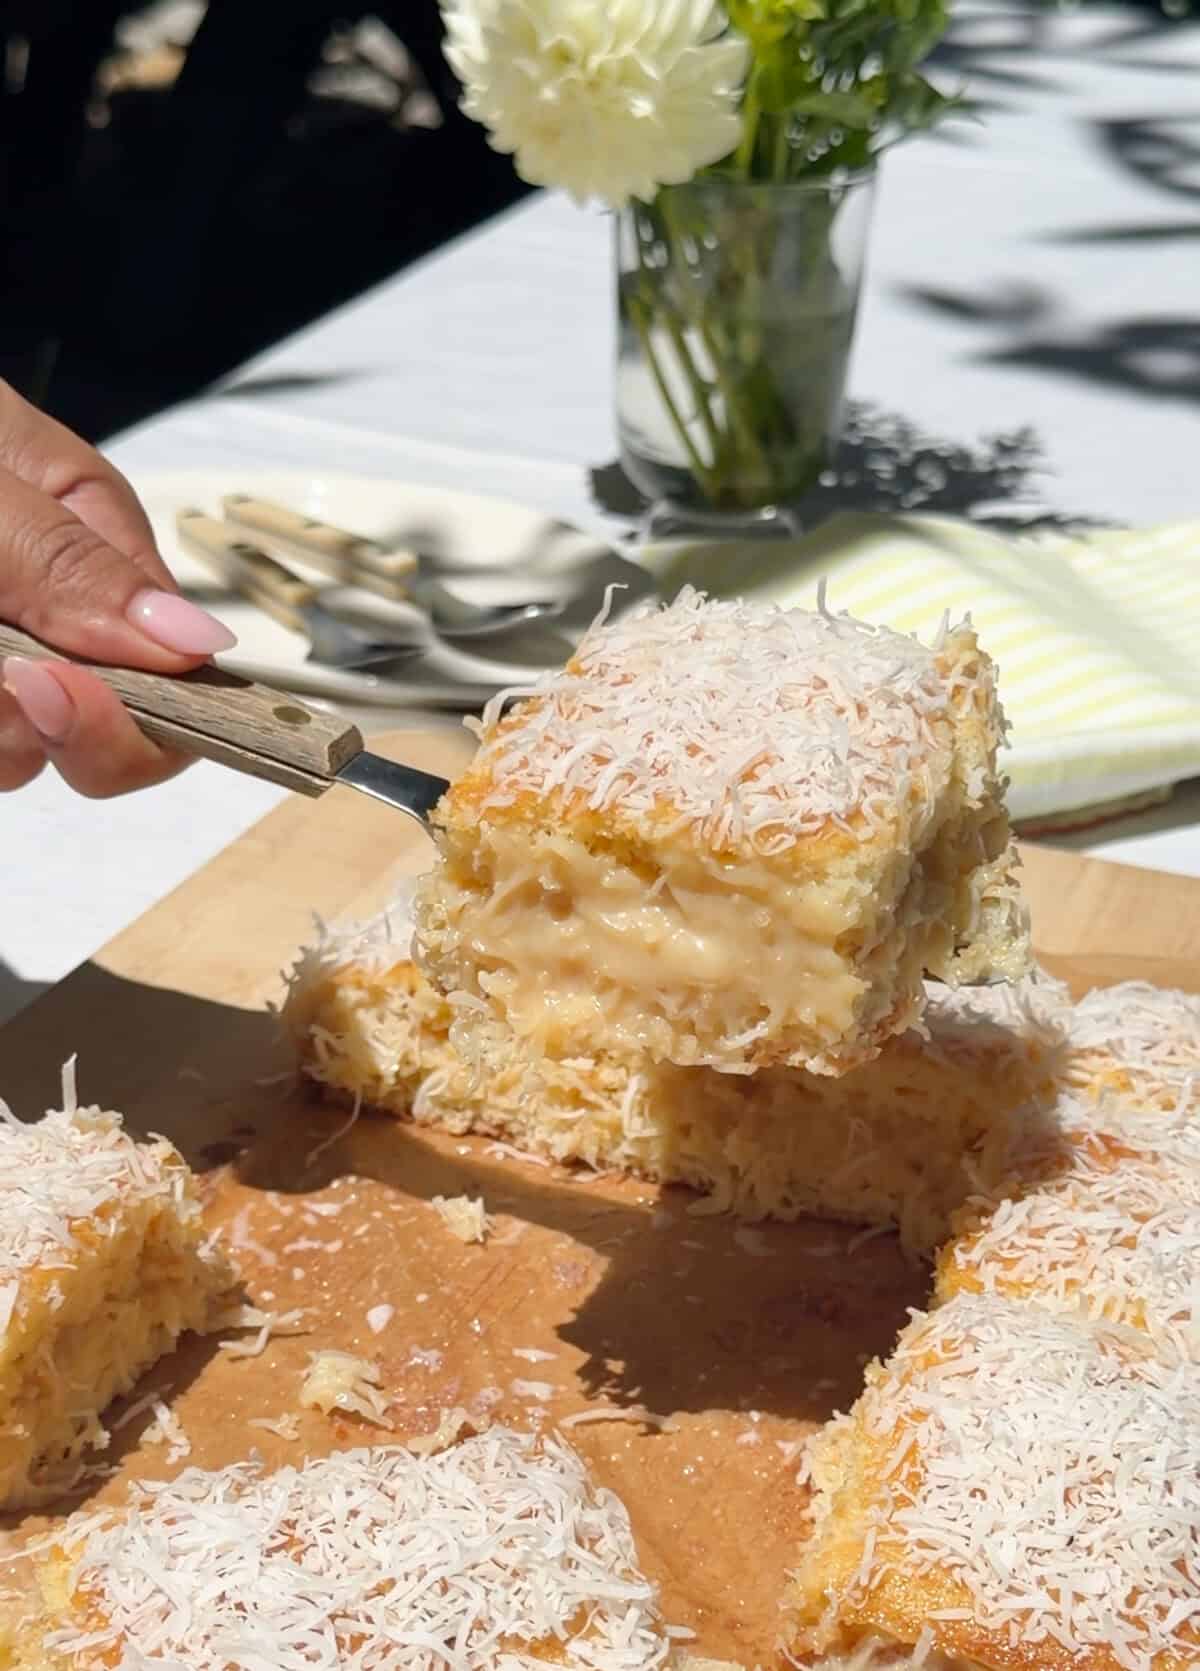
I’ve kinda been obsessing over coconut flavors this season, looking at you tropical banana bread and piña colada brownies. So when I stumbled upon this Brazilian coconut cake, I knew I needed to make my own version. If you’re a coconut lover, this Bolo de Coco deserves a spot on your baking list. The cake is light, moist, and layered with a creamy coconut filling that turns every bite into a trip to the beaches of Rio de Janeiro. I love to make it ahead so that the cake has time to soak and absorb all the coconut flavor. If you love this cake, you’d probably also love my tres leches cake, too. Give it try!
Ingredients You’ll Need for Bolo de Coco
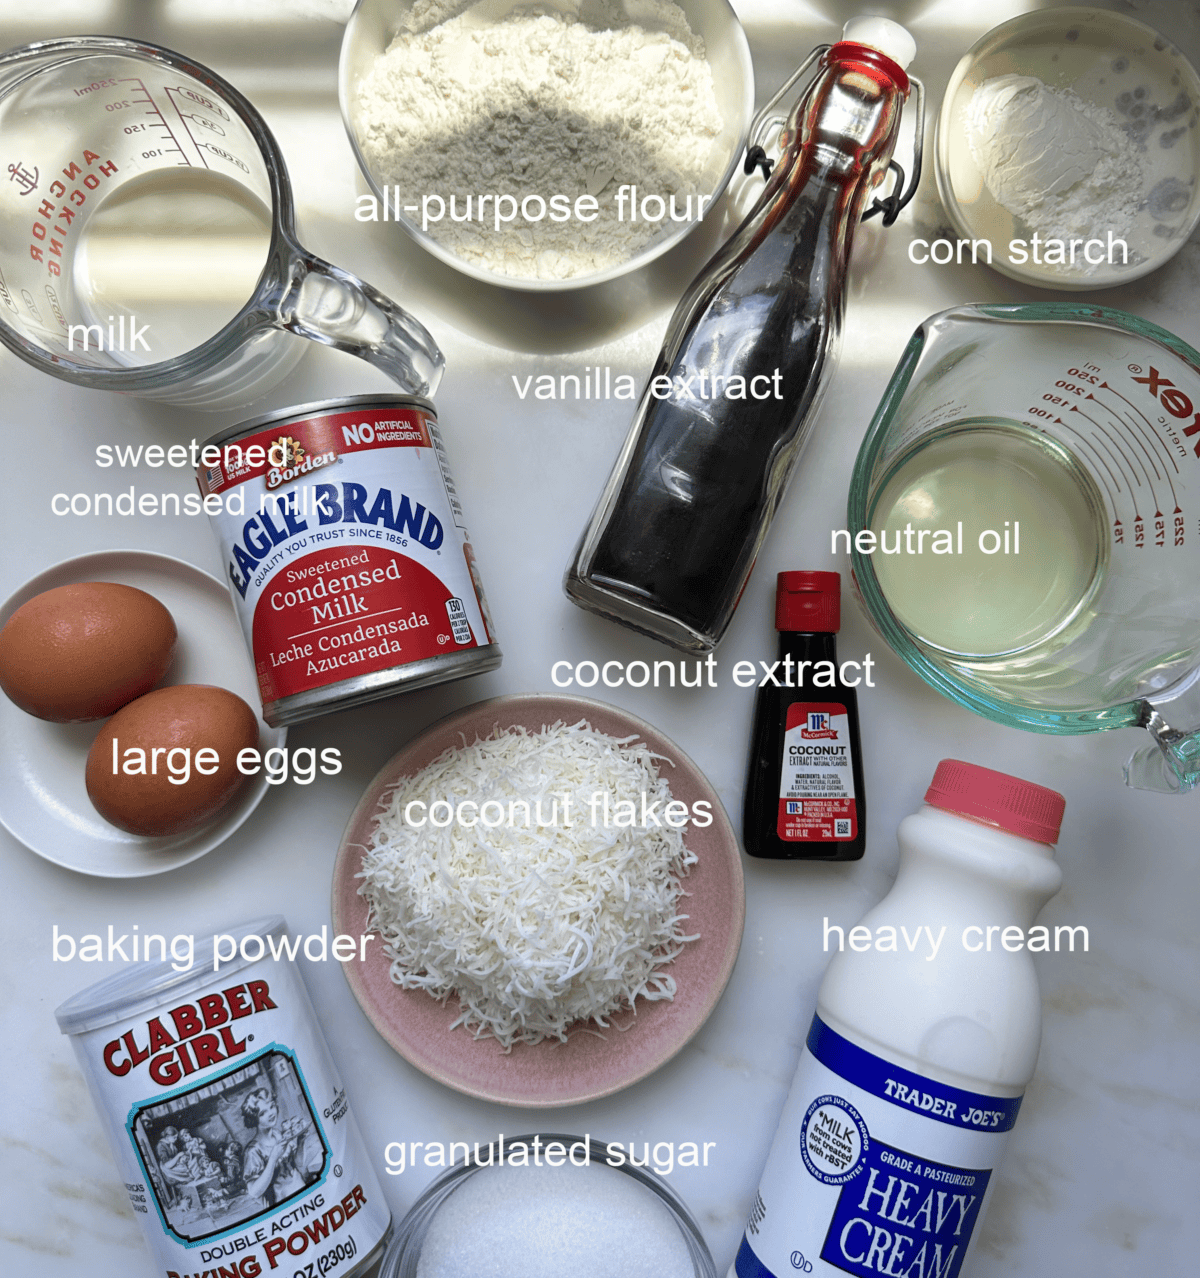
- Eggs – Provide structure and help create a soft, fluffy crumb while keeping the cake light.
- Coconut Extract – Gives the cake a pronounced coconut flavor without making it overly sweet. A little goes a long way.
- Sweetened Condensed Milk – Forms the base of the creamy filling, creating a rich, custardy texture.
- Unsweetened Shredded Coconut – Adds texture and natural coconut flavor to both the filling and topping.
- Whole Milk – Used for the milk soak, helping the cake stay incredibly moist and tender.
For the rest of the ingredients, please refer to the recipe index card below!
How to Make Bolo de Coco
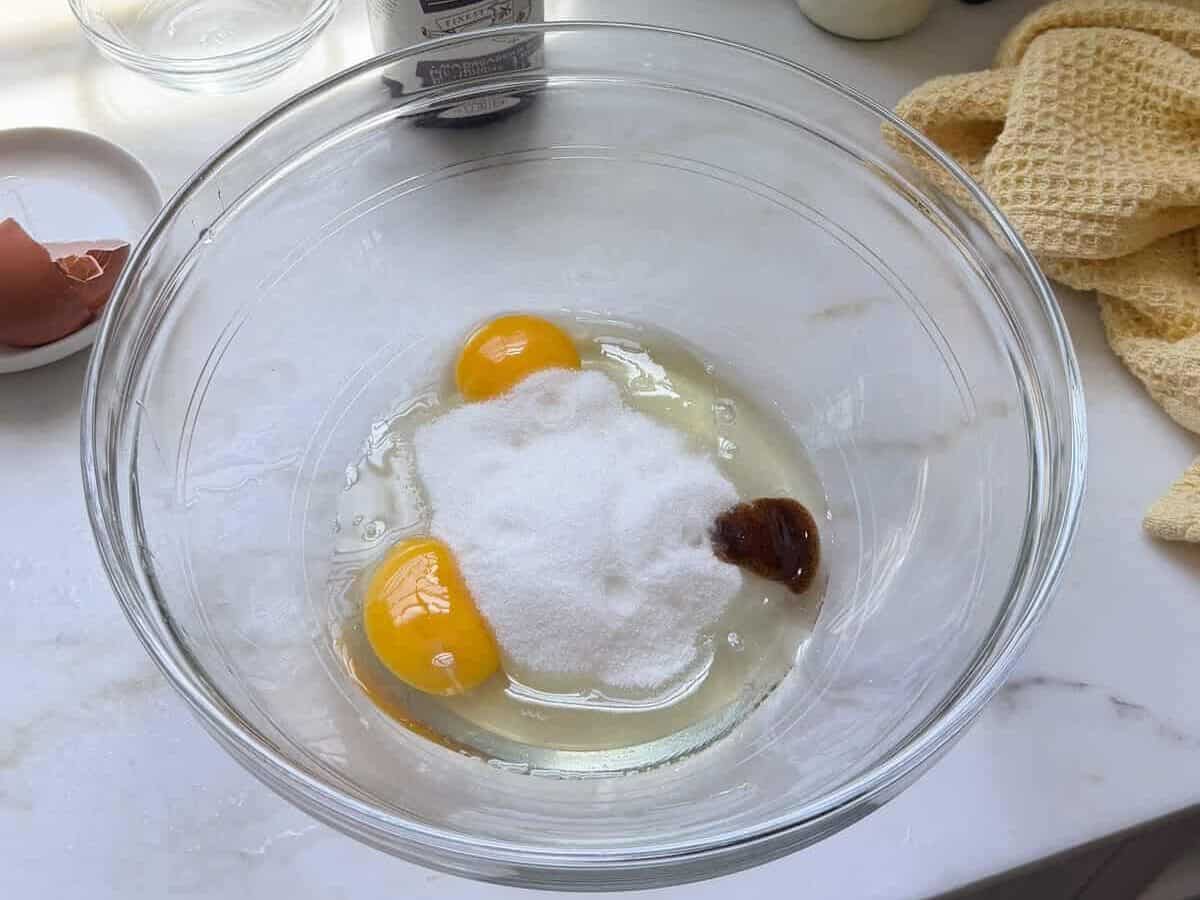
- Whisk together the eggs, sugar, vanilla, coconut extract, oil, and milk.
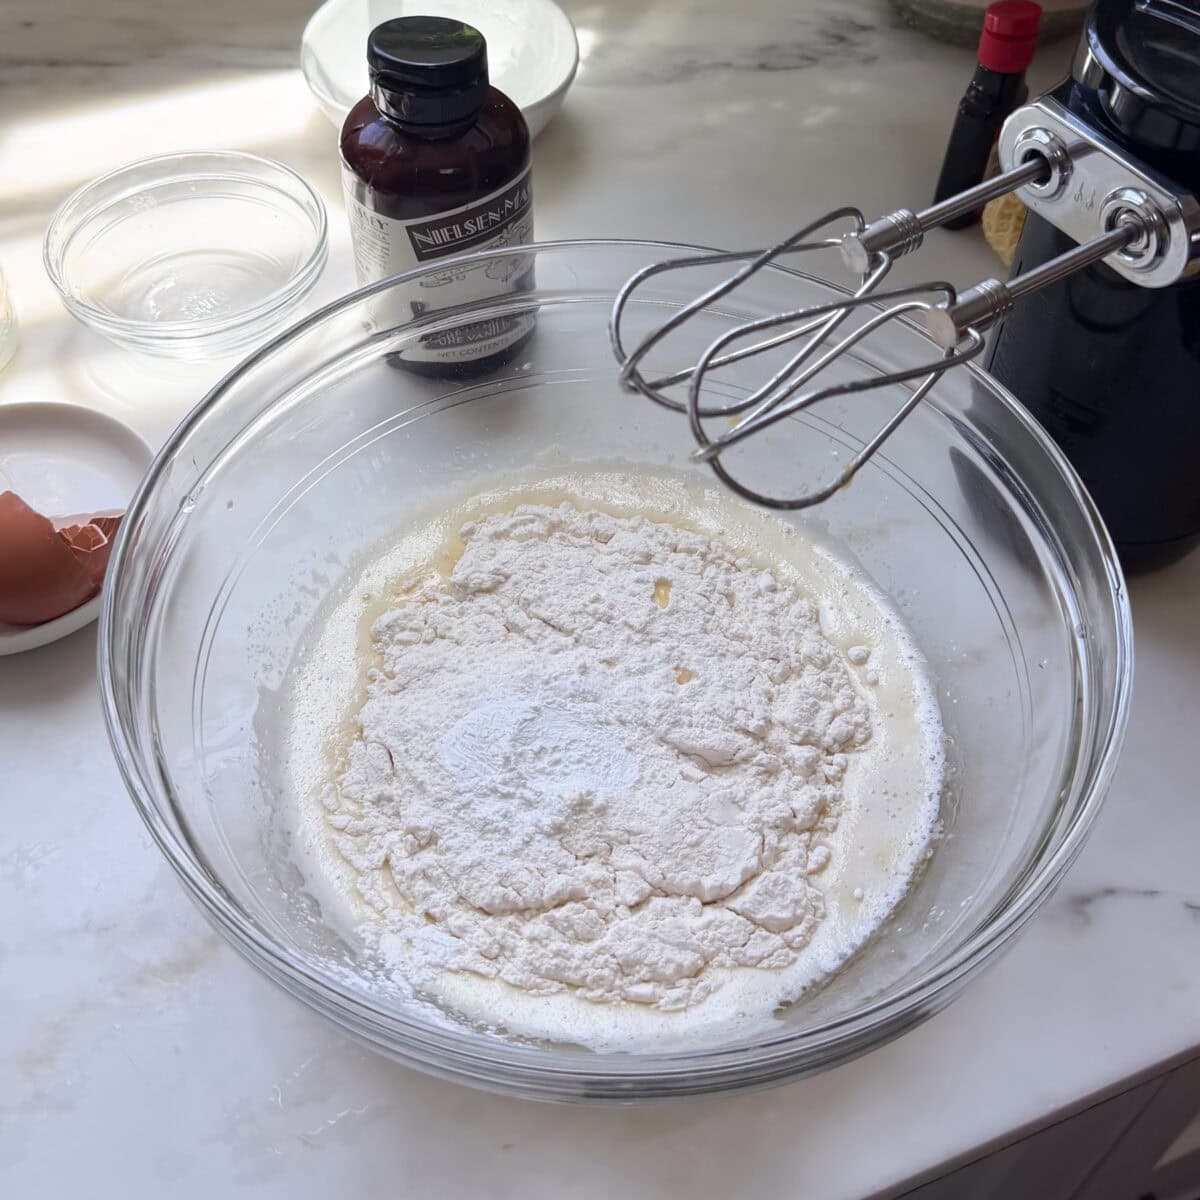
- Stir in the dry ingredients until smooth.
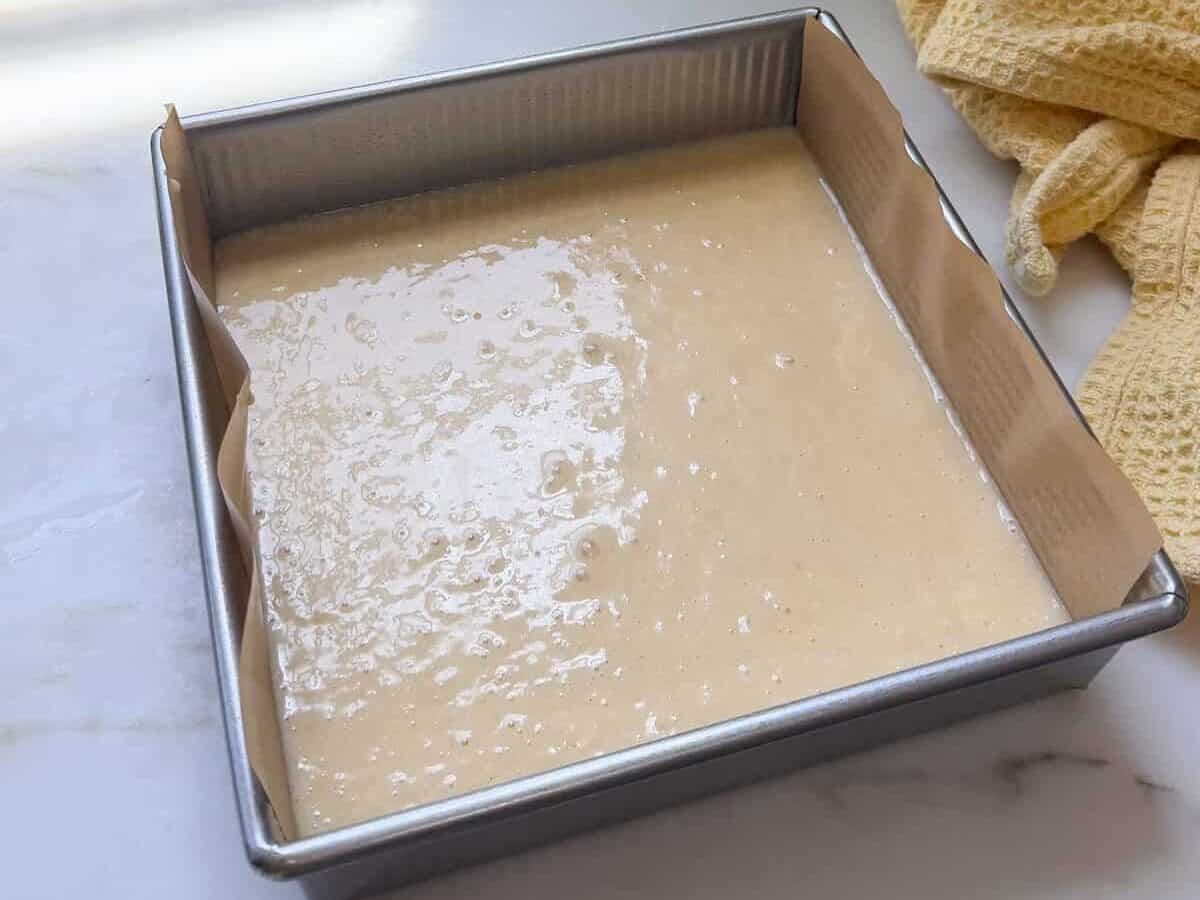
- Transfer the batter to a prepared baking pan. Bake at 350F for 26 minutes until golden brown.

- Make the filling. Warm the condensed milk, cream, salt, and vanilla. Whisk in the cornstarch slurry and cook until thick. Chill for 1 hour.
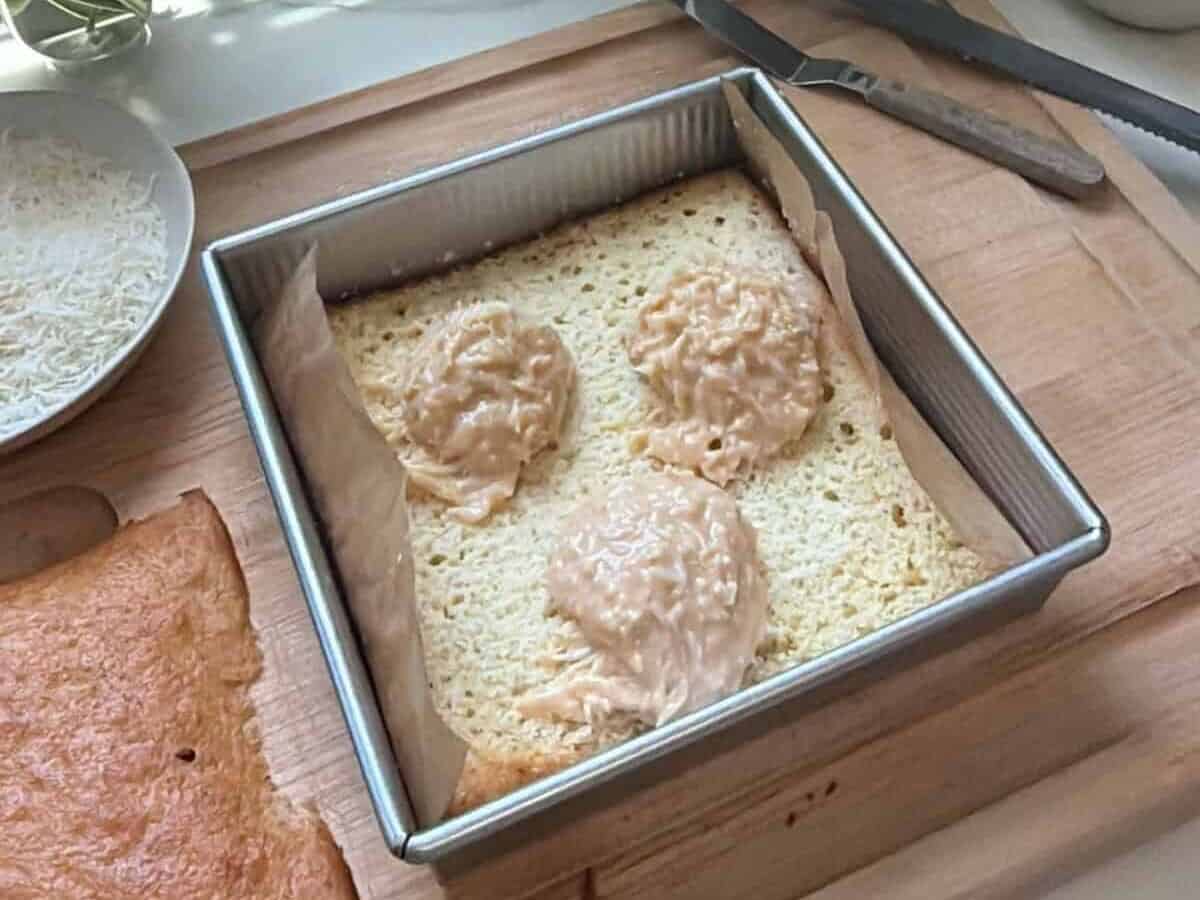
- Slice the cooled cake horizontally in half. Return the bottom layer to the pan and soak with milk. Spread chilled filling over the bottom layer.
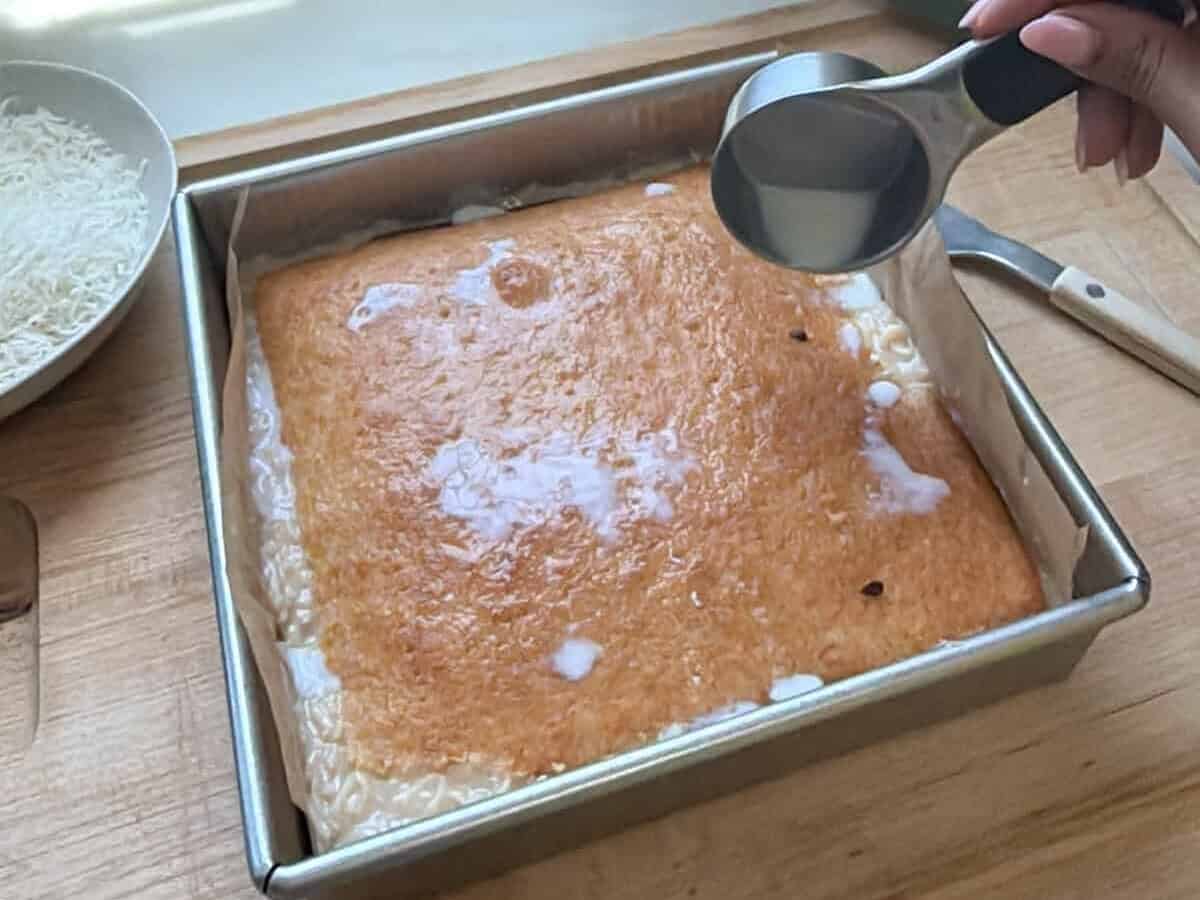
- Add the top cake layer and soak again with milk.
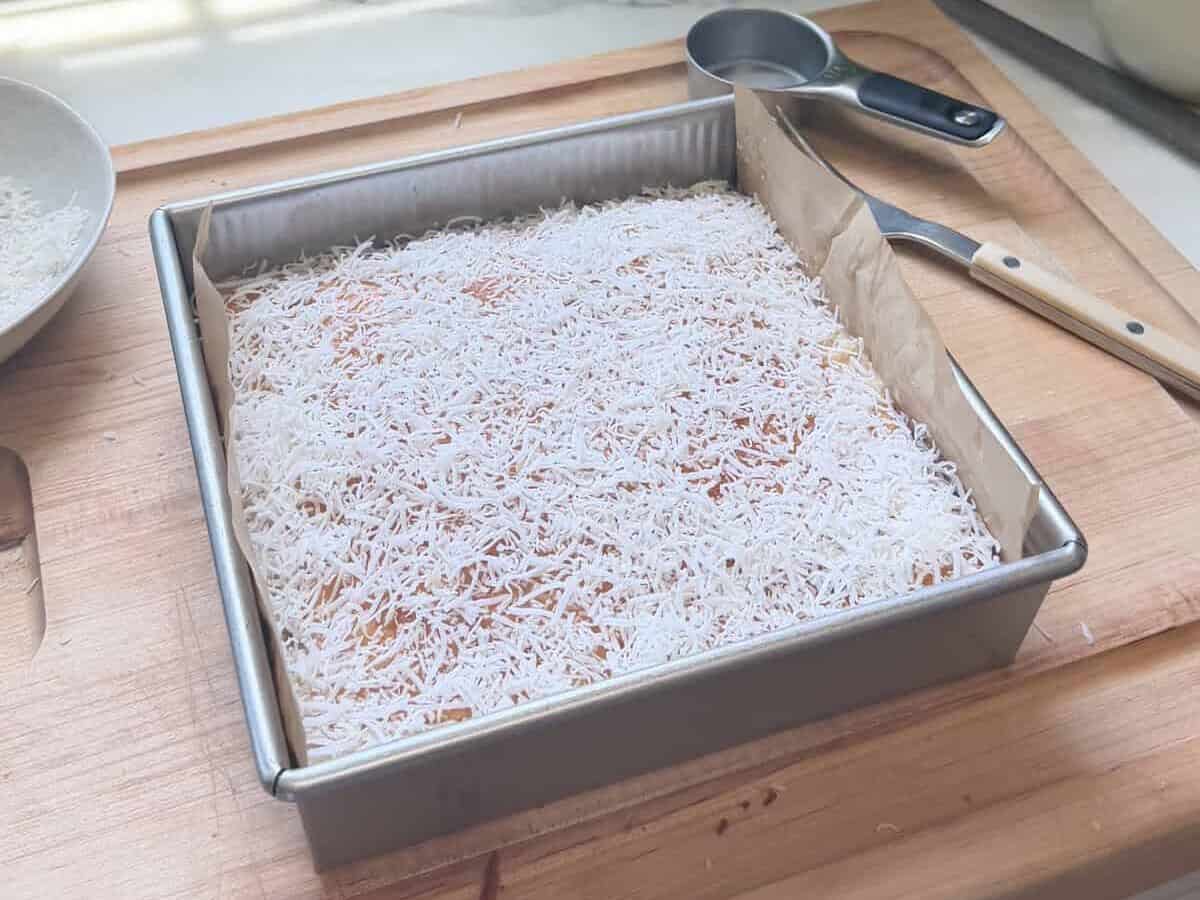
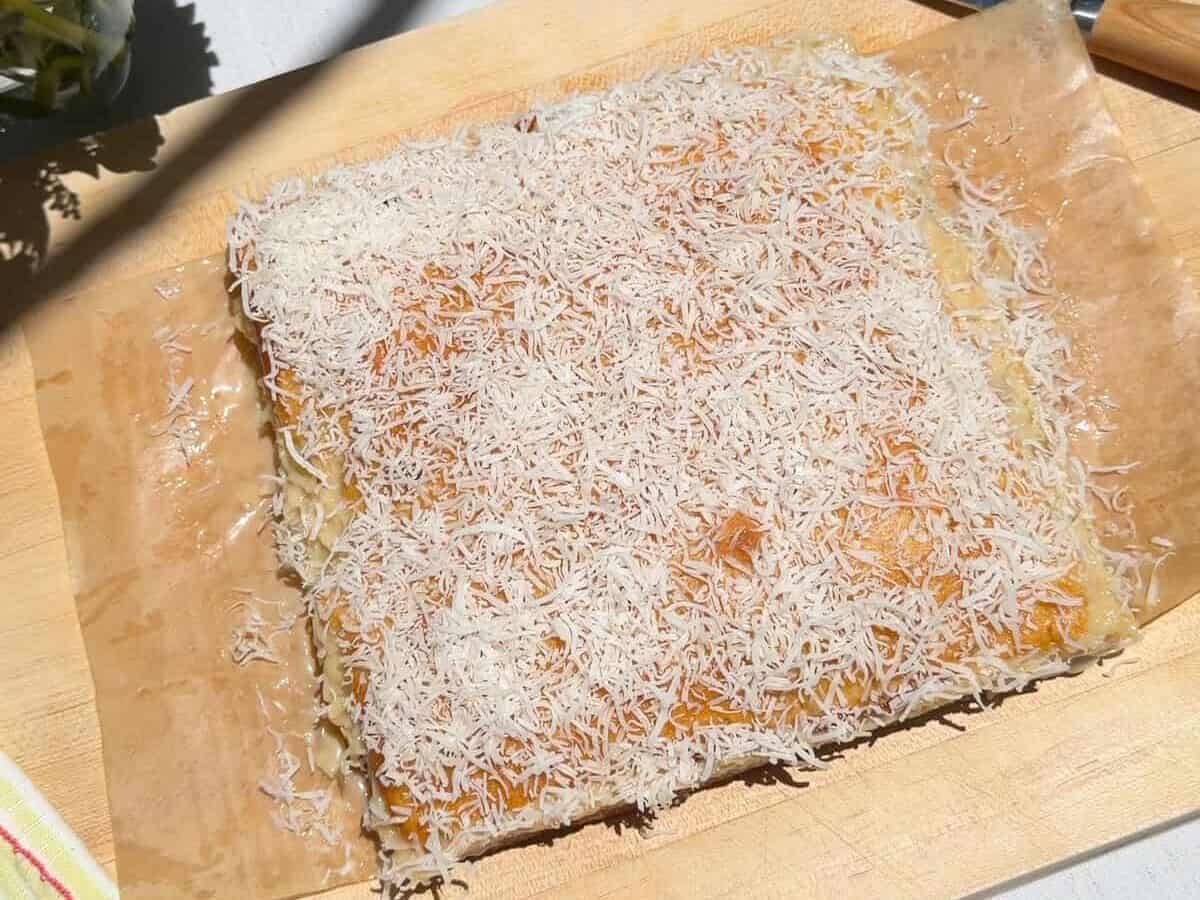
- Sprinkle on more shredded coconut.
- Chill until ready to serve.
Quick Tips for the Best Bolo de Coco
Cool the cake completely before slicing and assembling. A fully cooled cake is much easier to split into even layers and won’t melt the filling while assembling.
Use a serrated knife for cutting the layers. This helps create clean cuts without ruining the cake.
The filling should be spreadable. If the filling is hard to spread while cold, allow it to come to room temperature for a more spreadable consistency.
Make it a day ahead. The cake becomes even more tender and flavorful after spending a night in the refrigerator.

Make-Ahead & Storage
Make Ahead: The cake and filling can be prepared up to 1 day in advance. Assemble the cake several hours before serving or the night before for the best texture.
Storage: Store covered in an airtight container or tightly wrapped baking pan in the refrigerator for up to 3 days.
If you tried this Bolo de Coco recipe or any other recipe on my website, please leave a 🌟 star rating and let me know how it went in the 📝 comments below. Thanks for visiting!
Bolo de Coco
Ingredients
Cake:
- 2 large eggs
- ½ cup (100g) granulated sugar
- 1 teaspoon vanilla paste or extract
- 1 teaspoon coconut extract
- 1/3 cup neutral oil
- 1/3 cup whole milk
- 1 cup (130g) all-purpose flour
- 1 1/2 teaspoons baking powder
- 1/2 teaspoon kosher salt
Filling:
- 1 can, (12-ounce) sweetened condensed milk
- 3/4 cup heavy cream
- Pinch of kosher salt
- 1 teaspoon vanilla paste or extract
- 1 tablespoon corn starch
- 1 cup (64g) unsweetened shredded coconut flakes
Milk Soak and Topping:
- 1 cup whole milk
- ½ cup unsweetened shredded coconut flakes
Instructions
To Make the Cake:
- Preheat the oven to 350F. Grease and line an 8×8-inch baking pan with parchment. I like to make it so I make a sling with the parchment so I can lift the cake out.
- In a large bowl, whisk together the eggs, sugar, vanilla, and coconut extract. Pour in the oil and milk and mix once more. Add in the flour, baking powder, and salt. Mix until combined. Pour the batter into the prepared baking pan and smooth it out into one even layer. The batter should be on the thinner side.
- Transfer to the oven to bake for about 26-30 minutes, until a skewer inserted into the center comes out clean and the top is a medium golden brown. Allow to cool in the pan for about 1 hour.
To Make the Filling:
- Meanwhile, make the filling. In a saucepan set over medium heat, pour in the sweetened condensed milk, heavy cream, kosher salt, and vanilla. When it’s warm, add a few tablespoons of the milk mixture to a small bowl. Whisk in the corn starch to make a “slurry”. Pour it back into the pan and whisk. Heat it until bubbly and thickened. It should coat the back of a spoon. Pour it into a glass bowl. Fold in the coconut flakes. Press a piece of plastic wrap onto the surface. Transfer to the fridge to chill. It takes about 1 hour to 2 hours to chill.
To Assemble the Cake:
- Remove the cake from the pan. Slice it horizontally in half. Remove the top and set aside. Transfer the bottom part of the cake back to the pan. Pour the milk all over the bottom piece of cake. Add the filling from the fridge and spread it into an even layer. Add the top of the cake onto the filling. Poke the top with a fork all over. Pour the rest of the milk on top of the cake. Sprinkle the top with coconut flakes. Slice the cake into nine slices.
Notes
Quick Tips
Cool the cake completely before slicing and assembling. A fully cooled cake is much easier to split into even layers and won’t melt the filling while assembling. Use a serrated knife for cutting the layers. This helps create clean cuts without ruining the cake. The filling should be spreadable. If the filling is hard to spread while cold, allow it to come to room temperature for a more spreadable consistency. Make it a day ahead. The cake becomes even more tender and flavorful after spending a night in the refrigerator.Make Ahead & Storage
Make Ahead: The cake and filling can be prepared up to 1 day in advance. Assemble the cake several hours before serving or the night before for the best texture. Storage: Store covered in an airtight container or tightly wrapped baking pan in the refrigerator for up to 3 days.Nutrition
Nutrition information is automatically calculated, so should only be used as an approximation.
More Latin Sweets
Desserts
Horchata Tres Leches
Desserts
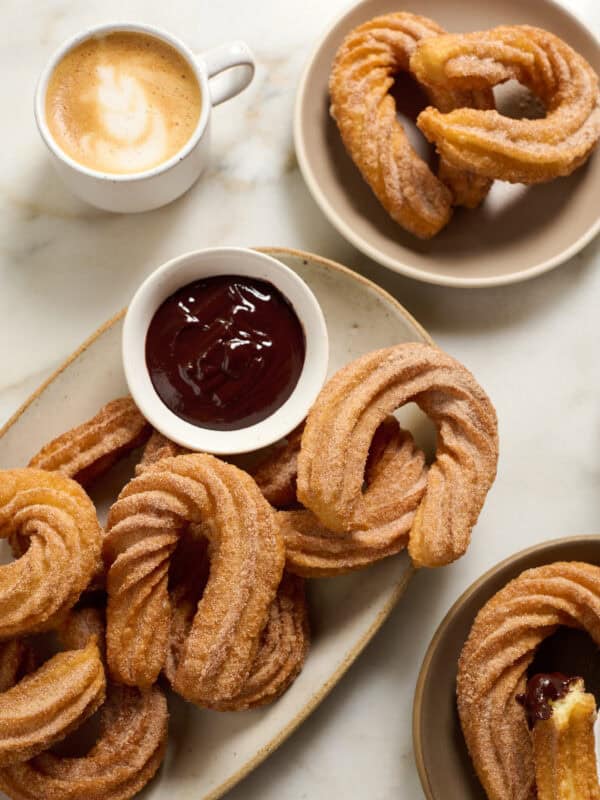
Churros

Desserts
Conchas (Mexican Pan Dulce)
Desserts


