Disclosure: This post may contain affiliate links, which means I may earn a commission if you click on the link and make a purchase.

Were at t-minus nine days before Thanksgiving and the countdown is very real. I’m crossing my fingers that everything for the kitchen renovation will be in tact so we can have our first quiet, small Thanksgiving. It’s been a slow and arduous process that has tested my patience. But everything looks awesome haha.
Let’s talk about DIYs. I have lots of opinions about them. When I did The Year of Cozy, I really wanted to make DIYs that were doable and that people would actually make. The Thanksgiving nametags were one of the most instagrammed DIYs! Because they consisted of things you could easily find with minimal amount of supplies.
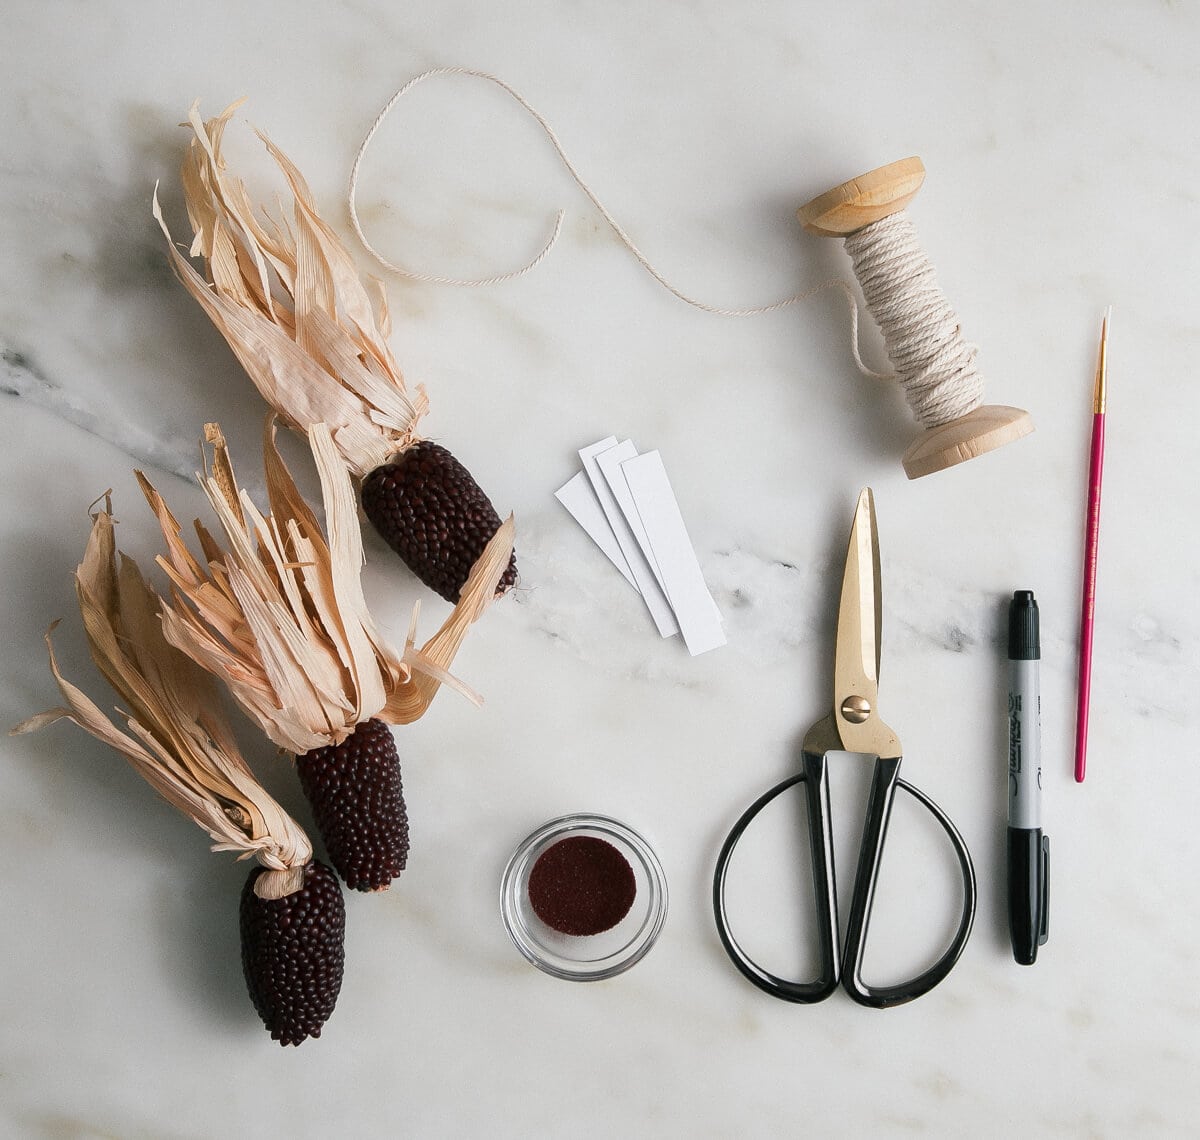
Supplies Needed for Corn Name Tags
I wanted this DIY to also be like that: easy to do, no crazy skill required and not stressful. I like to delegate things like this to people. Give people jobs! That’s the only way Thanksgiving is not crazy. I feel like this would be a great thing to delegate to kids and it is also something you can prep WAY in advance since the corn is dried.
For this post, I teamed up with French’s®! I love their mustard (obviously) and I buy and love their Crispy Fried Onions every single year. This year they sent me the Crispy Jalapeños and omg they are so good. I ate them by the handful and had to stop myself because we actually needed them for the shoot.
I’m actually quite in love with this DIY and we tested it like a recipe, simplifying it as we went, streamlining and making it cuter.
Just a heads up, you can usually find decorative corn at grocery stores at this time of year and big box places like Walmart and Target will have them, too.
How To Make Corn Name Tags
I found mine at Whole Foods, right by the front door. They sold burgundy and white ones and with this dye color, I liked the burgundy a bit more.
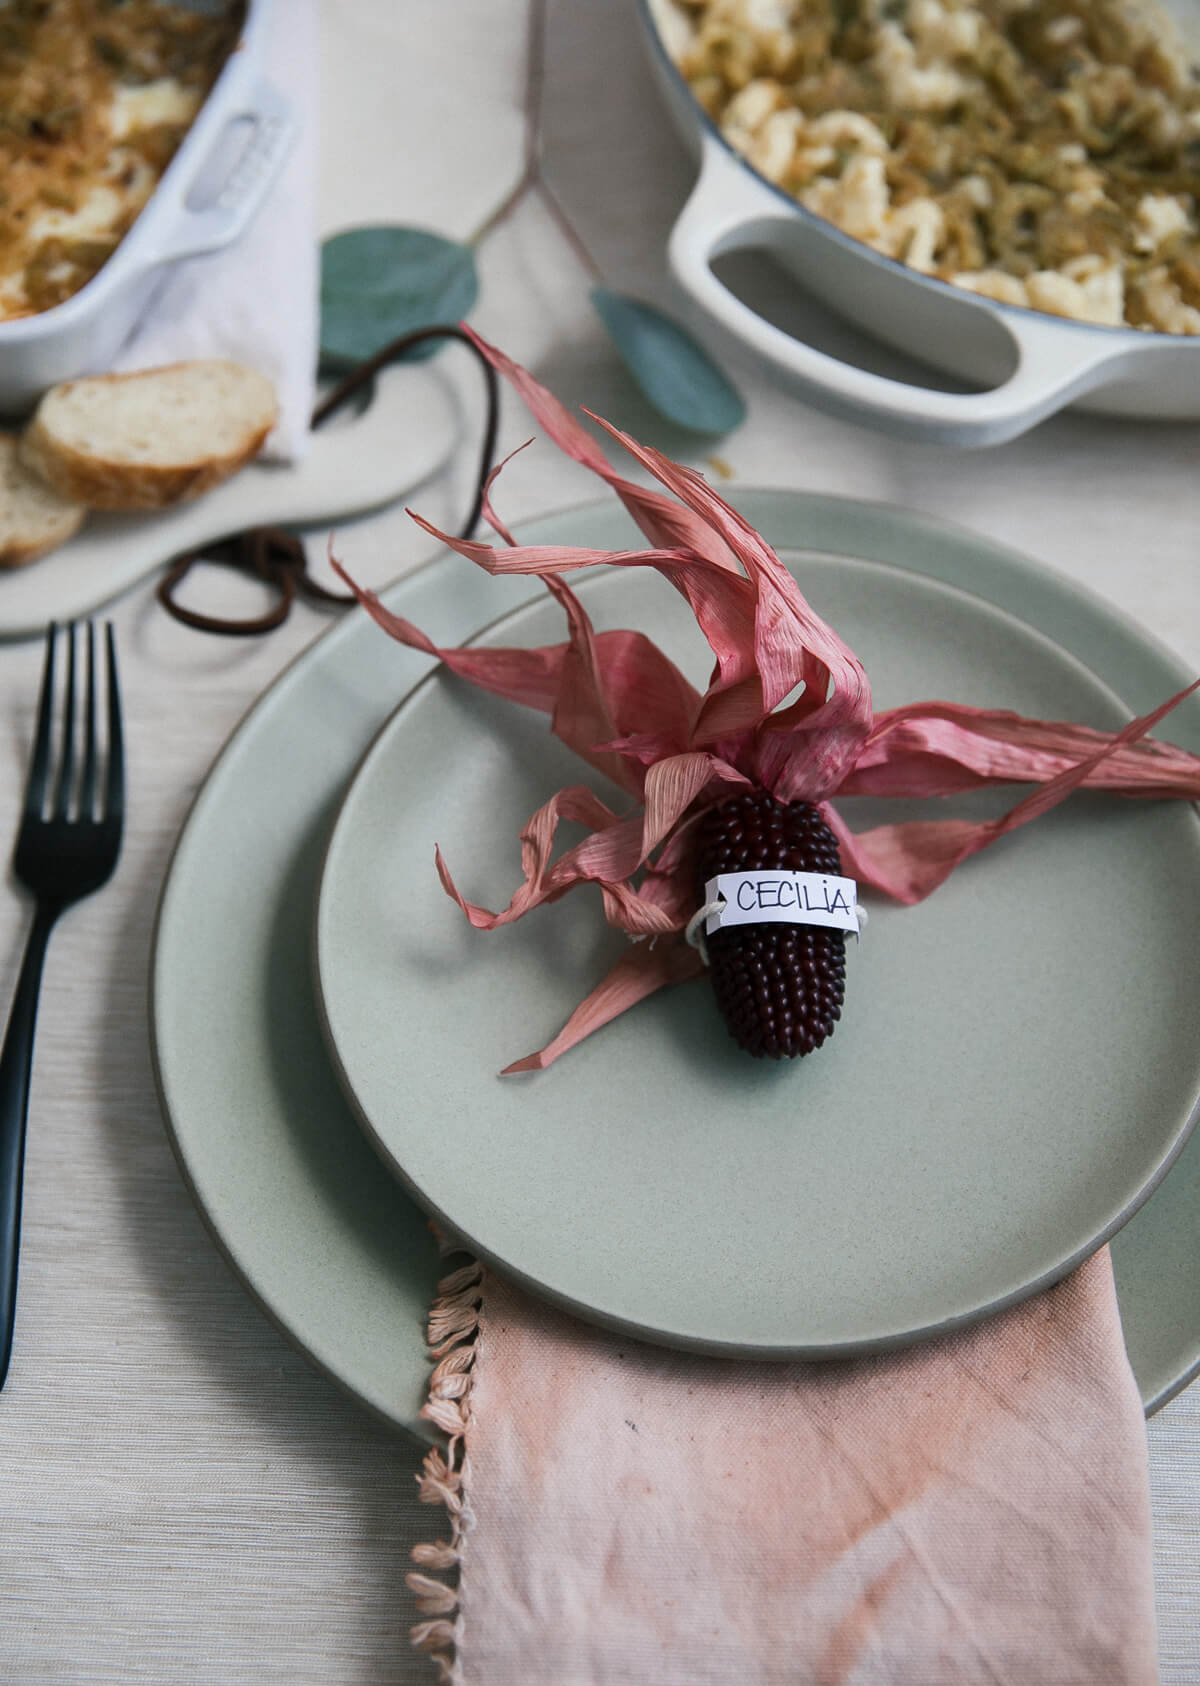
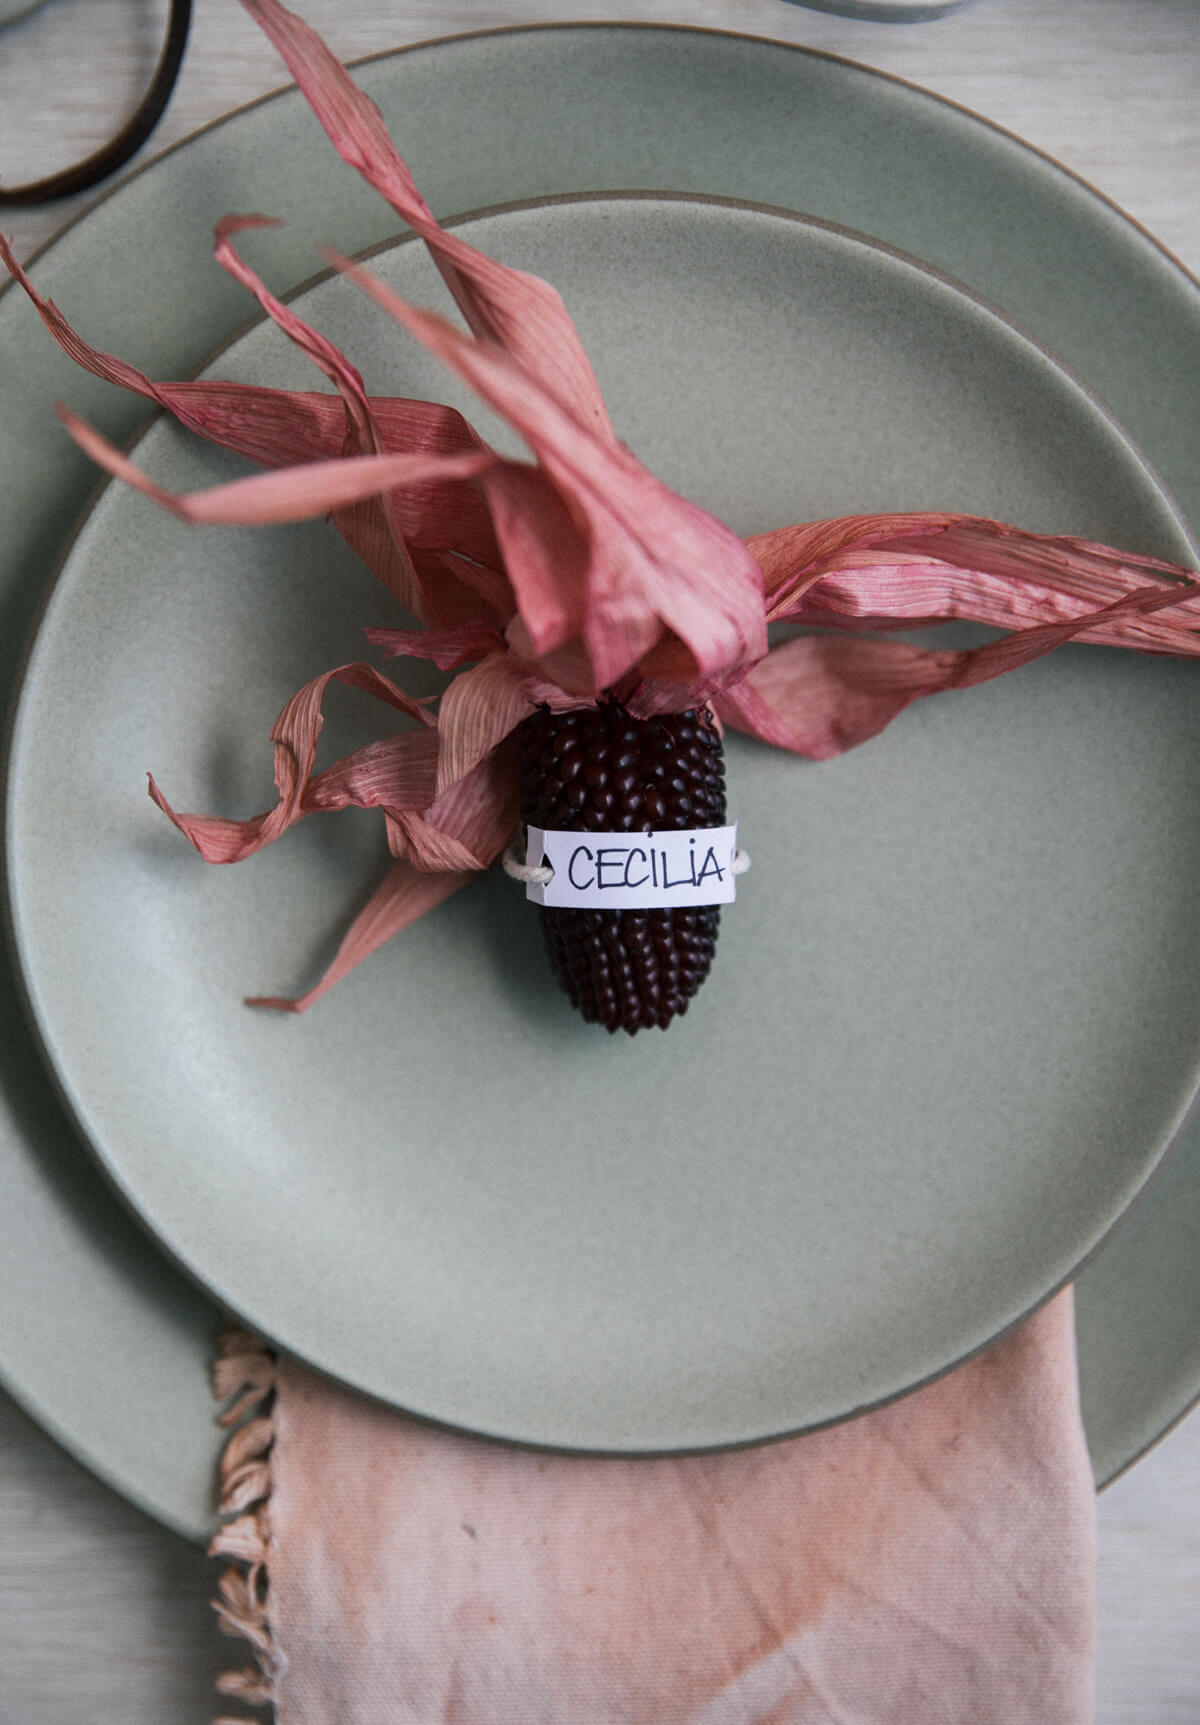
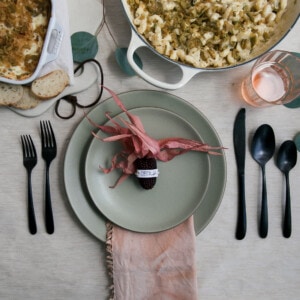
The color palette this year is sage green and pink. I love it so much. It’s fall-like without being full of the typical orange and browns. It’s warm and cozy and will even go into the holiday season.
So let’s start. I figured it’d be easier to show you step-by-step.
Step 1:
Get your supplies ready. You’ll need scissors, dye in the color Fuchsia, decorative corn, twine, a marker and strips of card stock.
Step 2:
Whisk warm water with the dye. (For exact ratios, see the “recipe below” in printable form)
Step 3:
Dip husks into the dye and allow them to soak for about 2 to 3 minutes. Since I didn’t want the color to be CRAZY pink, I let it soak for only a little bit. If you want bright fuchsia you could do this for up to 24 hours.
Step 4:
Remove them from the dye and transfer them to a bed of paper towels or butcher paper.
These need to dry for about 4 to 5 hours. If you’re in a pinch, you can always blow-dry them. I let them dry for a full 24 hours!
Step 5:
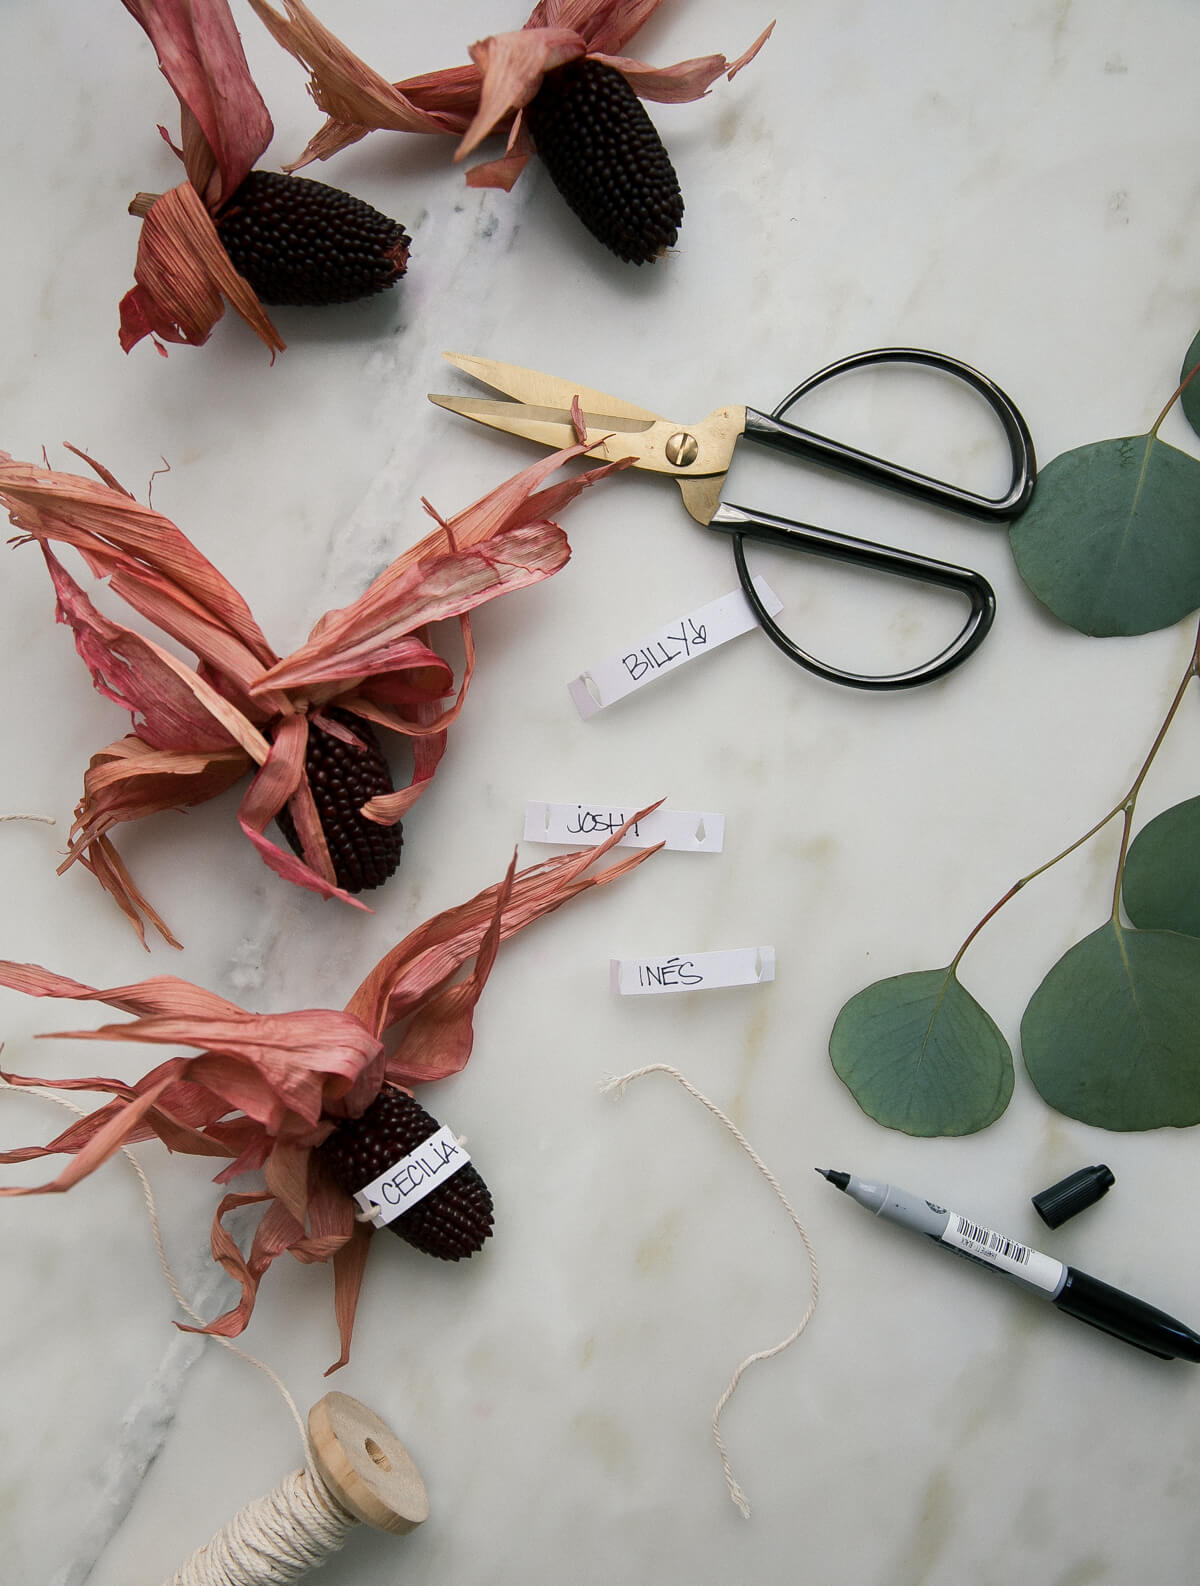
Write your guests’ names on the strips of card stock.
Step 6:
Take the strips of card stock, fold them in on the edges, and cut small slits on the sides. This is where the twine will be threaded through.
Step 7:
Thread the twine through and tie it around the corn!
And that’s it! I feel like it’s the simplest DIY and hopefully you’ll find a few minutes.
For the table, I went with sage plates, black flatware, a beige tablecloth and little strands of eucalyptus that I got from the grocery store. The best part about eucalyptus is that it can be out of water for a long time and it doesn’t dry out or wilt. AND, they smell calming.
Here’s the printable “recipe” for this DIY and a big thanks to French’s for sponsoring this post. A few recipes using the crispy jalapeños are coming up soon!
DIY Mini Corn Name Tags
Equipment
- Several paper towels
- Pair of scissors
Ingredients
- 1 teaspoon fuchsia dye
- 1 3/4 cups warm water
- Decorative corn
- Card stock, cut into slits
- Scissors
- Twine
- Marker
Instructions
- In a medium bowl, combine the fuchsia dye and warm water; whisk until combined.
- Make a bed of towels by layering a few sheets of paper towels. Dip the husks of the corn into the dye and allow to soak for 2 to 3 minutes. Place on a paper towels and allow to dry for at least 2 to 3 hours, ideally overnight.
- Write the names on the strips of card stock and fold in the edges. Cut slits into the fold. Thread a string of twine through the card stock and tie around the corn. Place on plates right before dinner!


Too, too cute! I love that they’re pink!
too kewt! i love your tablescape colors, v a cozy kitchen!