Disclosure: This post may contain affiliate links, which means I may earn a commission if you click on the link and make a purchase.
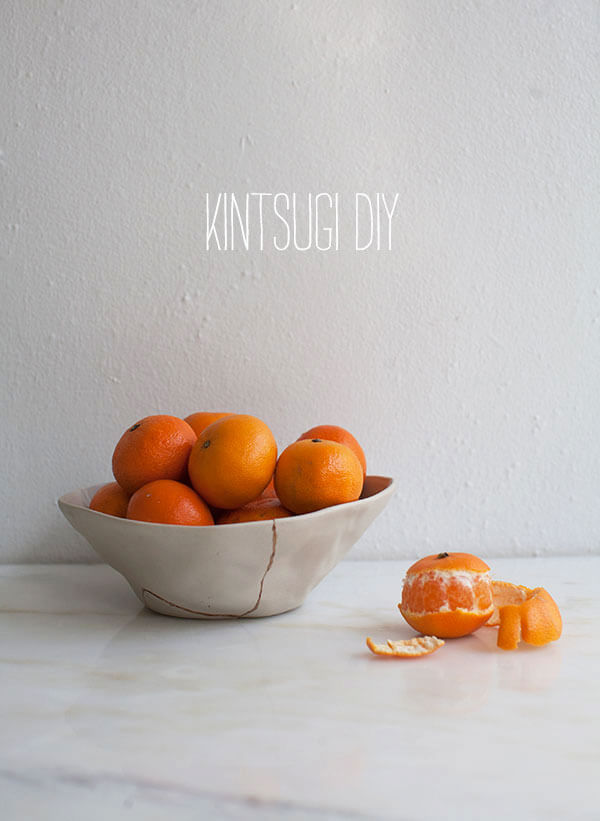
Kingsugi, The Japanese Art of Repair!
I guess you could say I like to collect a few things. I have a collection of vintage ice cream scoops. I have a few vintage salt and pepper shakes. And recently, I’ve been slowly buying beautiful ceramics.
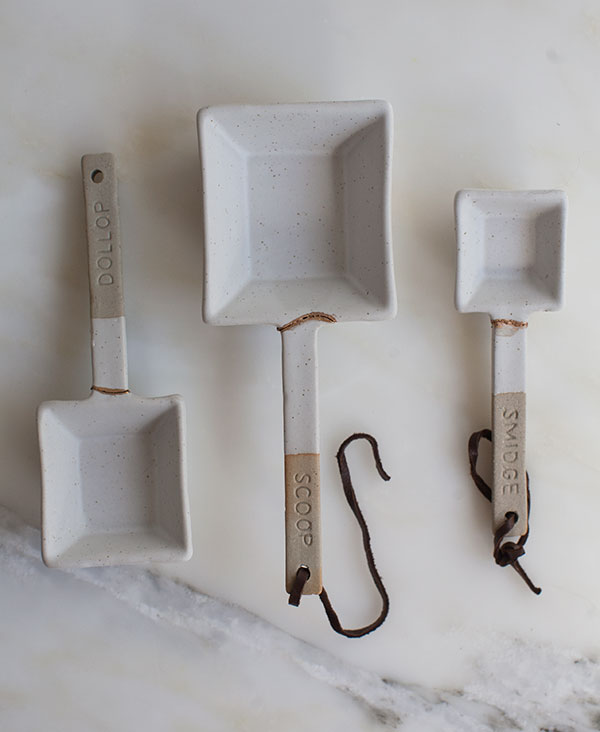
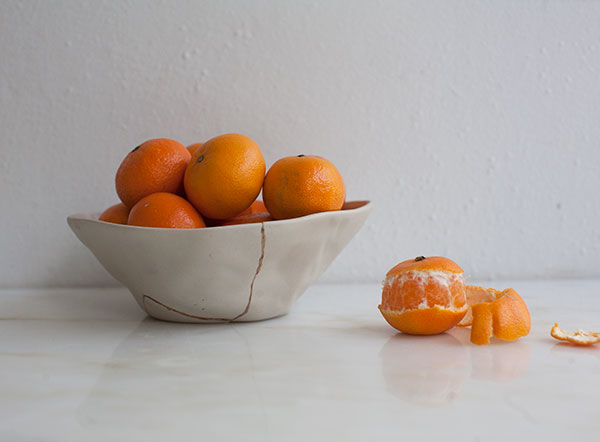
Well, a few of them have broken. The bowl you see pictured was broken by Amelia who excitedly ran into it when someone knocked on the door. (It was on the floor because I was unpacking from a shoot.) The spoons were broken because I didn’t realize the bag was on the bed and when I threw off the covers because I was exhausted, well, they went flying.
I always have something that needs repair. I always promise myself that I’m going to glue things back together and I often times do but this time I wanted to try something different.
Enter: Kintsugi. It’s the Japanese art of repair. Think of it like a beautiful rendition of gluing things back together. The philosophy behind kintsugi is about seeing the breakage and repair as part of the object’s history—embracing it rather than hiding it.
I feel like there could be some sort of analogy drawn out of this DIY and applied to life and I’m especially hormational today so I’ll stop while I’m ahead!
Traditionally kintsugi involves mixing a lacquer (gold, silver, copper) with a binding rice flour. It sounds simple, but nailing down that ratio is incredibly difficult. For some, repairs can take up to two months! People spend years learning this technique. It’s really beautiful!
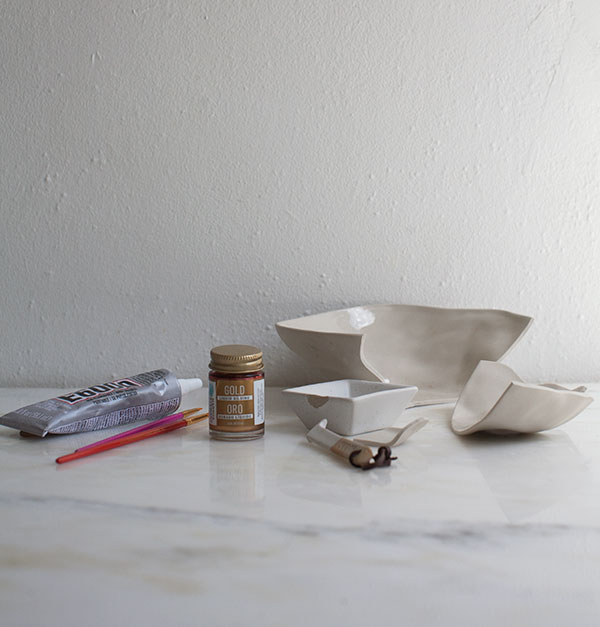
This is admittedly a huge shortcut. Here’s what you’ll need:
1. Gold Liquid Gilding
2. E600
3. Thin paint brushes
4. Your broken ceramics
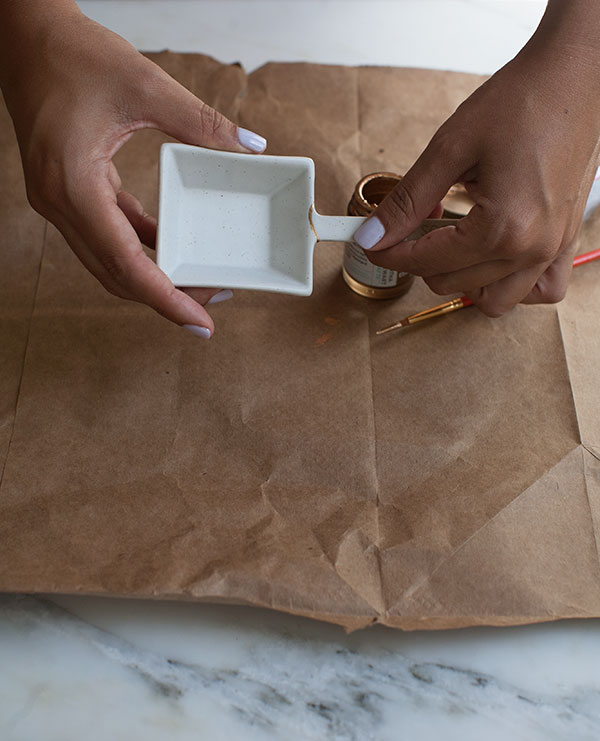
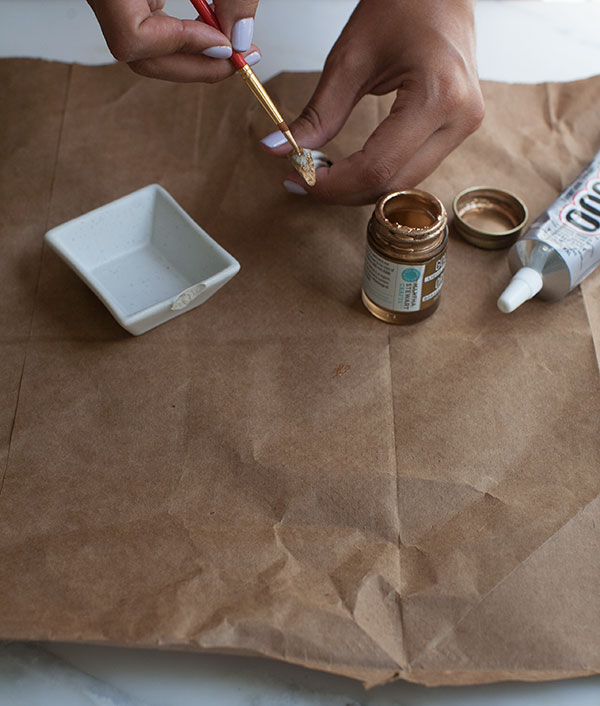
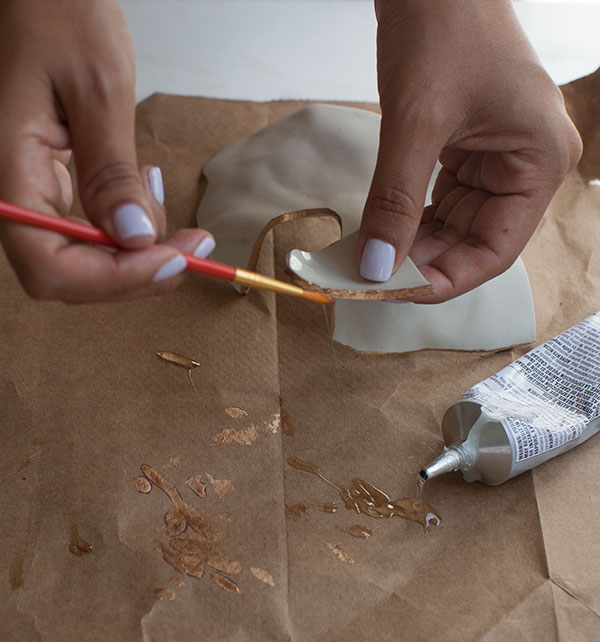
I found it easiest to do the painting process first. I gently went around the edges of the two broken pieces and then pushed them together.
Doing this made it so the paint pushed out a bit, creating a thin line. I allowed both pieces to dry completely, about 10 minutes.
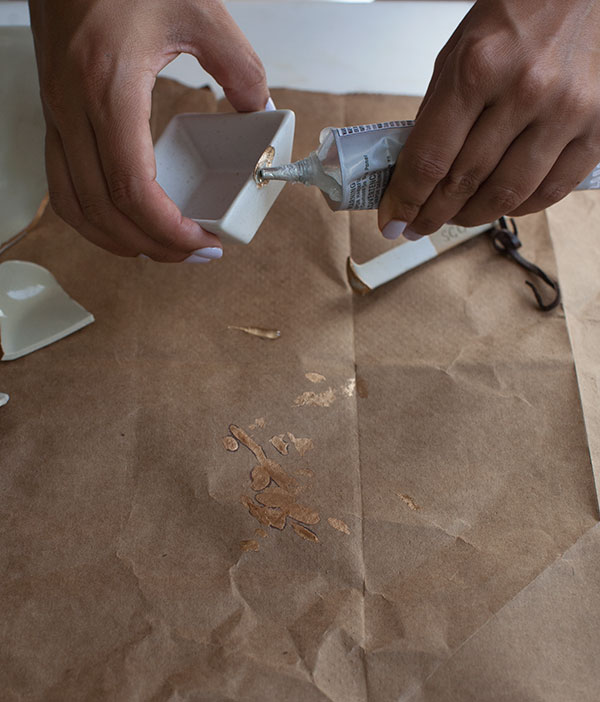
Next, I dabbed a bit of E600 (feel free to use your paint brush if you like) and pushed the pieces together once more. I found that a little went a long way AND that if I used too much, it would make the gilding all clumpy (you can notice one of the scoopers has some lumps, well, it’s from too much glue!)
I held the pieces with the glue together for about a minute and then allowed the object to dry, untouched, for about 2 hours.
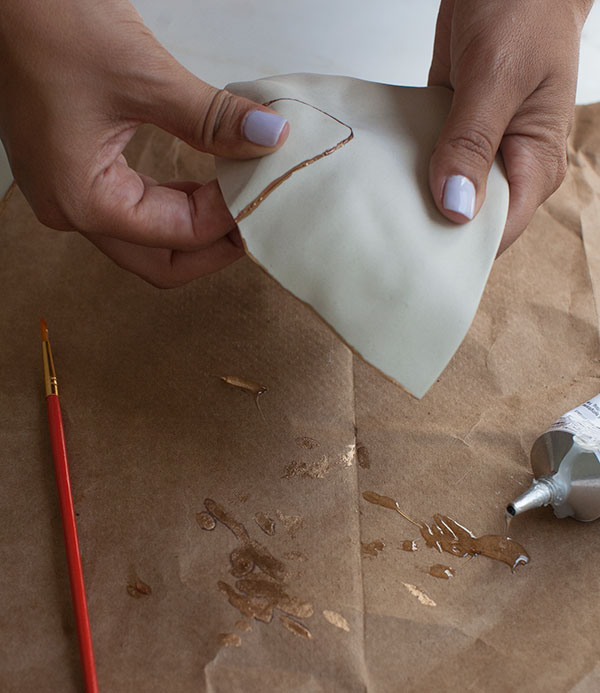
That’s it! It couldn’t be simpler. Obviously, the technique varies slightly depending on the pieces you’re putting back together.
Remember that the gold line doesn’t have to be perfect. At first I was bummed because a bit of the gold liquid gilding sort of ran out and the line wasn’t absolutely perfect, but that’s the point.
And I sort of think that the bowl looks prettier with the gold cracks; it has character now, it’s been through it.


Mine is an outdoor project our large pottery urn was broken in wind, about 60 cams high Greek urn style, we glued it together but want it to look beautiful and unique.It’s stoneware so gold would look good
However have no idea of amounts I would need or if your glue is suitable