Disclosure: This post may contain affiliate links, which means I may earn a commission if you click on the link and make a purchase.
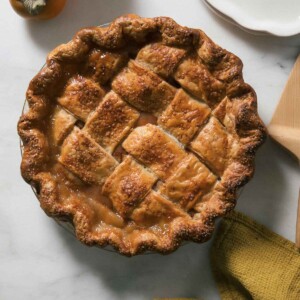
This Homemade Apple Pie is a fall classic. Honey crisp and braeburn apples are combined with flour, sugar and spices. This pie crust is flakey, butter, perfection. This pie is simple, classic; the ideal apple pie. If you’re looking for easier apple recipes, you’ll enjoy my easy apple cobbler or apple pandowdy.
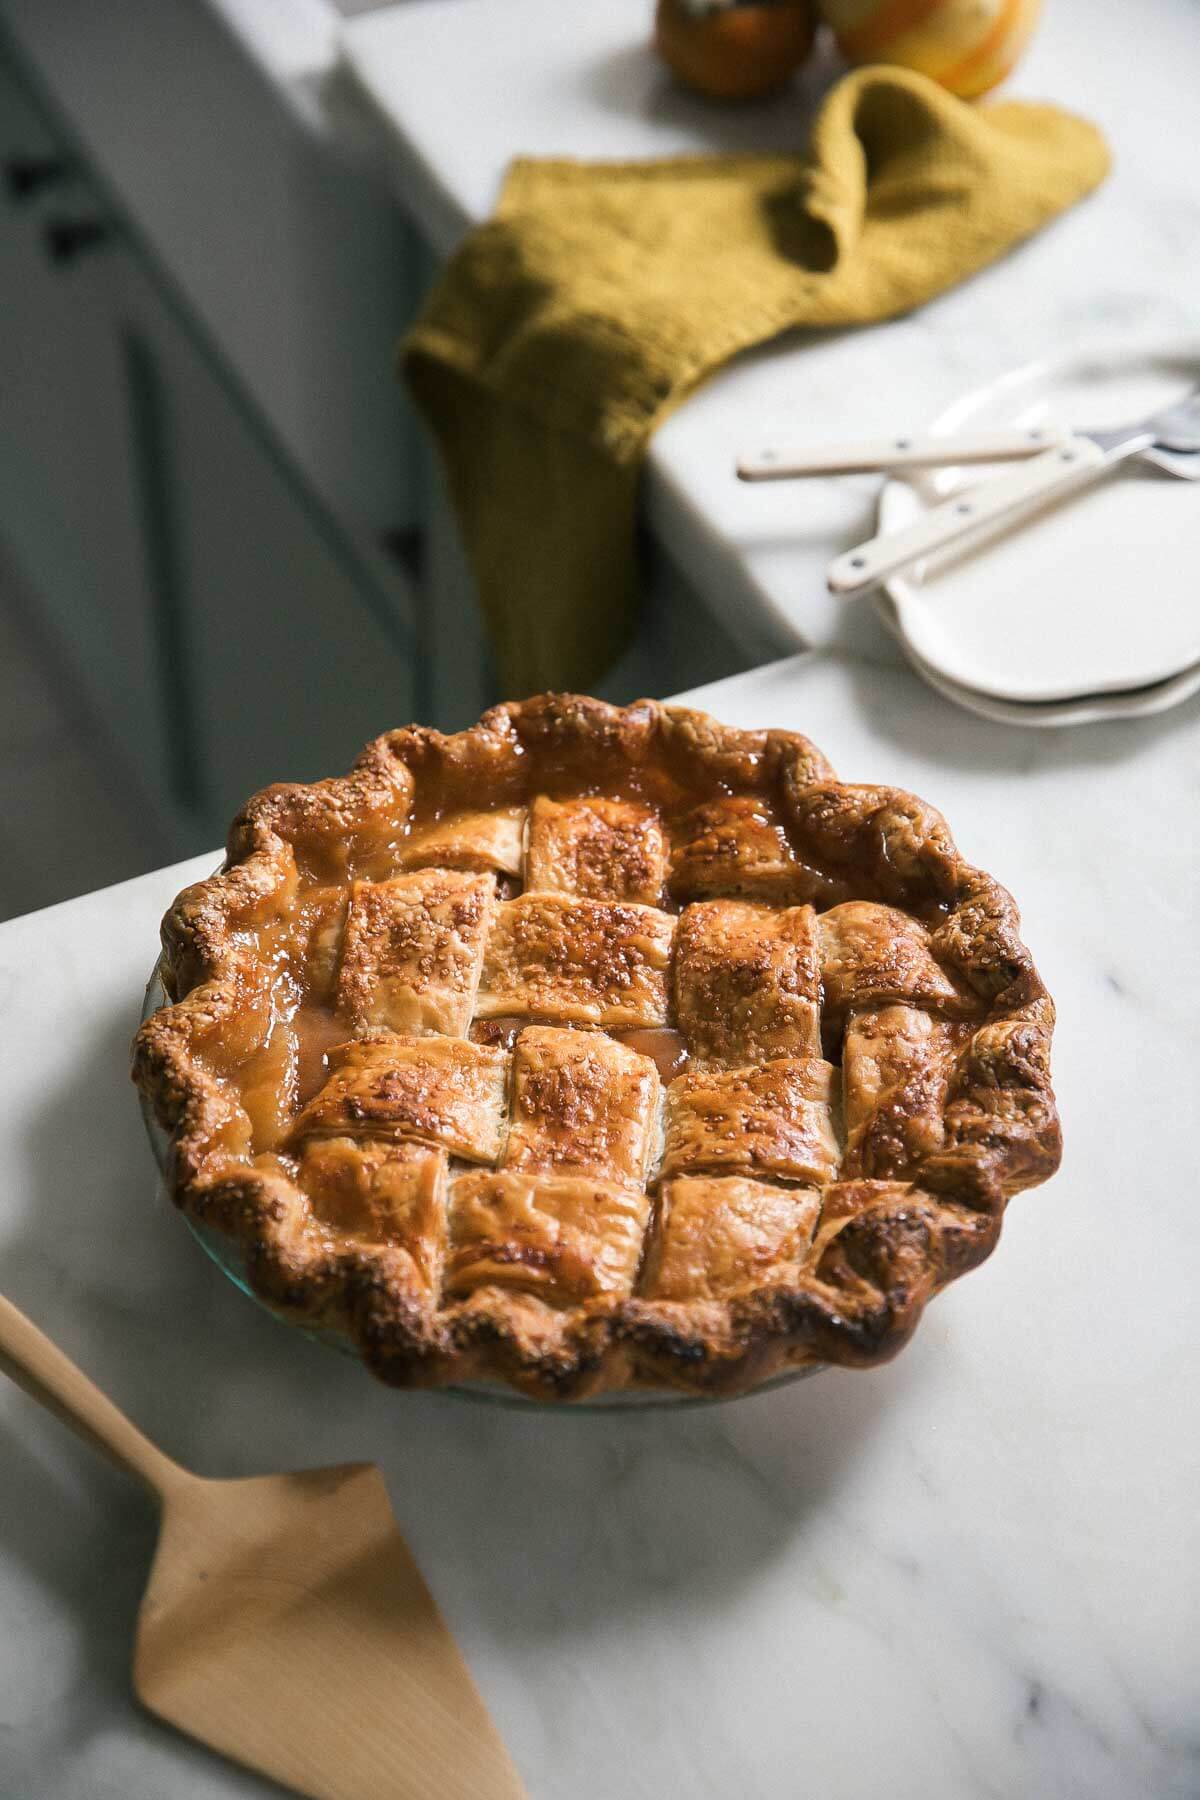
Table of Contents
- What Are the Best Apples for Apple Pie?
- How to Make Pie Crust
- Tips to Making Homemade Pie Dough:
- Best Vessel to Bake a Homemade Apple Pie In
- How to Make Filling for the Best Homemade Apple Pie
- Additions to Filling
- How to Make a Homemade Apple Pie
- Tips and Tricks for our Apple Pie Recipe
- Recipe FAQs
- How to Make An Apple Pie Ahead
- Cutting and Slicing an Apple Pie
- What to Serve with Homemade Apple Pie
- Homemade Apple Pie Recipe Recipe
It’s the apple pie version of the perfect white t-shirt we spend years searching for.
This pie is classic in every sense of the word: simple, streamlined and absolute perfection.
What Are the Best Apples for Apple Pie?
There are apples that are AWFUL and GREAT for apple pie. Some apples are best for eating raw. Others are best for cooking on the stove-top for hours and hours that will give you the most delicious apple sauce. Here are my favorites for pie that will keep their integrity/shape even when baked for an hour:
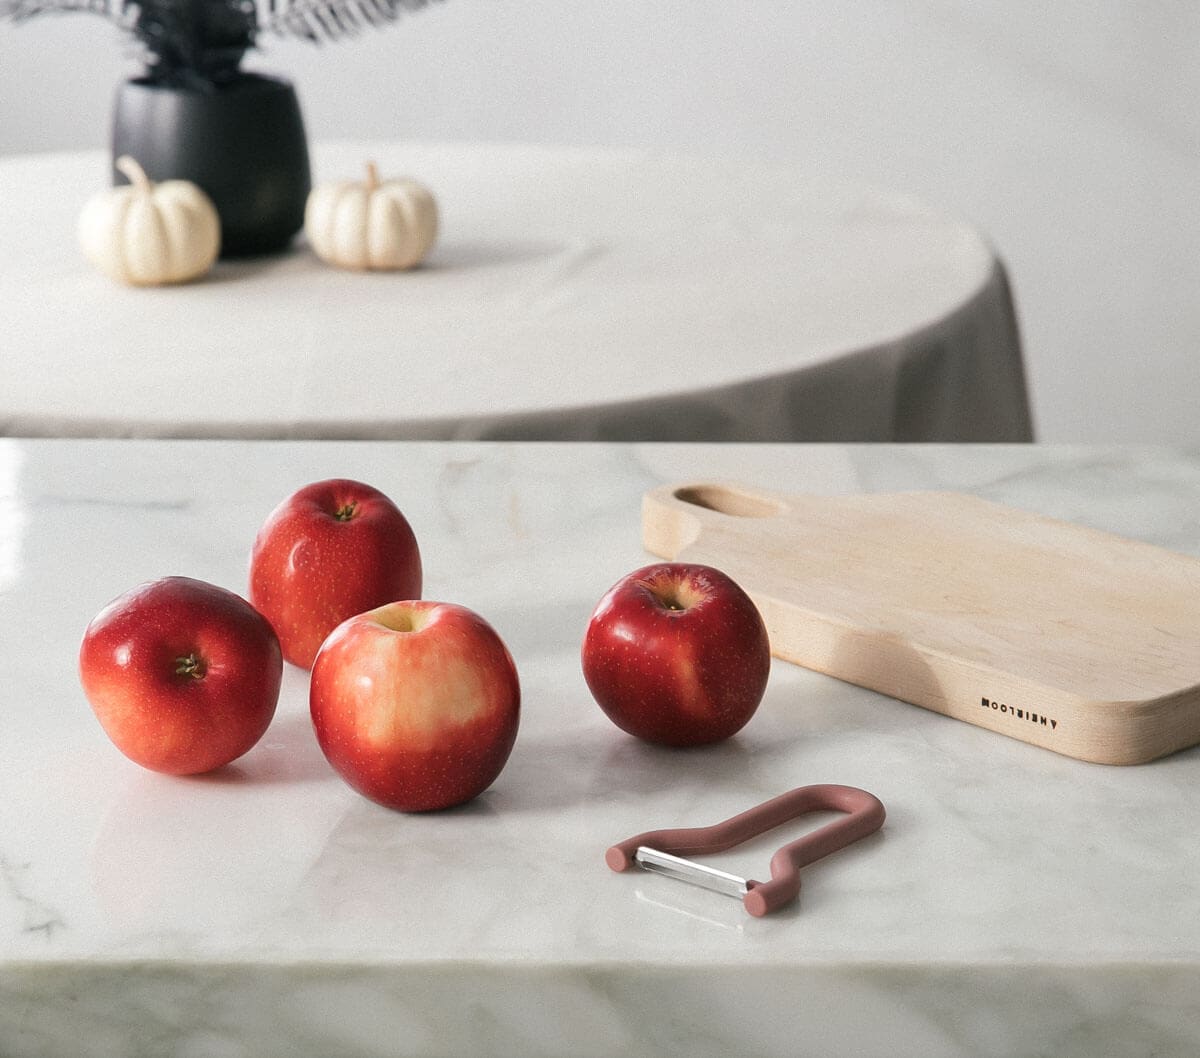
- Honey Crisp: The pie pictured uses ALL honey crisp apples. I don’t always do this but honey crisp apples are delicious and if you’re going to go with a very simple, one varietal type of pie, I say you can’t lose with honey crisp.
- Granny Smith: This variety is incredibly tart so definitely use it with that in mind. Granny smith is great to pair with a sweeter more mild apple.
- Northern Spy: This type of apple grows in the Northeast of the United States and may be difficult to find in the midwest and on the west coast, but if you do have Northern Spy apples around, use them. They’re delicious. They have a cider-like quality to them when cooked.
- Golden Delicious: People love to hate on golden delicious apples because they’re sort of basic. But if that’s all you have in your grocery store, pair them with a granny smith apple. It’ll result in a great pie.
- Pink Lady: If you’re looking for an apple with a great balance of sweet and tart, look no further. Pink lady does a great job at doing this.
- Braeburn: A super crisp apple that has notes of spices, pear and nutmeg.
How to Make Pie Crust
I have a recipe for homemade pie crust, so definitely go there for a step-by-step. I will say that there is ZERO shame in buying a store-bought pie crust. If you can, look for an all-butter pie crust. All butter is a game changer for me. Nothing tastes better than all butter in a pie crust.
Tips to Making Homemade Pie Dough:
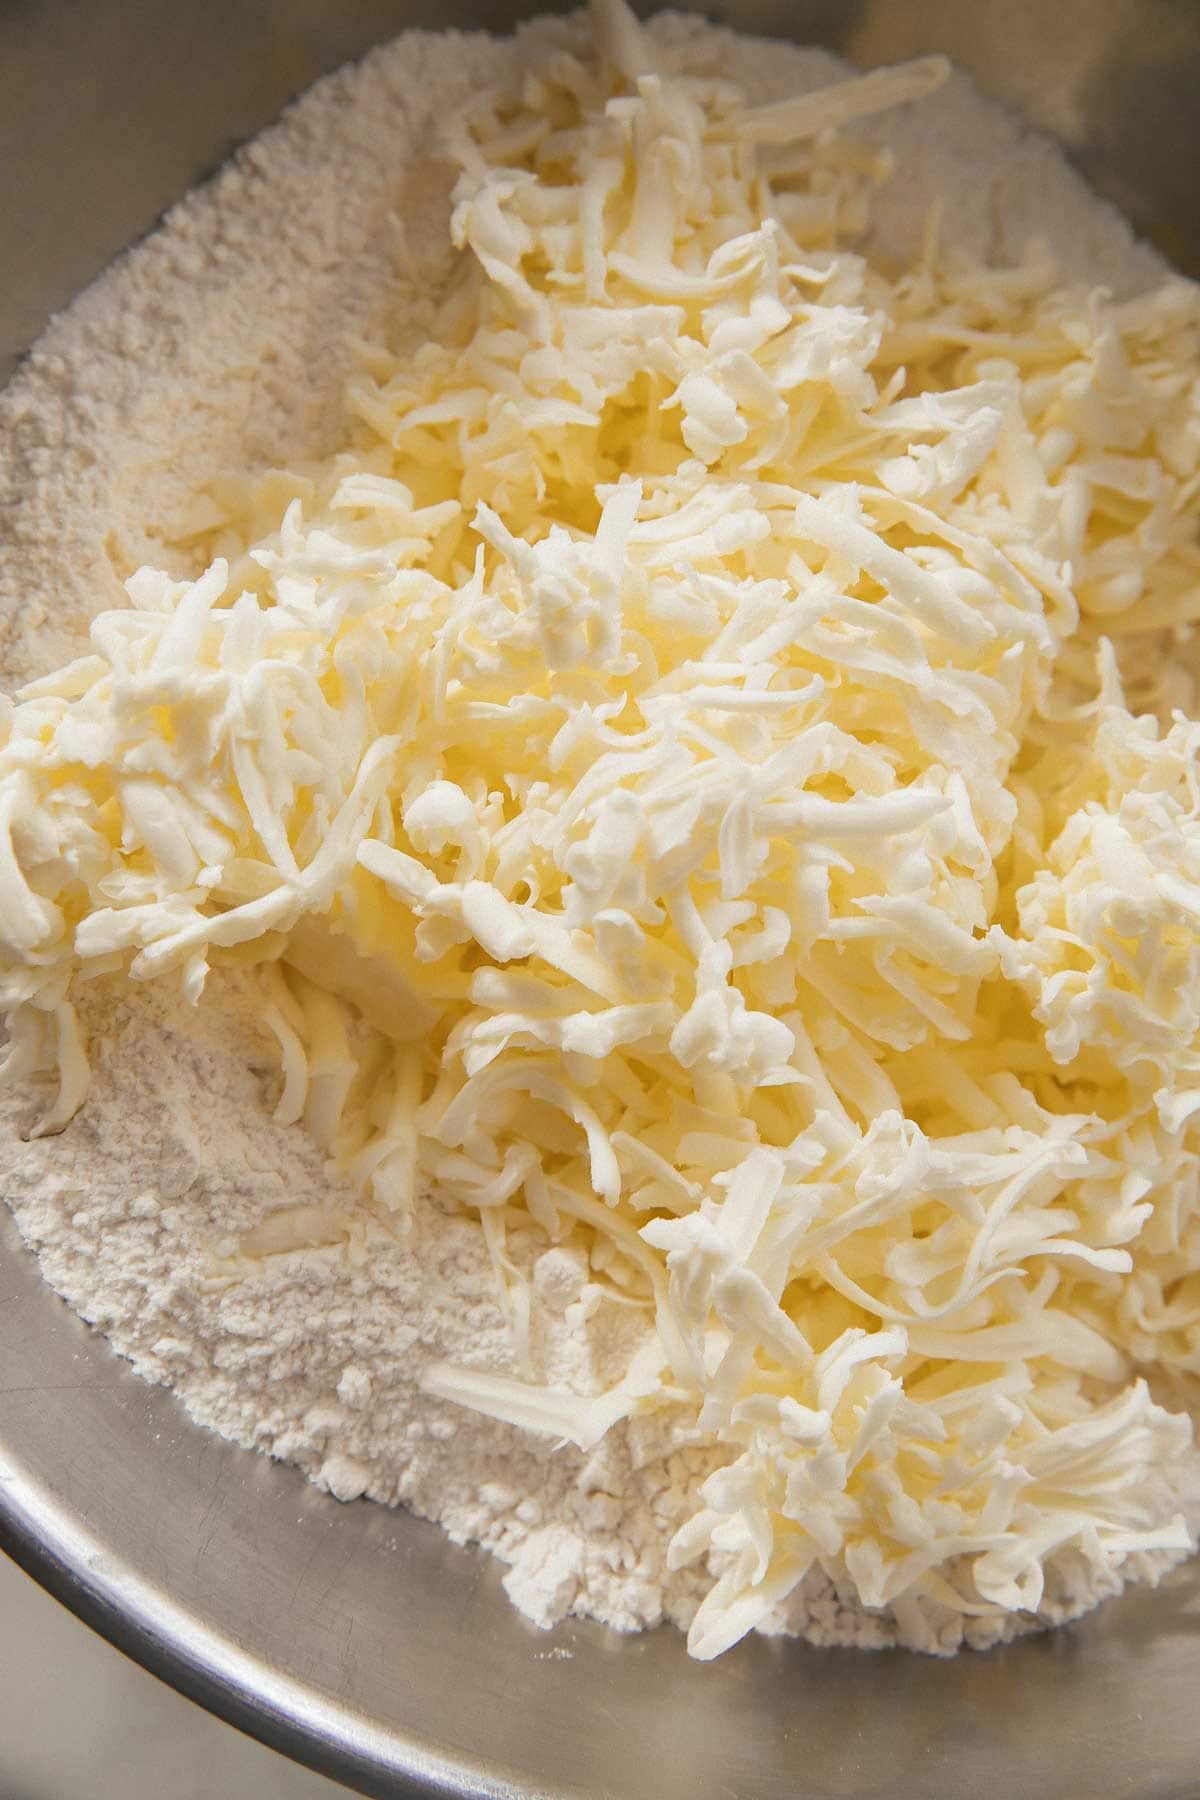
- Make sure you have ice cold water
- Use your box grater to shred the cold butter
- No need to use frozen butter, just use it straight from the fridge
- Chill the butter as it sits on top of the flour in the freezer
- It’ll be super easy to break it up and mix it throughout the flour
Best Vessel to Bake a Homemade Apple Pie In
I used to be a fan of glass pie dishes, but I have recently converted to tin pie pans and will never go back. They heat up very quickly and will leave you will a delicious crust.
How to Make Filling for the Best Homemade Apple Pie
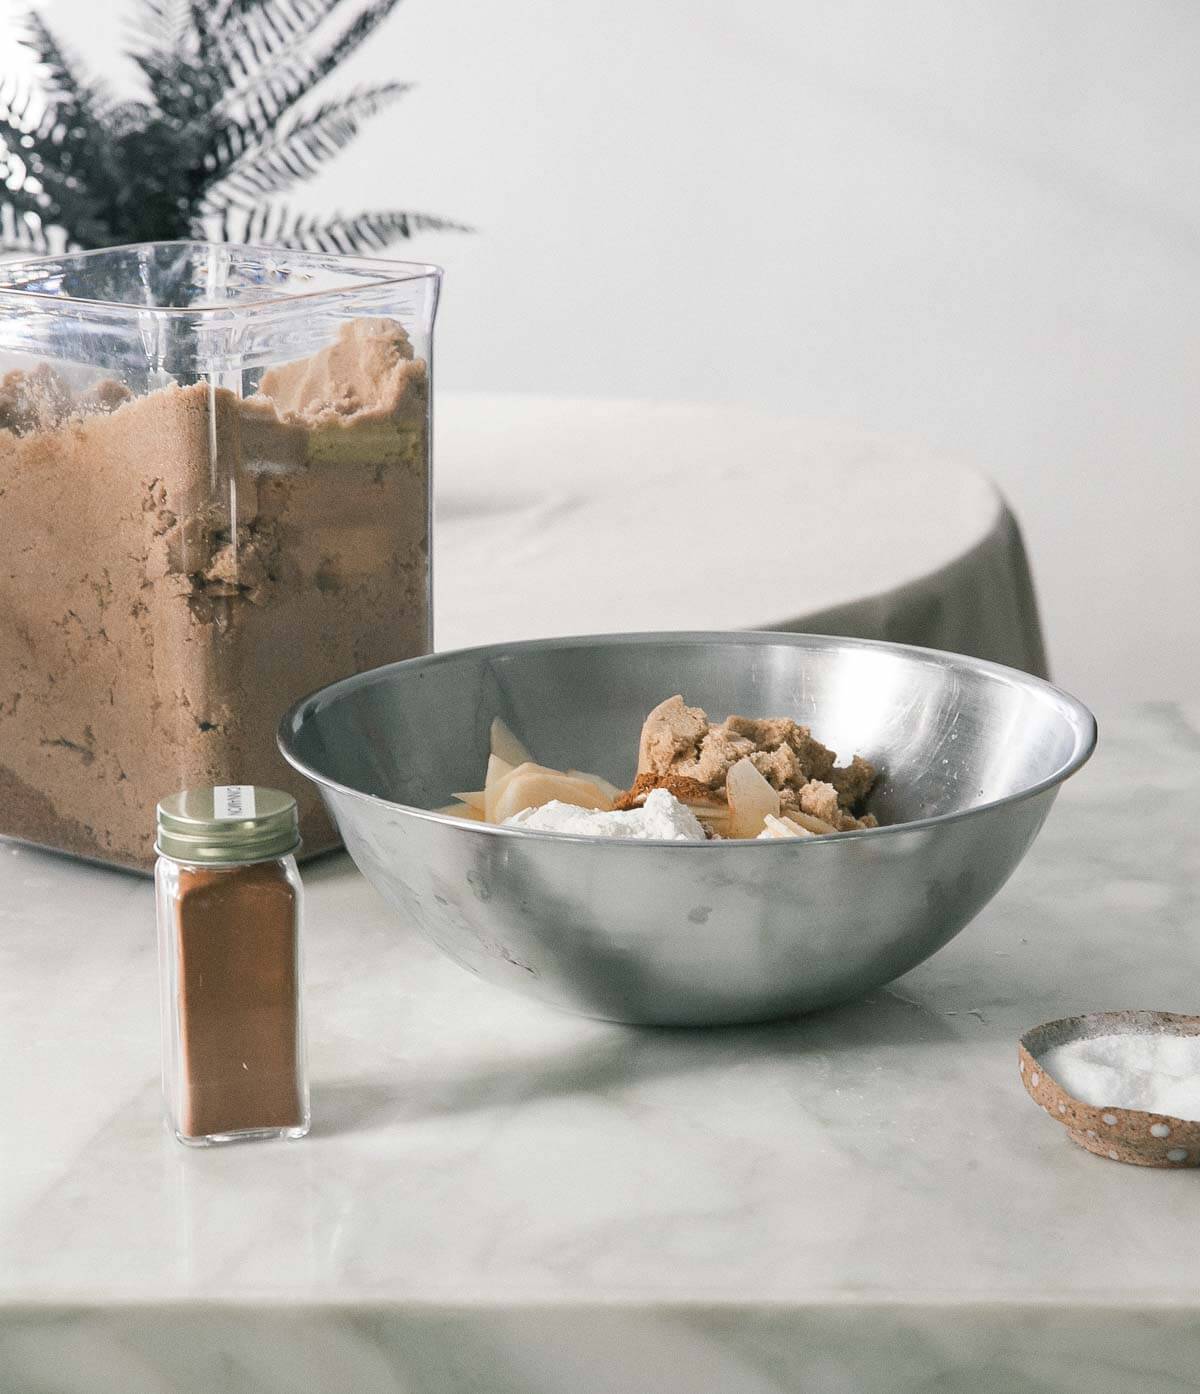
Filling is supposed to be simple. I like to add a few extra things to make it extra special, but here is usually what it should consist of:
- Apples: I like to peel the apples and to slice them thinly. Extra points if you use a mandolin.
- Thickener: For berry pies, corn starch or tapioca starch is needed because berries very juicy. But with apples, they don’t release a ton of juices so I add a few tablespoons of all-purpose flour. I find that corn starch or tapioca starch makes it a bit too gummy for me.
- Acid: I like to use fresh lemon juice. It adds a lovely tartness.
- Sweetener: For this pie, I add all brown sugar. I love the molasses, caramel notes it provides. But feel free to use cane sugar, maple syrup or honey.
Additions to Filling
I like to add a few other things to my filling. I love adding a dollop of creme fraiche or sour cream. This creates a caramel when the apples and brown sugar are all cooked together. It’s glorious. It transforms any normal apple pie into a caramel apple pie and it is SO delicious. I also love adding a bit of vanilla paste. It feels indulgent and what better place to put some vanilla. You can even make your own Homemade Vanilla Extract, if you’re up for a project.
How to Make a Homemade Apple Pie
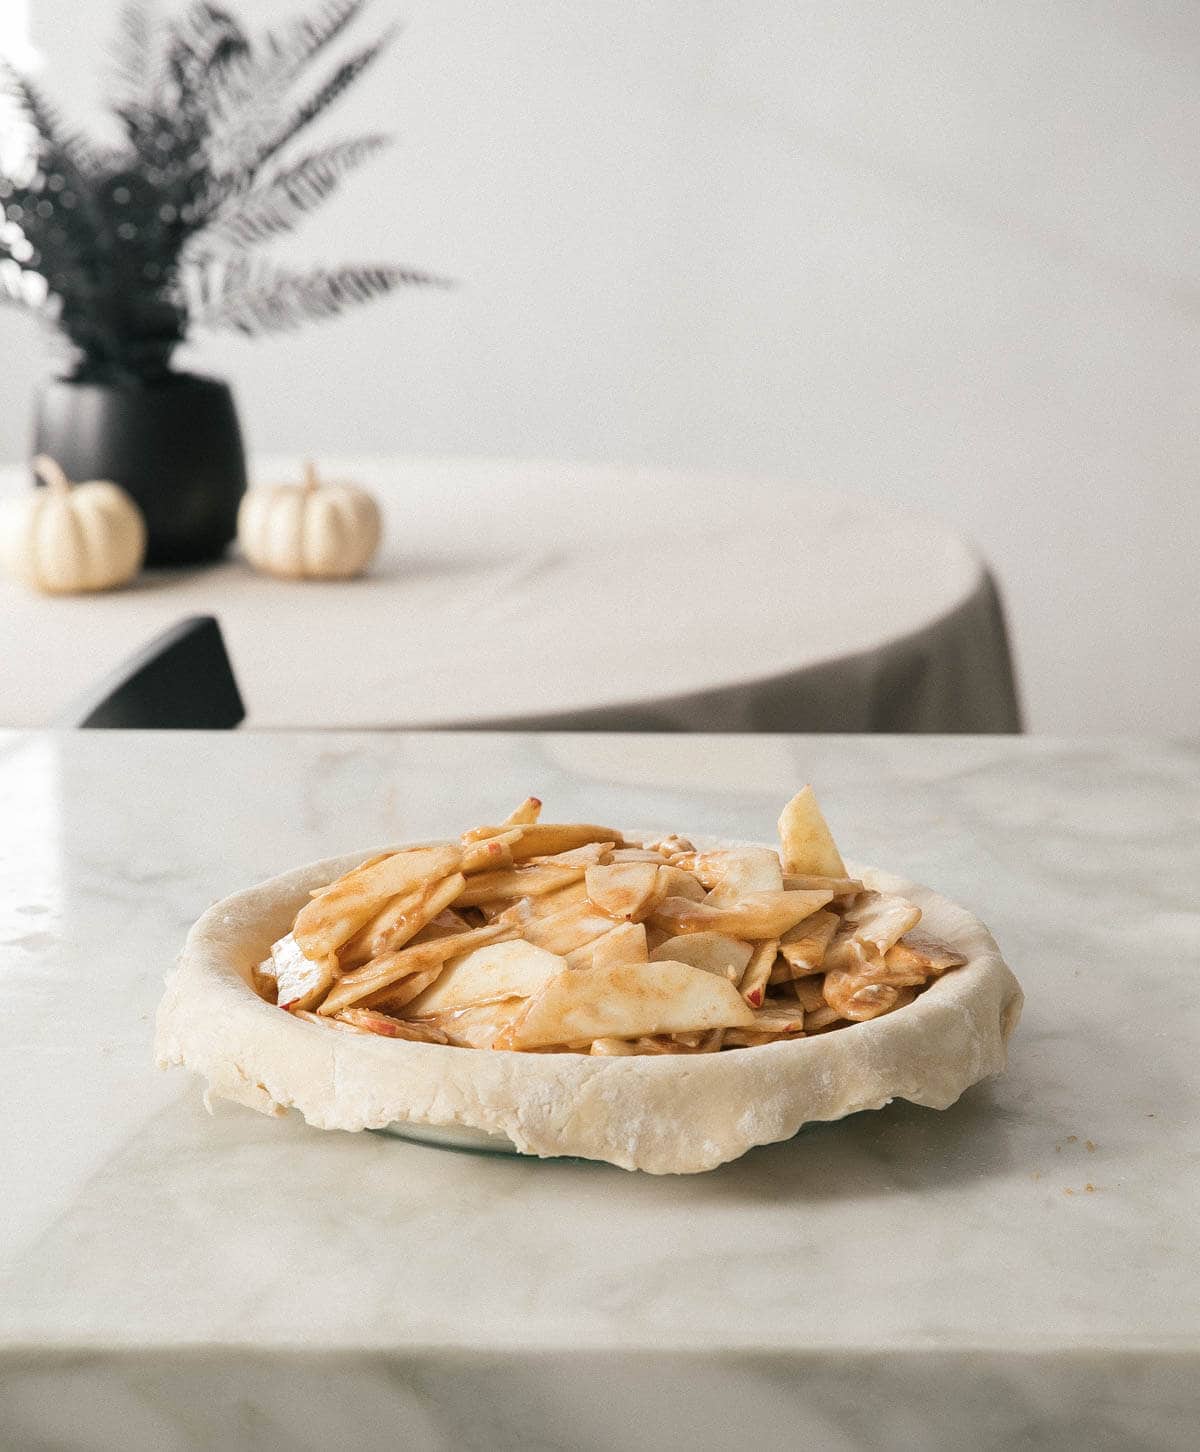
- Mix the filling together: apples, lemon juice, sugar, vanilla and salt.
- Roll out the dough into a thin sheet and press it into the pie pan.
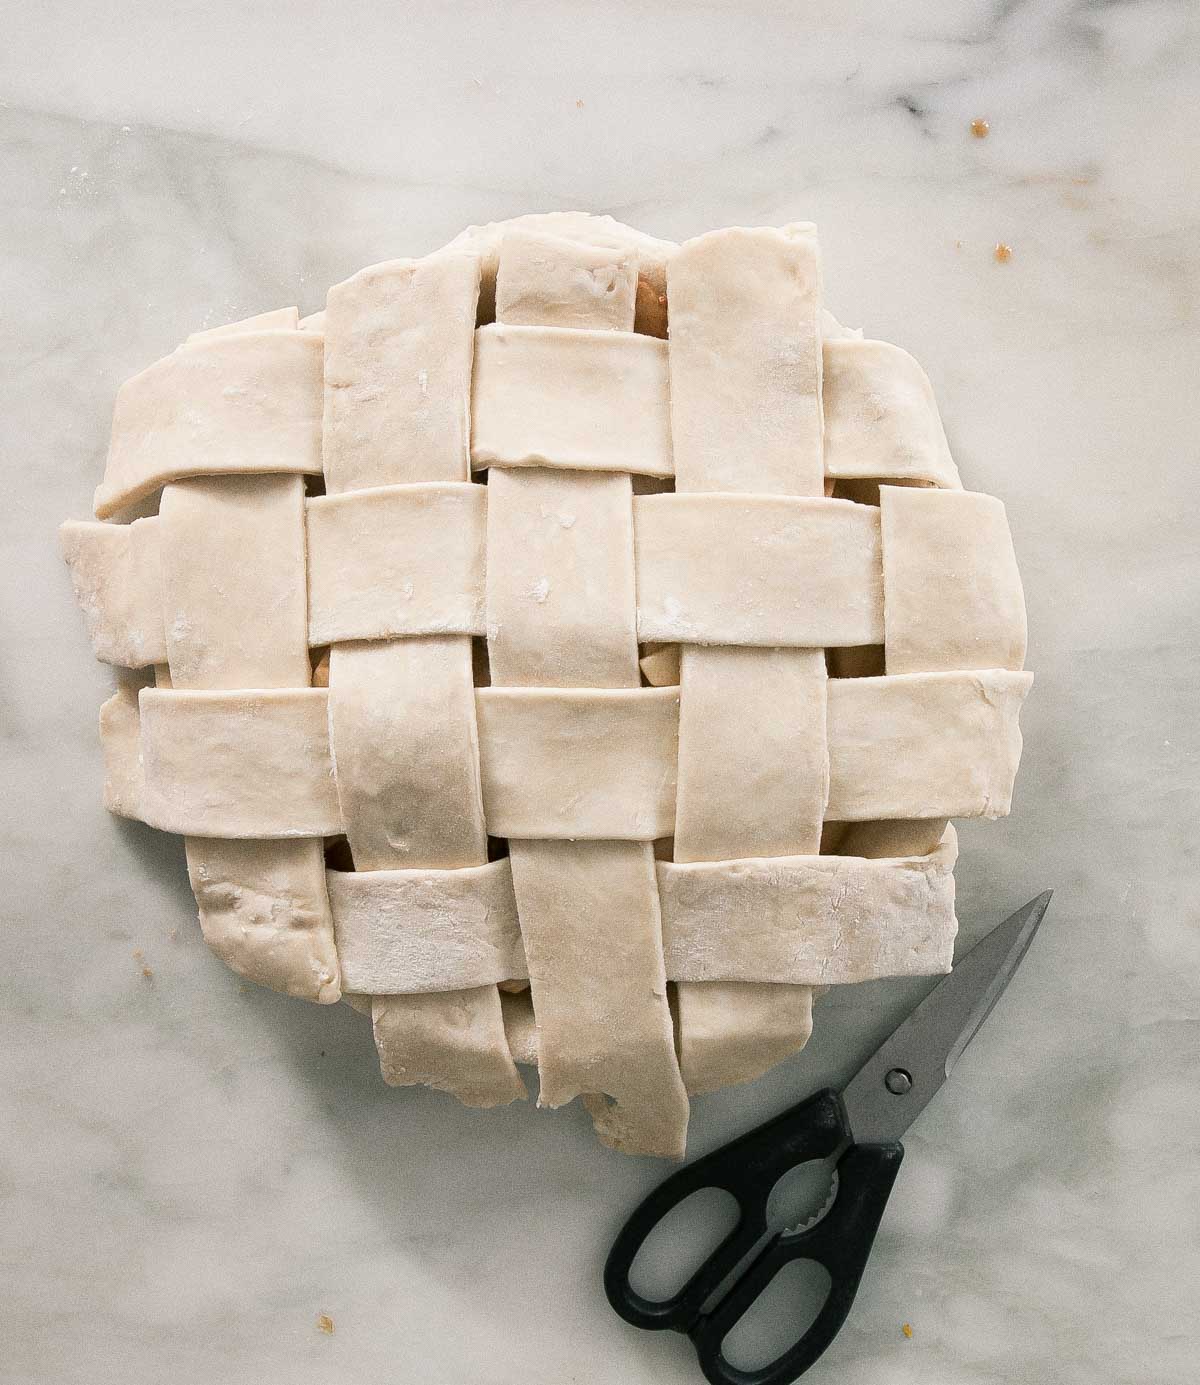
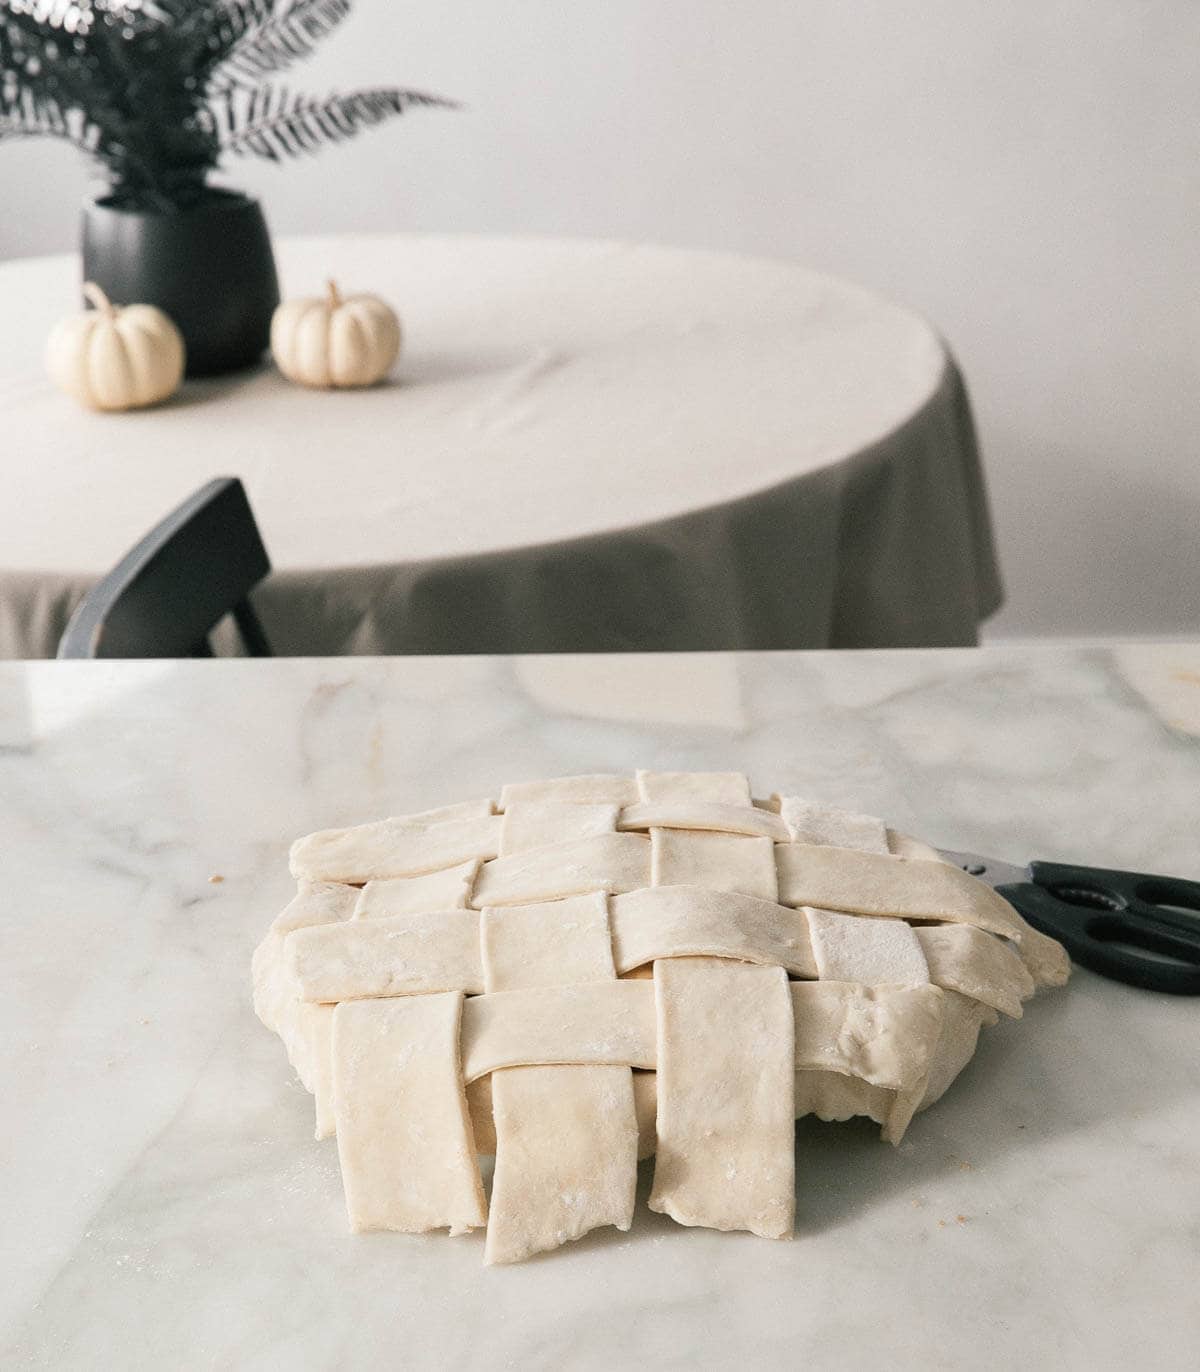
- Pour in the apple filling and choose your decoration on top. If you’re doing a lattice, stick the whole pie in the fridge (so the dough can stay cold) while you make the topping.
- Decorate the top however you like and then transfer the pie to the fridge to chill for 15 minutes.
- Brush the top with egg wash and sprinkle it with turbinado sugar (if using).
- I like to bake my pie for an hour MINIMUM. I check on it regularly. If any part of the pie crust begins to burn or get a bit too dark, you can cover that part with a sheet of foil.
Tips and Tricks for our Apple Pie Recipe
- Use a good pie crust recipe (cough, cough). A delicious crust recipe should have a healthy amount of salt in it. Yes, you want the balance of salty and sweet in your top crust.
- Bake the pie until bubbling and a deep golden brown. You don’t want to overcook your pie (aka burn it) but you do want the crust golden brown. This also ensures that the bottom crust is fully cooked.
Recipe FAQs
This is a personal decision. Lol. I personally don’t want to do ANOTHER step so I avoid it. But I will say that apples will cook down a bit and if you cook them prior to baking, you do keep A LOT of the same volume. I also love that the apples have texture to them. When you cook them prior to baking the pie, you literally end up with zero apple texture.
I think this has a lot to do with the length of baking time. A lot of people don’t bake their pie enough. The pie should be bubbling (this indicates that the flour has been activated and the pie filling will be thickening) and the crust should be a deep golden brown.
How to Make An Apple Pie Ahead
Let’s throw out a scenario: You have a Friendsgiving or autumnal get together and you are working all week long and know you won’t have time to make it the day of. Not a problem. Up to two weeks prior, make the crust, make the filling, assemble the entire pie and then FREEZE IT whole.
Yes, freeze the entire pie. In its dish and everything. If it’s for longer than a night, then I cover it with plastic wrap after it’s mostly frozen.
Then, brush it with egg wash, sprinkle it with turbinado sugar and then bake it frozen. It will take about 15 minutes longer but it will turn out gloriously.
I also love freezing my pies first because it ensures that the pie crust doesn’t shrink.
Cutting and Slicing an Apple Pie
I will never tell you what to do lol. But if you want your apple pie to be a cohesive, beautiful, Instagram-worthy slice of apple pie, you have to wait a few hours. Two at the very least.
I know it’s hard but it will allow the pie to set and make it sliceable. Now, if you want a warm apple pie with cold ice cream, then slice it up. Just know that it might make a bit of a mess. But is that really a bad thing? Nahhh.
What to Serve with Homemade Apple Pie
- Acorn Squash Soup
- Pot Roast
- Chicken and Dumplings
- Squash Stuffed Shells
- Melty Baked Brie with Figs and Walnuts
If you tried this Homemade Apple Pie or any other recipe on my website, please leave a 🌟 star rating and let me know how it went in the 📝 comments below. Thanks for visiting!
Homemade Apple Pie Recipe
Equipment
- 1 (9-inch) glass or stainless steel pie dish
Ingredients
Double Pie Crust:
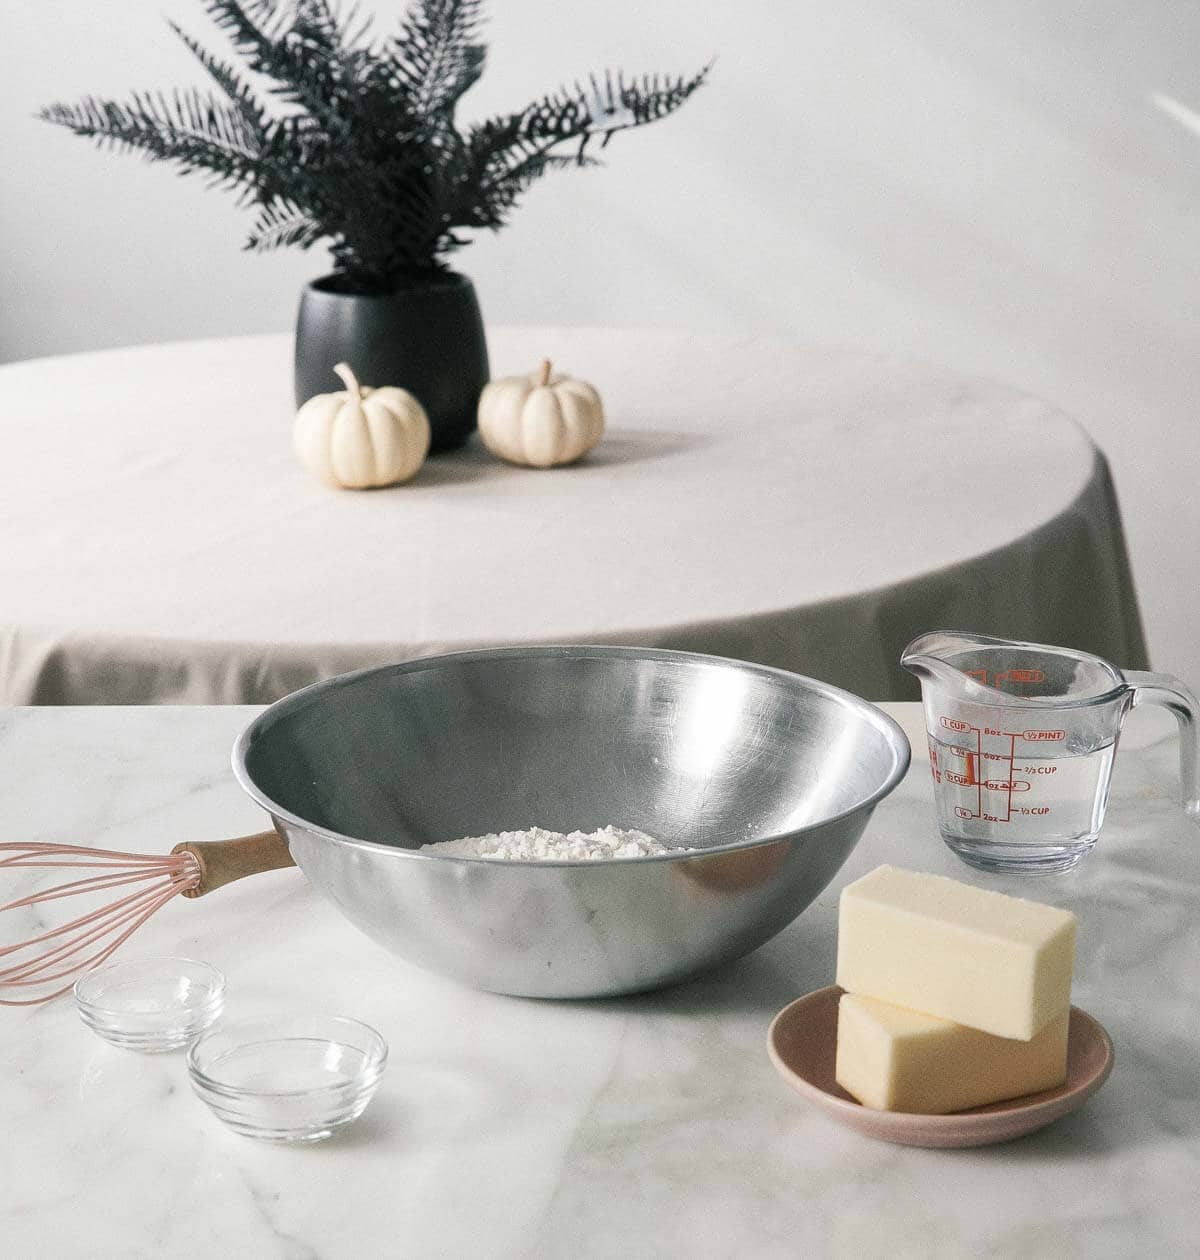
- 2 1/2 cups all-purpose flour
- 2 tablespoons white granulated sugar
- 1 1/2 teaspoons kosher salt
- 1 cup unsalted butter , cold and straight from the fridge
- 3/4 cups very cold water, divided
Apple Pie Filling:
- 1/2 small lemon , juiced (about 1 1/2 tablespoons)
- 3-4 whole medium to large apples (pink lady, gala and honeycrisp are my favorites), peeled, halved, cored and thinly sliced
- 1/4 cup all-purpose flour
- 1/2 cup light brown sugar
- 1 1/2 teaspoons ground cinnamon
- 1 teaspoon pure vanilla extract or 1/2 teaspoon vanilla paste
- 1/2 teaspoon kosher salt
- 2 tablespoons crème fraîche or sour cream
- 1 large egg, beaten (for egg wash)
- 1 tablespoon turbinado sugar, for topping (optional)
Instructions
To Make the Pie Crust:
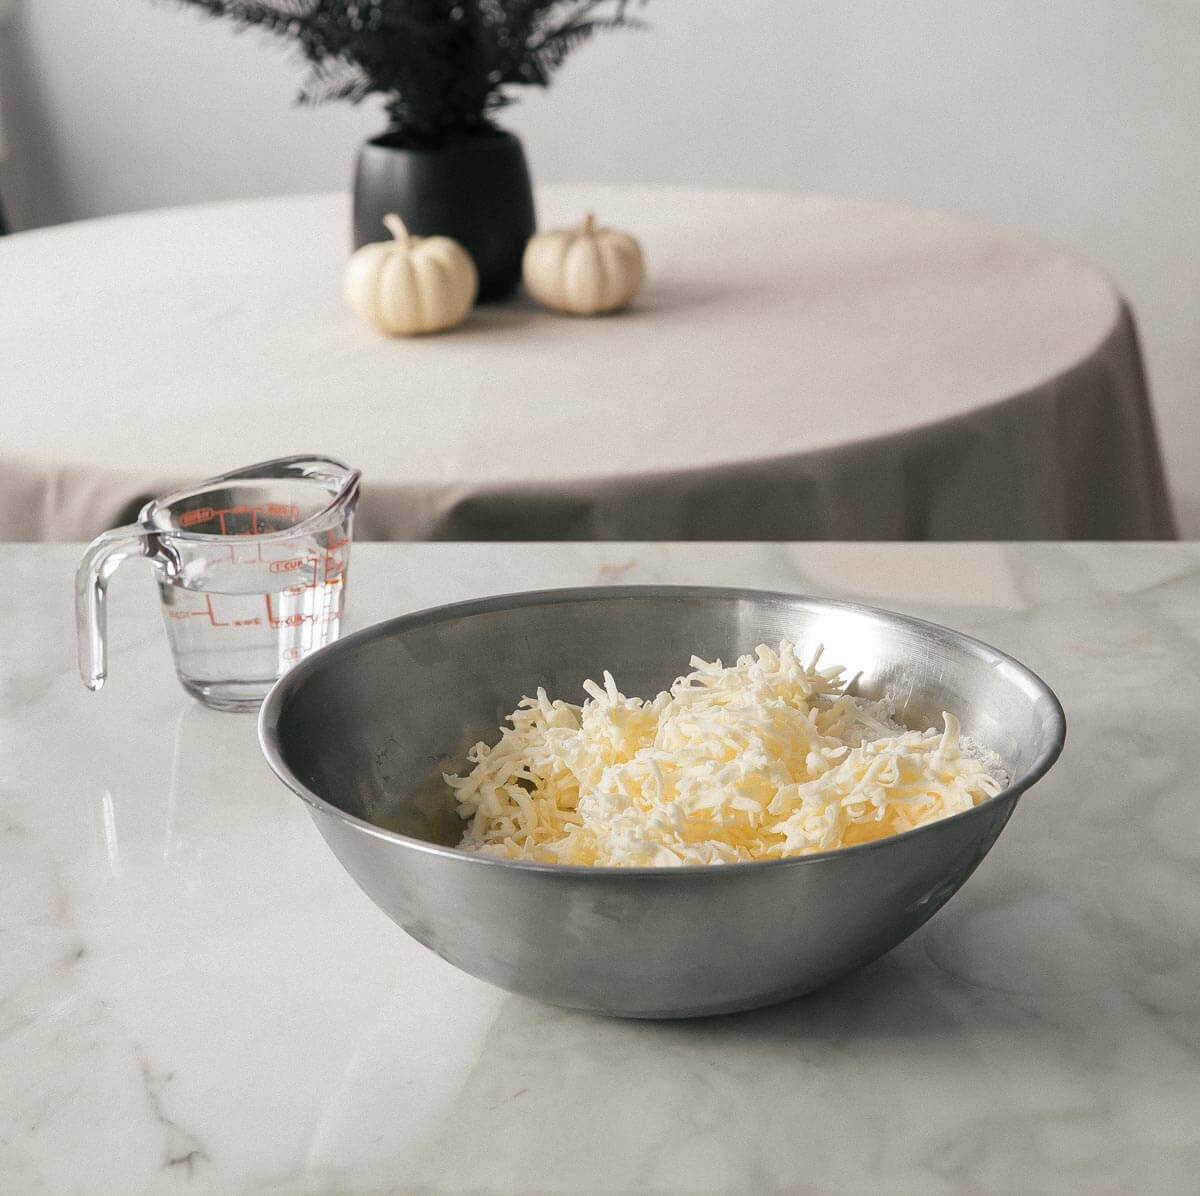
- In a large bowl, mix together the flour, sugar and salt. Using a box grater, grate the cold butter atop the flour mixture. Transfer to the freezer to chill for 10 minutes. Working quickly, and using your hands, break the butter bits into the flour until they’re evenly distributed and resemble the size of teeny, small peas. Add a 50% of the recommended water and mix.
- The mixture will be shaggy at this point. From here, add 1 tablespoon of water at a time until the dough comes together. Flour your counter and dump the dough onto it. Knead a few times more until it comes together into one cohesive mass.
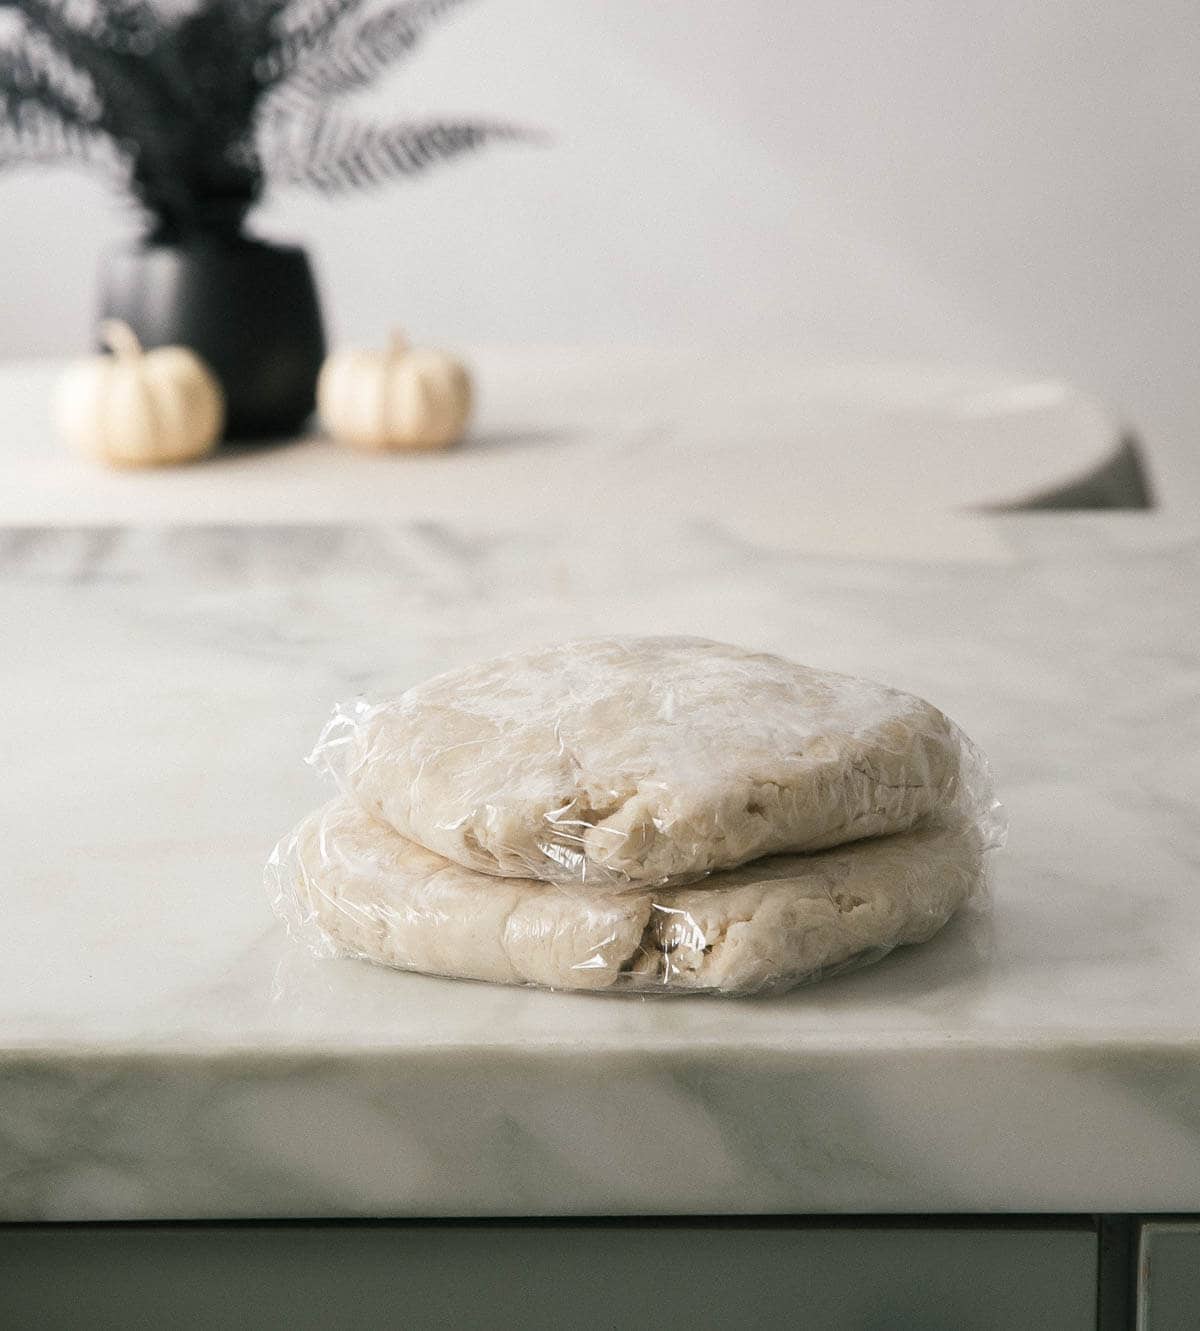
- Divide the dough, forming two discs. Wrap the discs in plastic wrap and transfer to the refrigerator to chill for at least 1 hour, ideally overnight.
To Make the Apple Pie Filling:
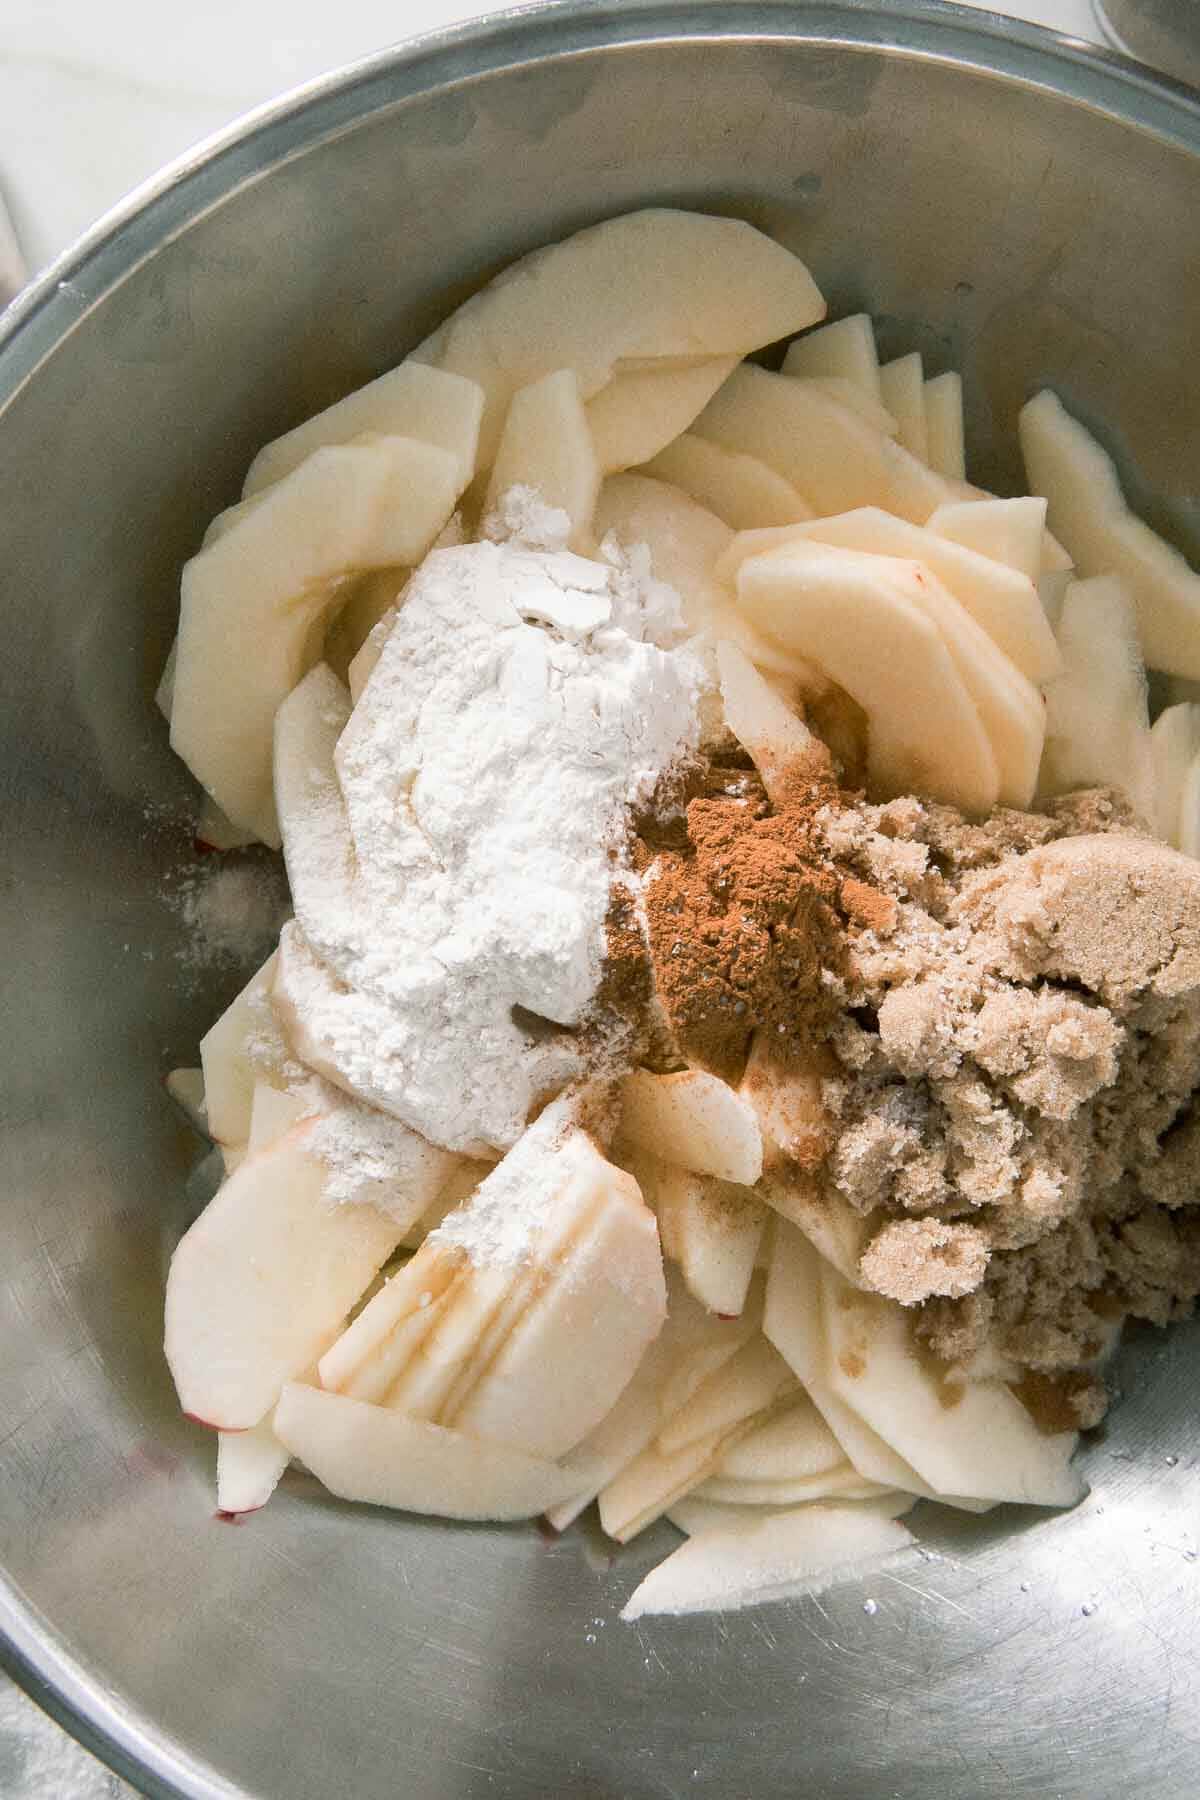
- You're welcome to peel your apples. This is optional. I personally like to peel the apples. Halve the apples, remove the core and then slice the apples into thin 1/4-inch pieces. OR, you can use a mandolin and slice them very thinly. Add the apple slices to a large bowl. Squeeze in the lemon juice, being sure to catch any seeds.
- Next, add the flour, brown sugar, cinnamon, vanilla extract and salt; toss until the apples are evenly coated.
- Add the crème fraîche and toss until it's evenly distributed throughout.
To Assemble the Apple Pie:
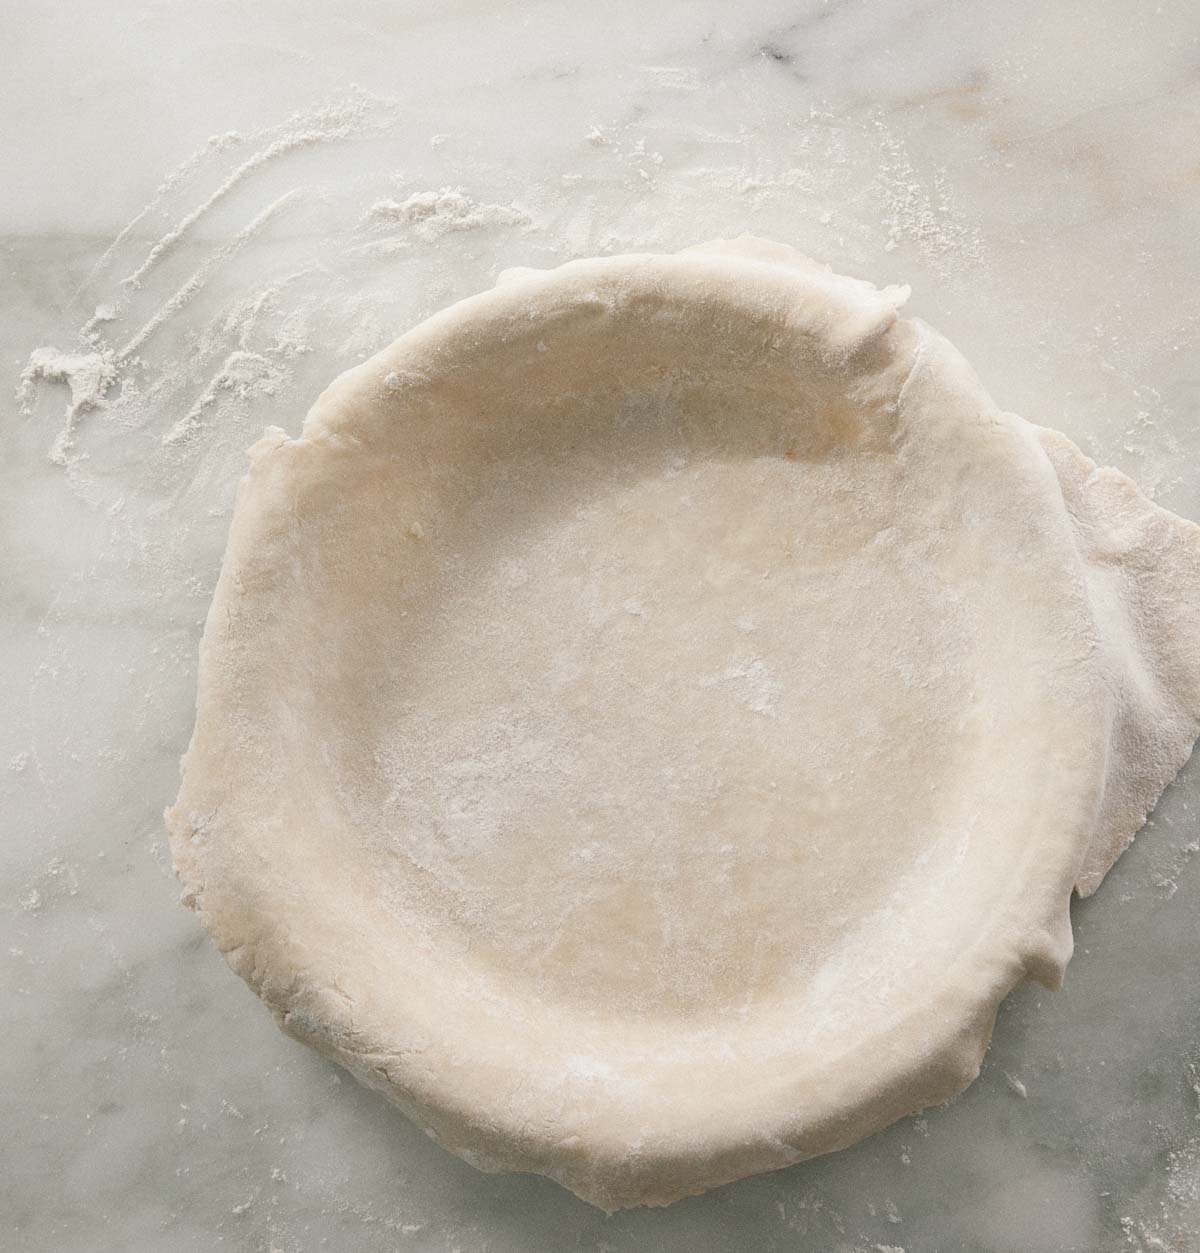
- Remove the first disc of dough from the refrigerator and allow to come to room temperature for about 5 minutes. Liberally flour your work surface and rolling pin. Begin to roll the dough, being sure to rotate it every so often to avoid sticking, to a 13-inch round. Wrap the dough around the rolling pin and unroll it over the pie dish.
- Gently fit the dough into the bottom and up the sides of the pie tin. Trim the dough around the pie tin, leaving about a 1/2-inch overhang. Recombine the scraps and set them aside. We’ll use them for the lattice. Transfer the pie shell to the refrigerator while you roll out the second disc.
- Remove the second disc from the fridge and repeat the rolling process. Using a knife, cut the dough into 3-inch strips.
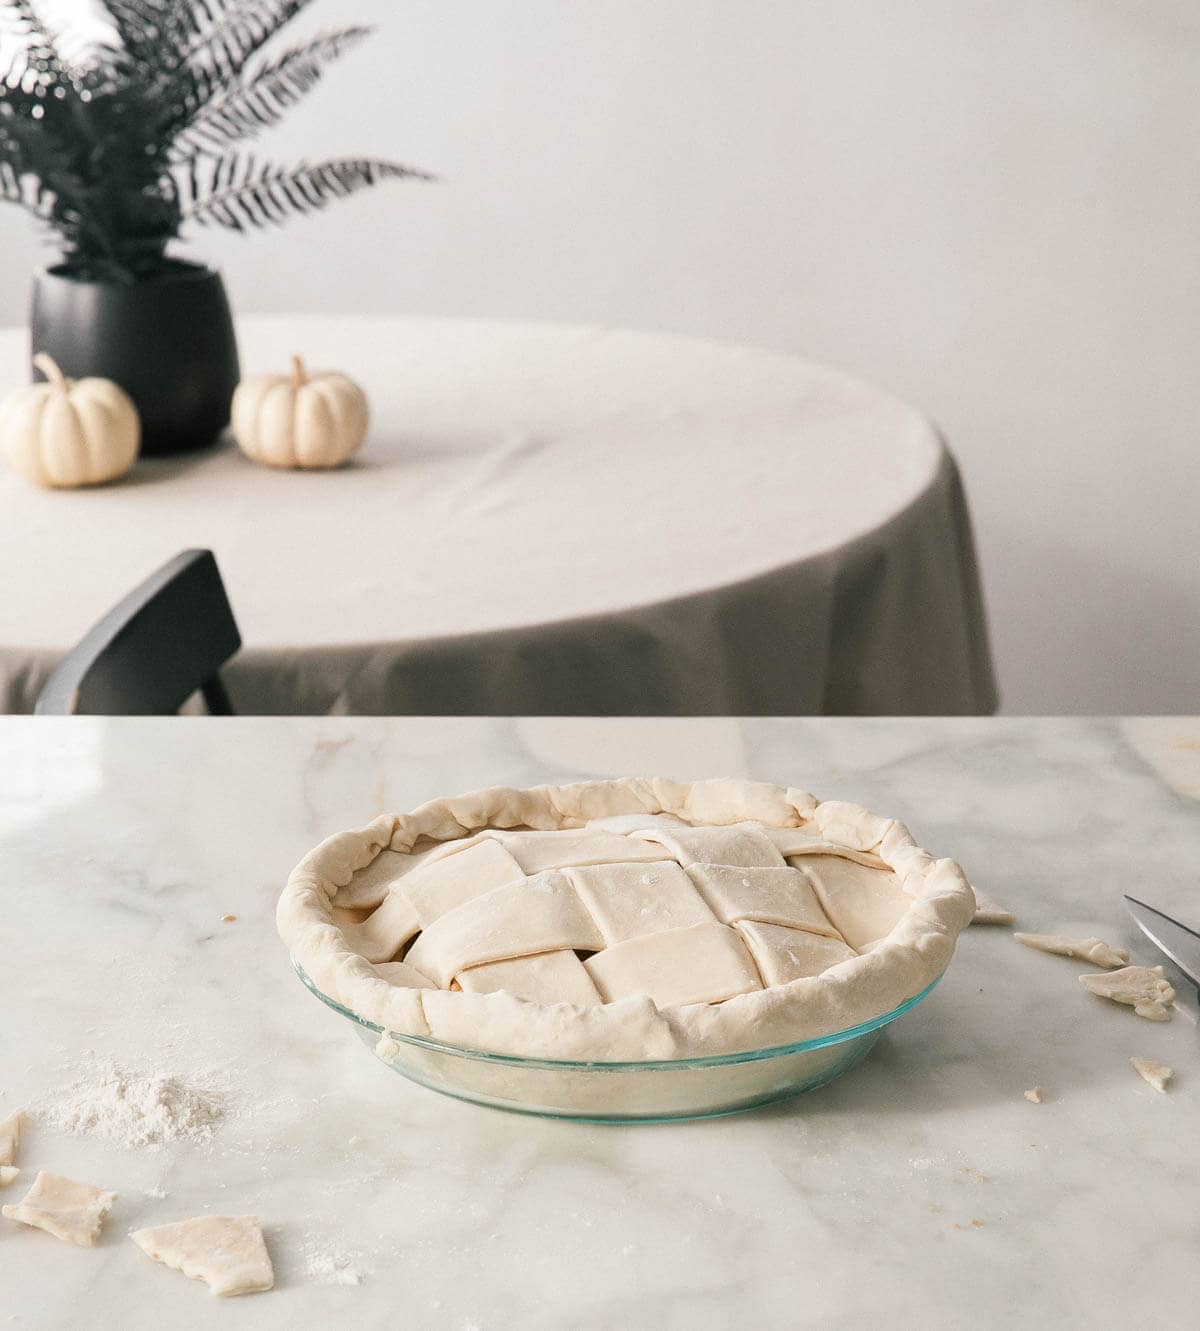
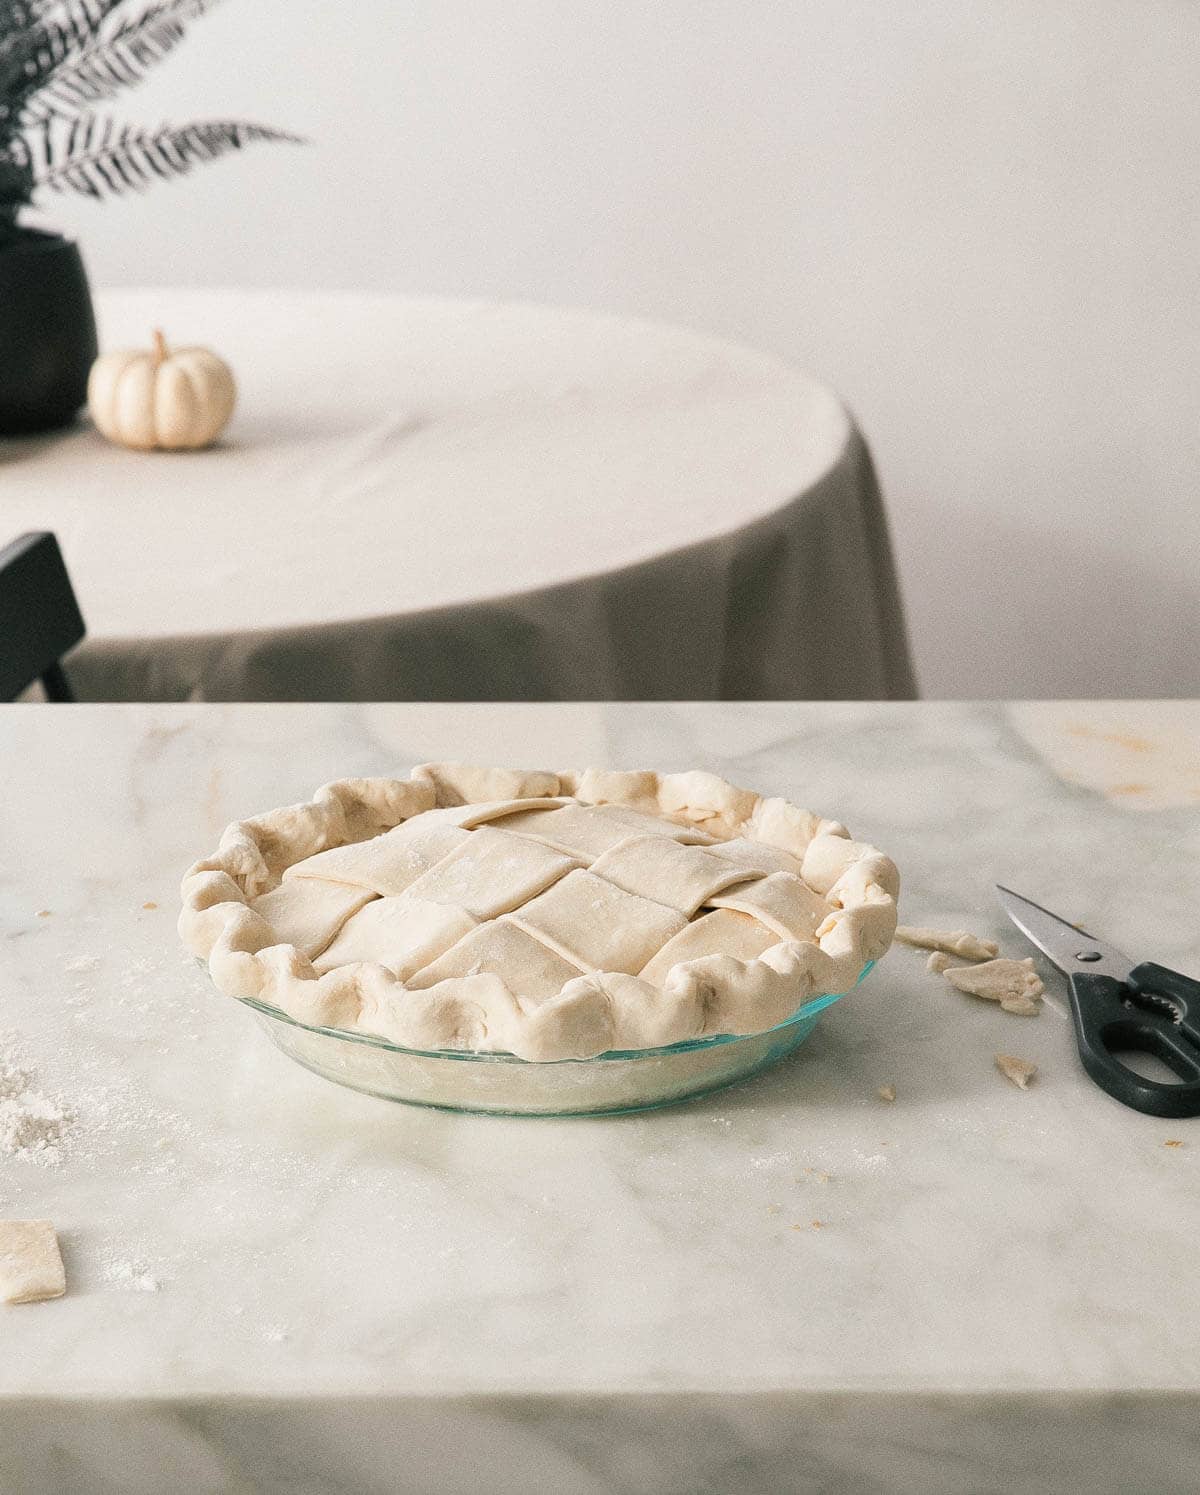
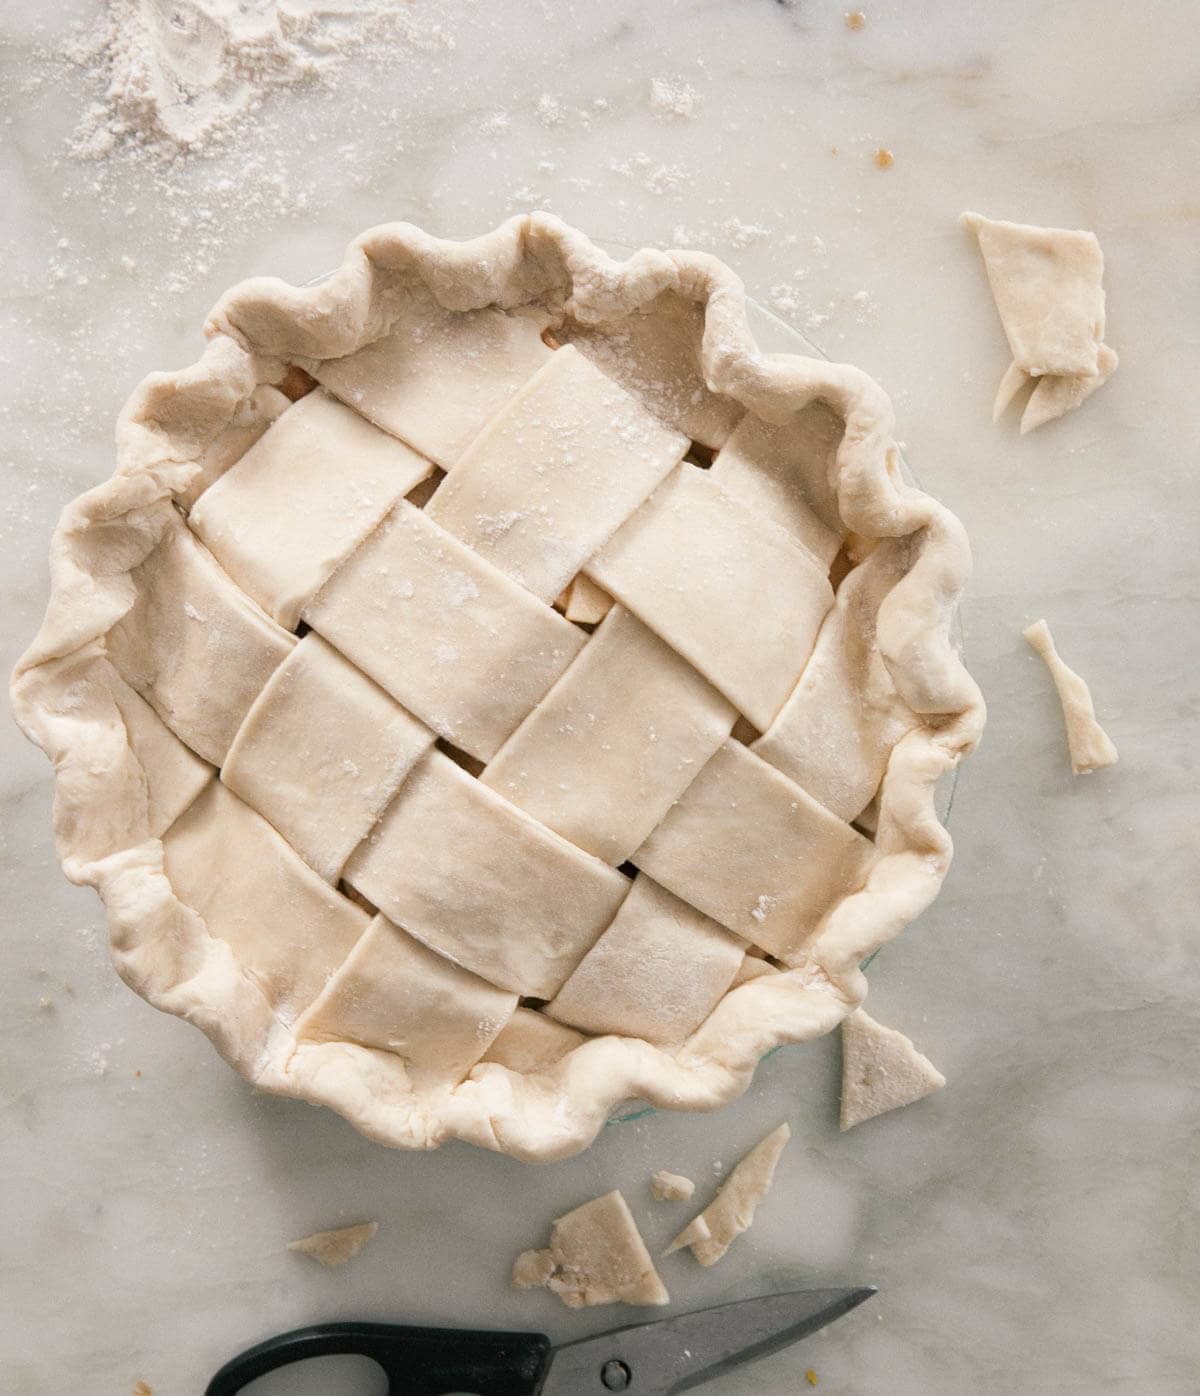
- I cut as many 3-inch strips as I can. Reroll the scraps you have set aside, too, you’ll need all of the pie dough. (If at any time your pie dough becomes too soft, transfer to a cutting board and put in the fridge to chill so it’s easier to work with.) Fill your pie shell with the apple filling. Lay out 5 strips of pie dough on top of the filling, leaving about 1/2-inch of space in between them. Lay the remainder of your strips running perpendicular. This will give you a good idea of how it will go. Next, fold back every strip. Start one at the top, running horizontally. and weave it under and over, rotating, each strip running vertically. Repeat this process until you’ve worked your way through every strip. If my directions are confusing, go to Youtube. The videos on there are super easy to follow. Much easier than written instructions!
- Trim the edges of the strips, being sure to leave about 1-inch overhand. Going all the way around, tuck the edges under. To make a pronounced crimp, like you see pictured, set your thumb on the outside edge of the crust. With your opposite pointer and thumb fingers, create a v, and push the two together. Repeat this process all the way around the pie crust.
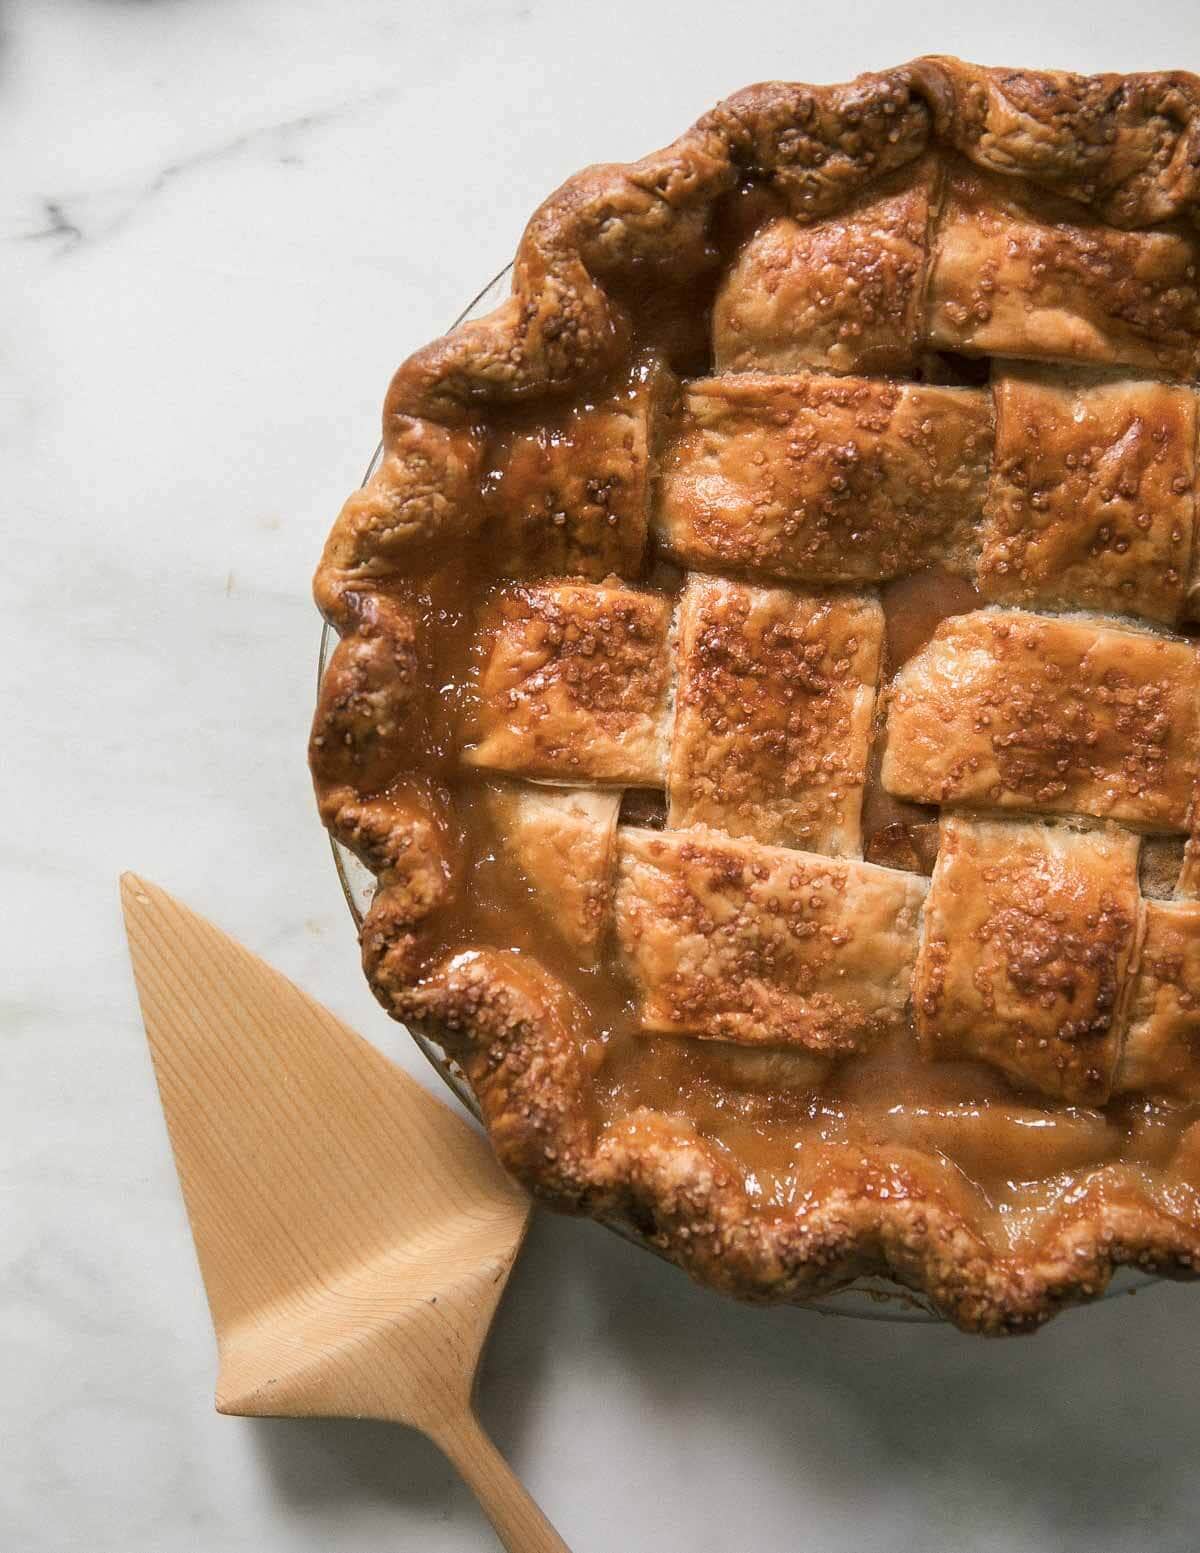
- Transfer to the freezer to chill for 30 minutes. Meanwhile, preheat the oven to 400 degrees F. Brush the entire pie, liberally, with egg wash and sprinkle with turbinado sugar.
- Transfer the pie to a baking sheet and place in the oven to for 20 to 25 minutes, until the edges are just lightly brown. Turn the heat down to 350 degrees F and bake for another 40 to 45 minutes, until the edges and top are deep golden brown. Be sure to check on it intermittently, if at any time the pie crust begins to turn too dark, use foil to cover those areas to stop browning. Allow to stand for at least two hours so it can firm up before slicing the pie.
- Serve with ice cream or a dollop of whipped cream.
Notes
Nutrition
Nutrition information is automatically calculated, so should only be used as an approximation.


First pie I ever made and it was amazing. This is our go to apple pie every time!
Don’t shy away from it because of time. It’s easy to folllow and I love that you can make it ahead.
I don’t even buy it at the store anymore since it’s much better. Not overly sweet too.
wow wonderful to hear!!
Hi! If I am freezing my pie whole a few days before baking, can I put the frozen pie dish in the oven immediately or should I wait until it hits room temperature? Scared of the glass breaking! Thanks!
Yeah I would definitely let it come closer to room temperature for 1 hour outside of the freezer to avoid anything breaking in the freezer. I’ve baked it straight from frozen before (in a glass pie dish) but to just be certain nothing will happen, i recommend letting it hang out for 1 hour before putting it in the oven.
Hello. Can’t wait to try recipe! Just want to clarify there’s no par-baking the crust before filling pie with apples ? Only required freezing for 30-40 mins
hi! it’s not necessary to par-bake the crust. usually apples pies don’t have par-baking because the apples can hold up for a long baking time! and yes, you can actually decrease the freezing time if you like to 20 minutes.
The picture looks like you burnt the pie
How do I print your recipes